
Something I’ve been seeing EVERYWHERE are fun braid styles. I myself am terrible at doing my hair. Don’t even ask me to braid, because well, I can’t. Luckily I have friends like Erica, owner of 1011 Makeup to teach me these things! She helped me create 4 easy braided hairstyles – 2 that can be changed easily into another. Doing your hair in a fun way is basically like adding a cute accessory to an outfit! And, you’ll be the envy of all the ladies, because these braids, are real impressive!
Photos by Riley Starr
 Here is what you’ll need….
A Curling Iron (Not Pictured)
Mini Rubber Bands
Bobby Pins
Teasing Comb
Hairspray
Sea Spray
Hair Wax
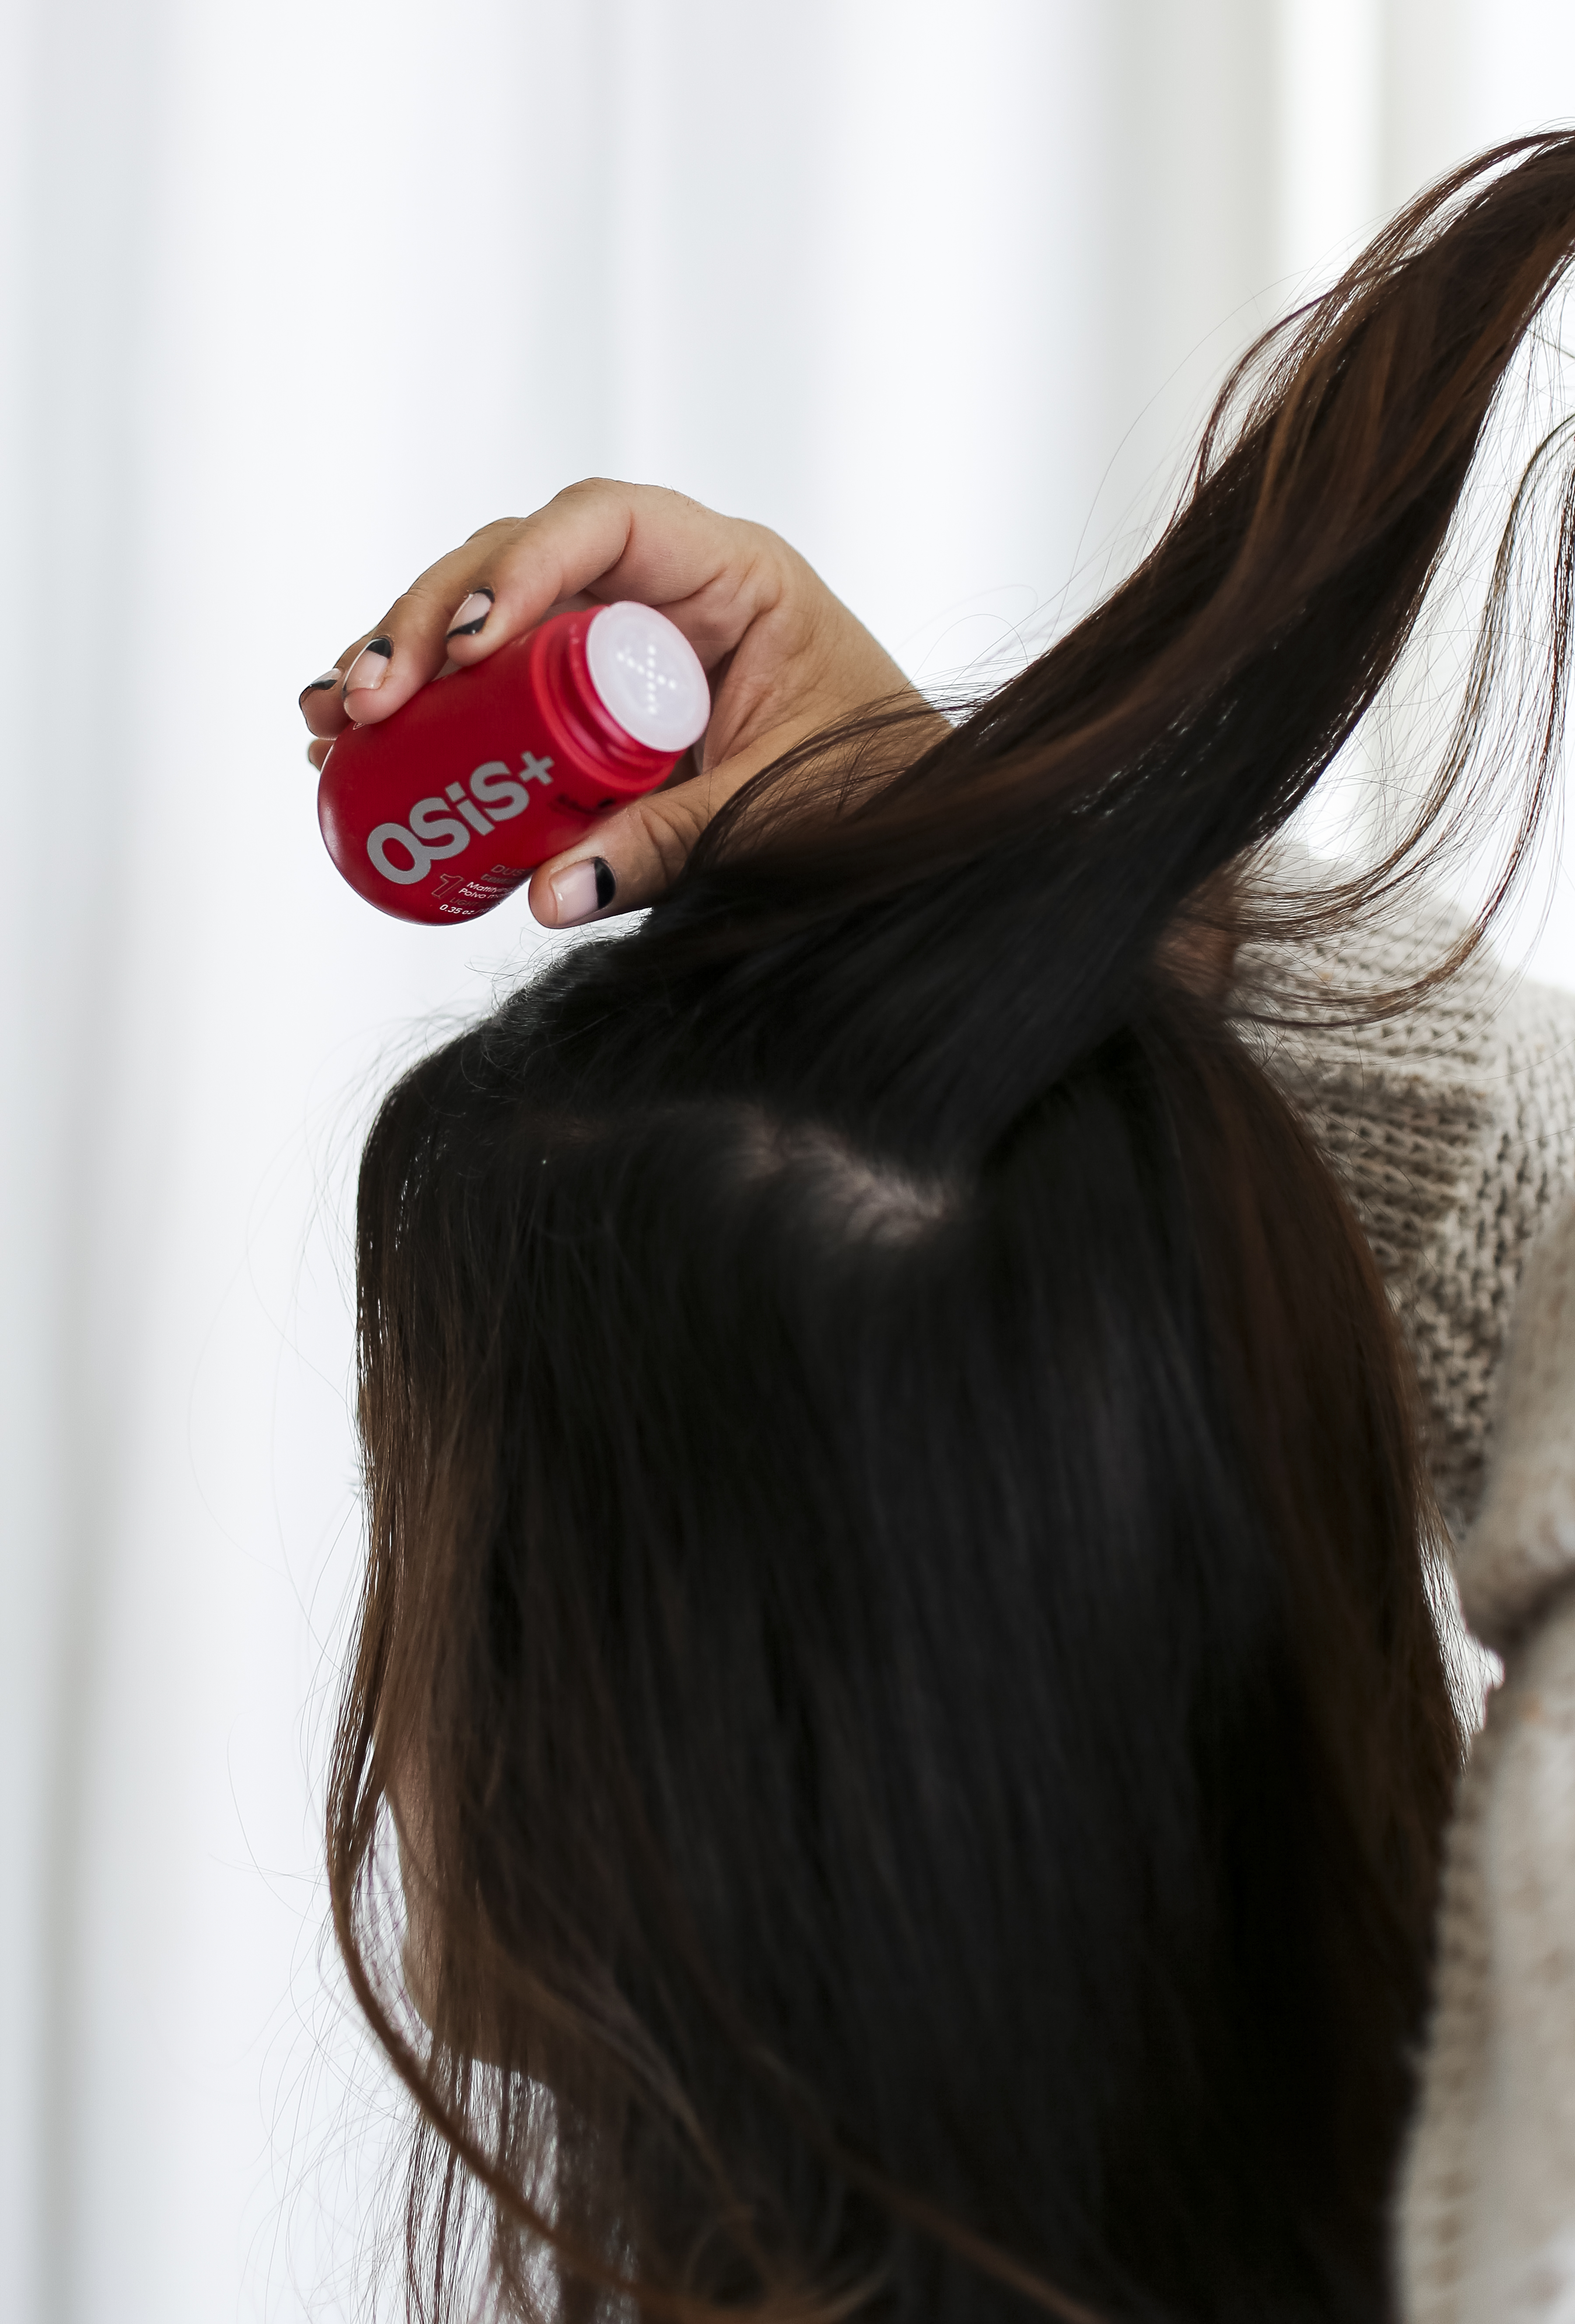
Volume Powder
Here is me before… Looking all sorts of dorky! But I basically just blow dried my hair that day before getting going!
 STYLE 1
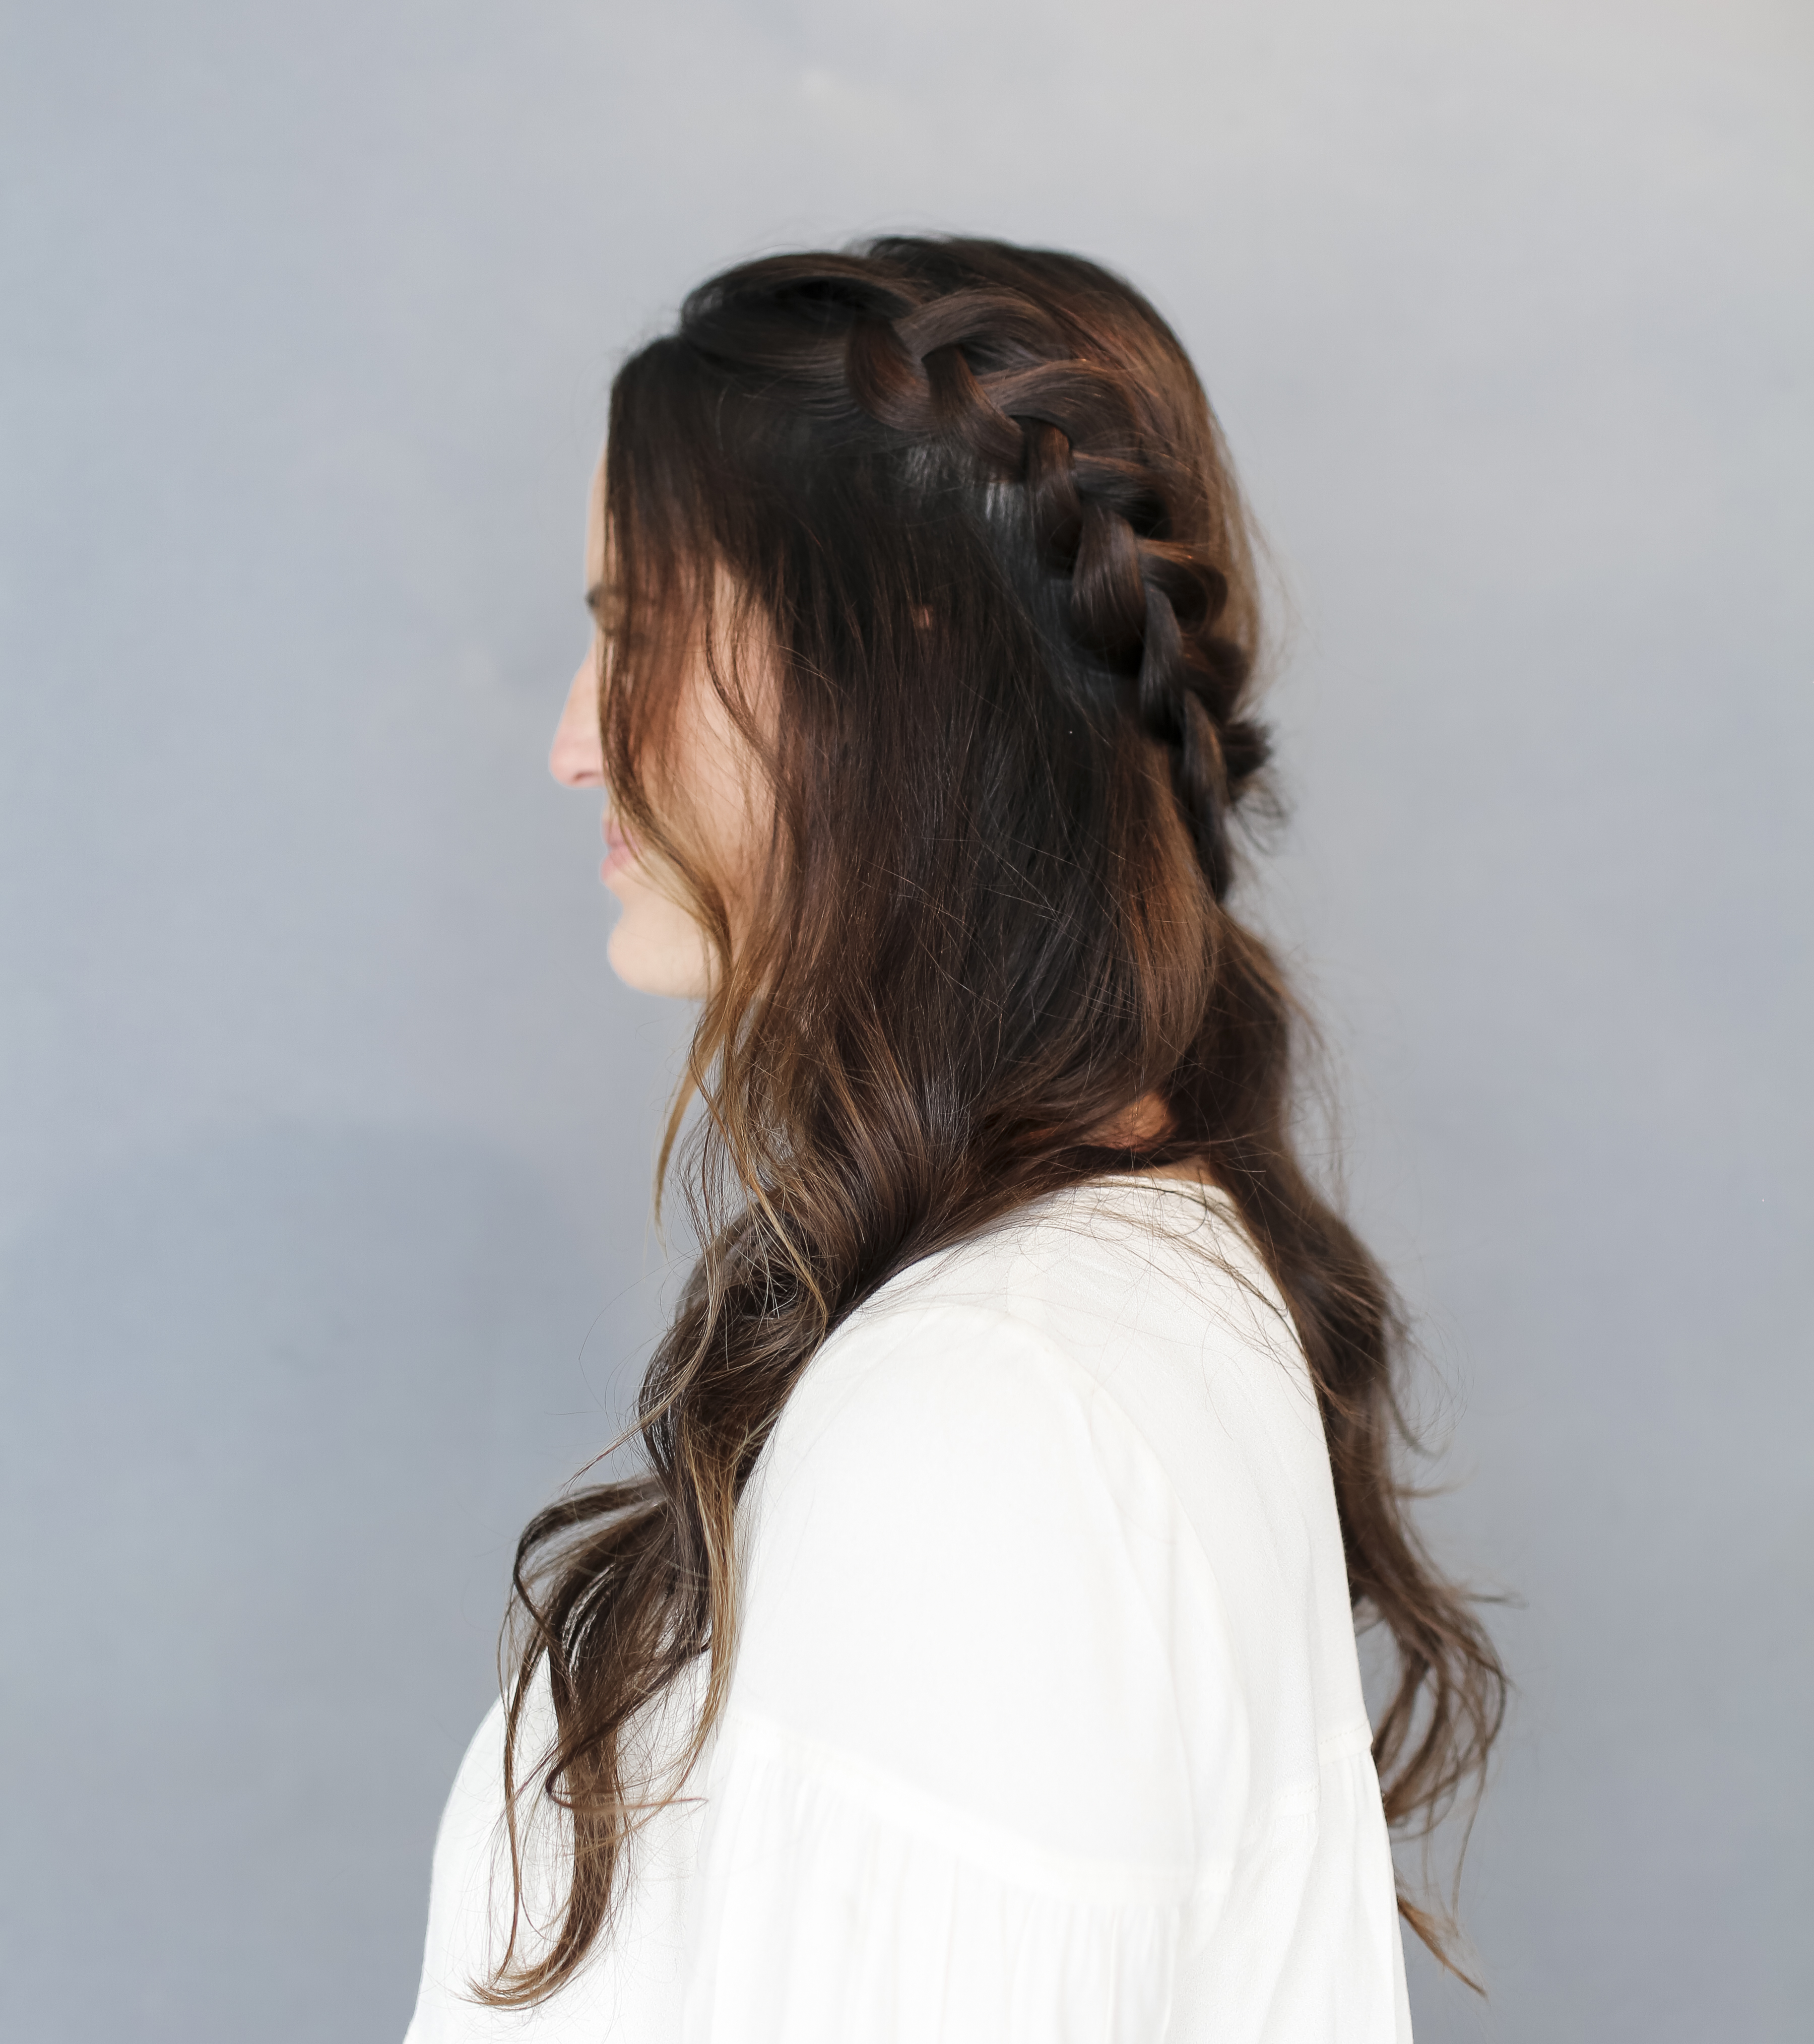
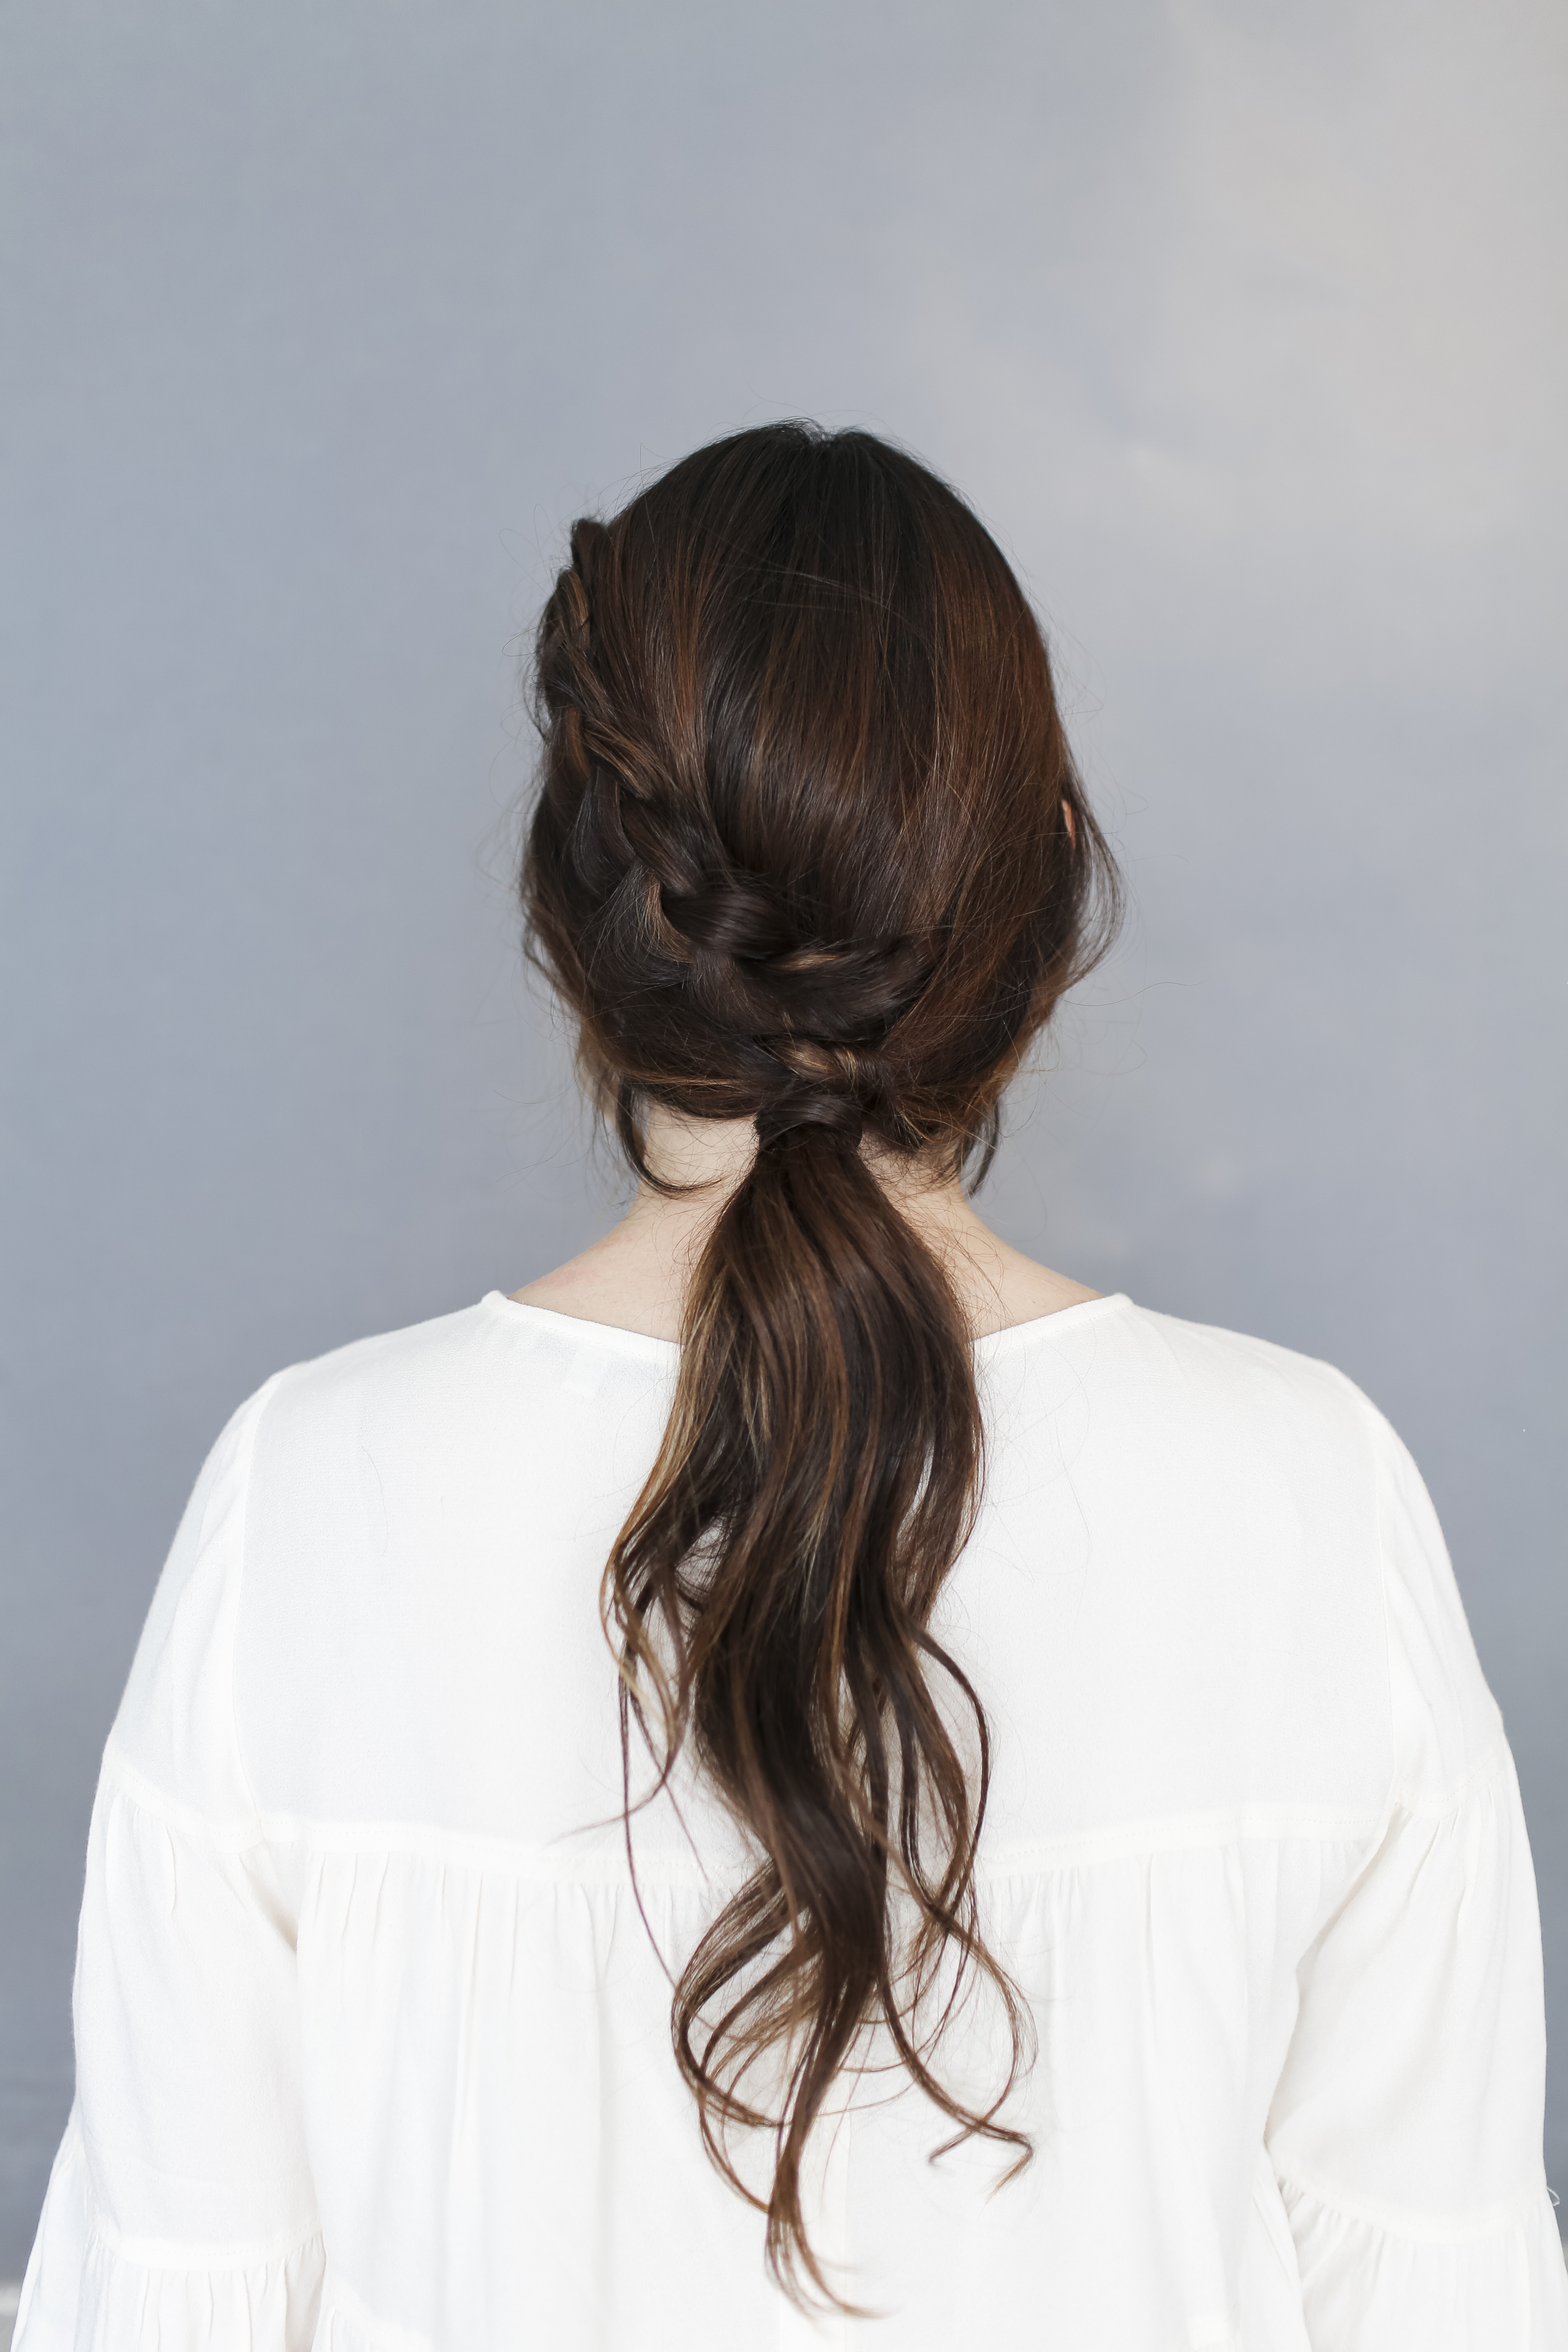
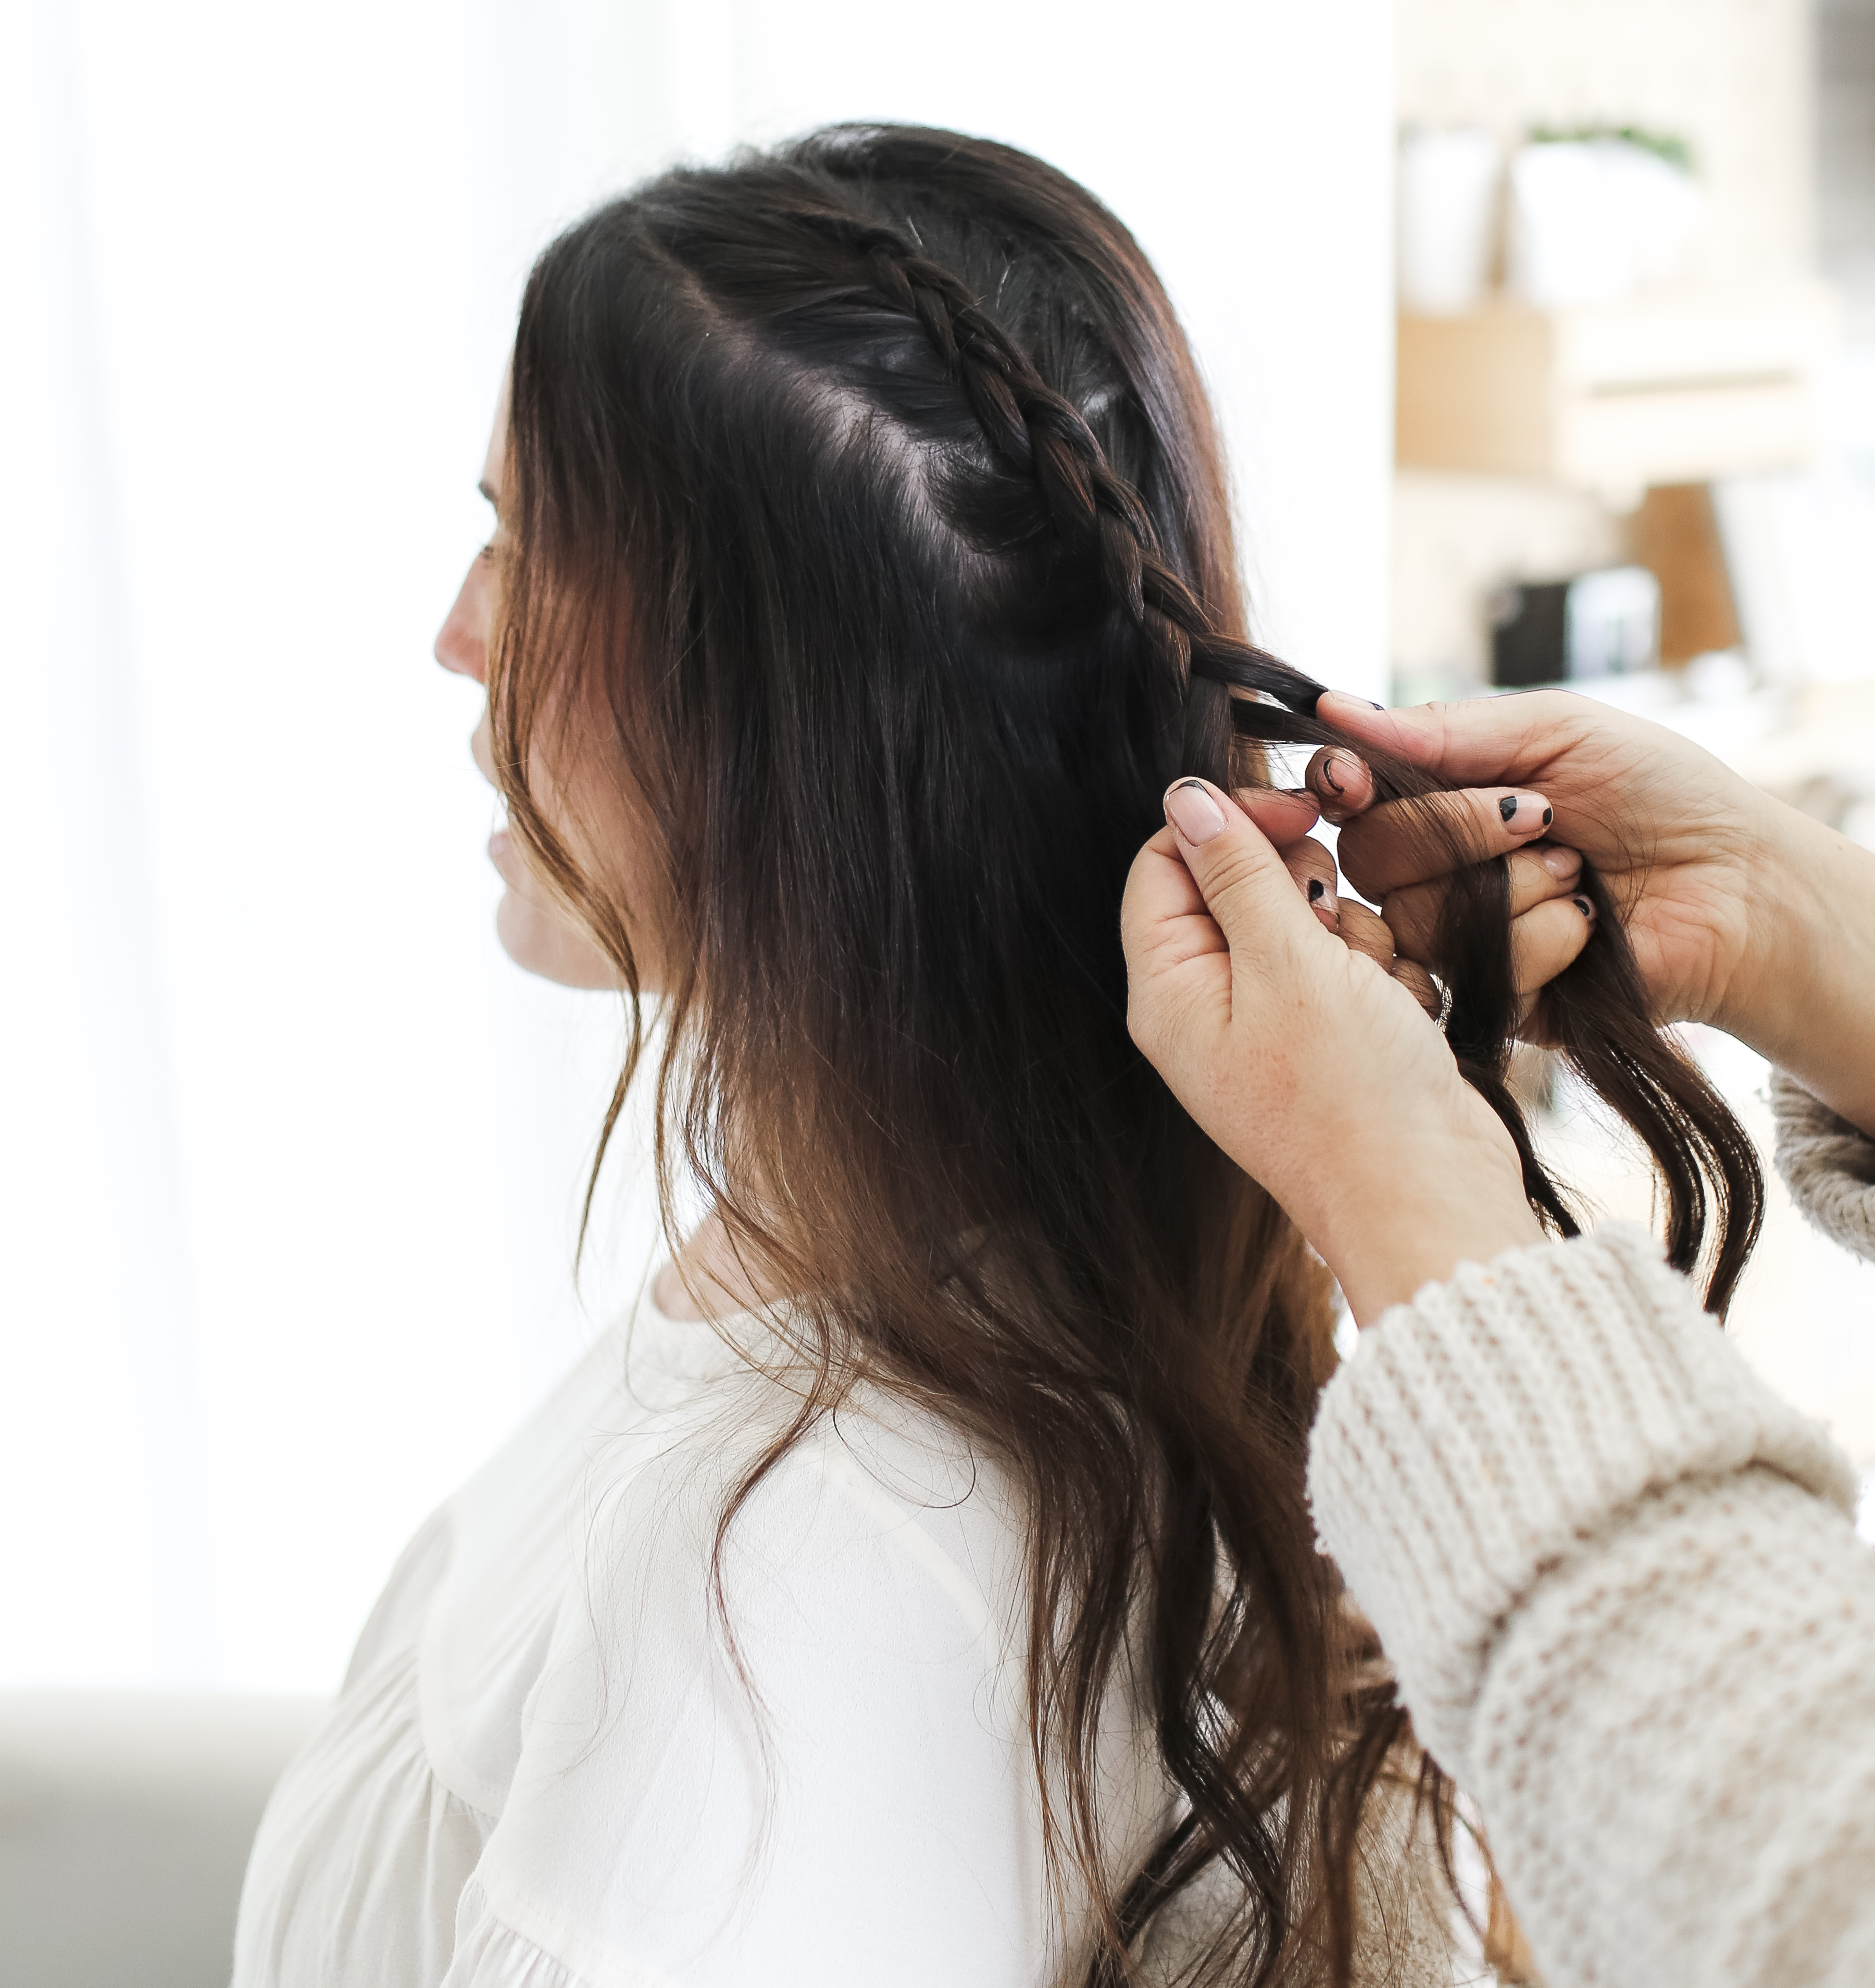
Braided Back
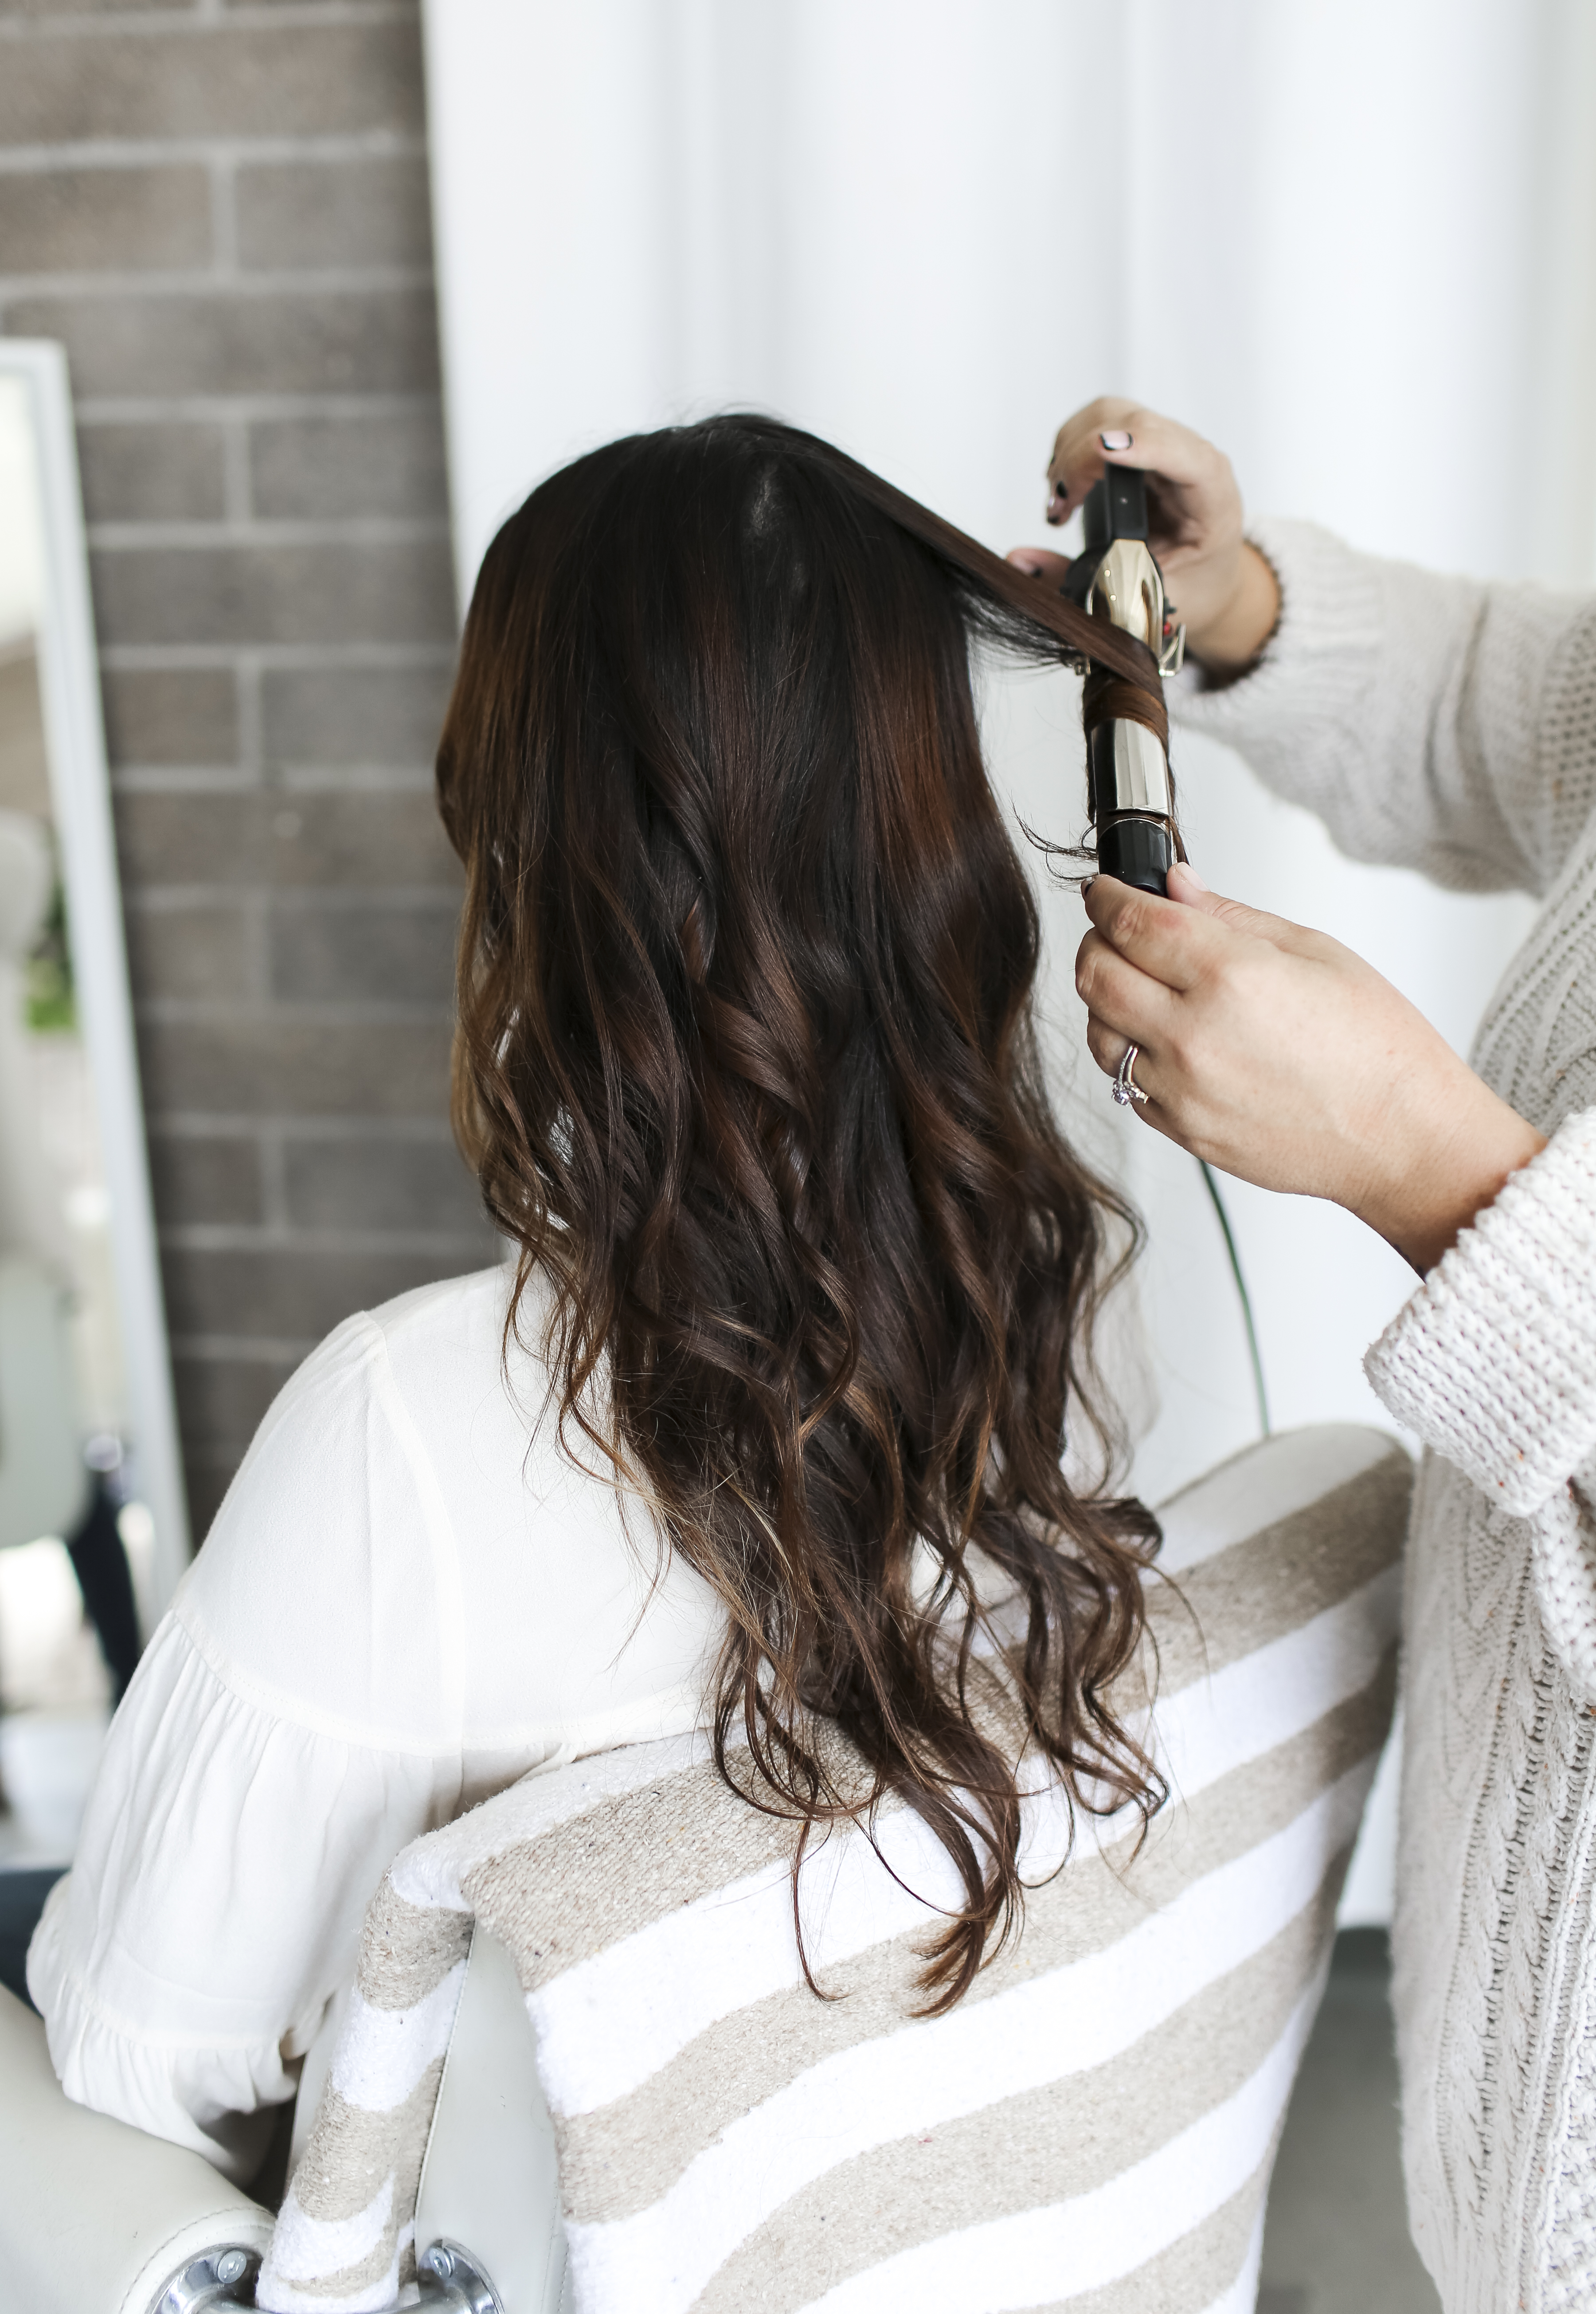
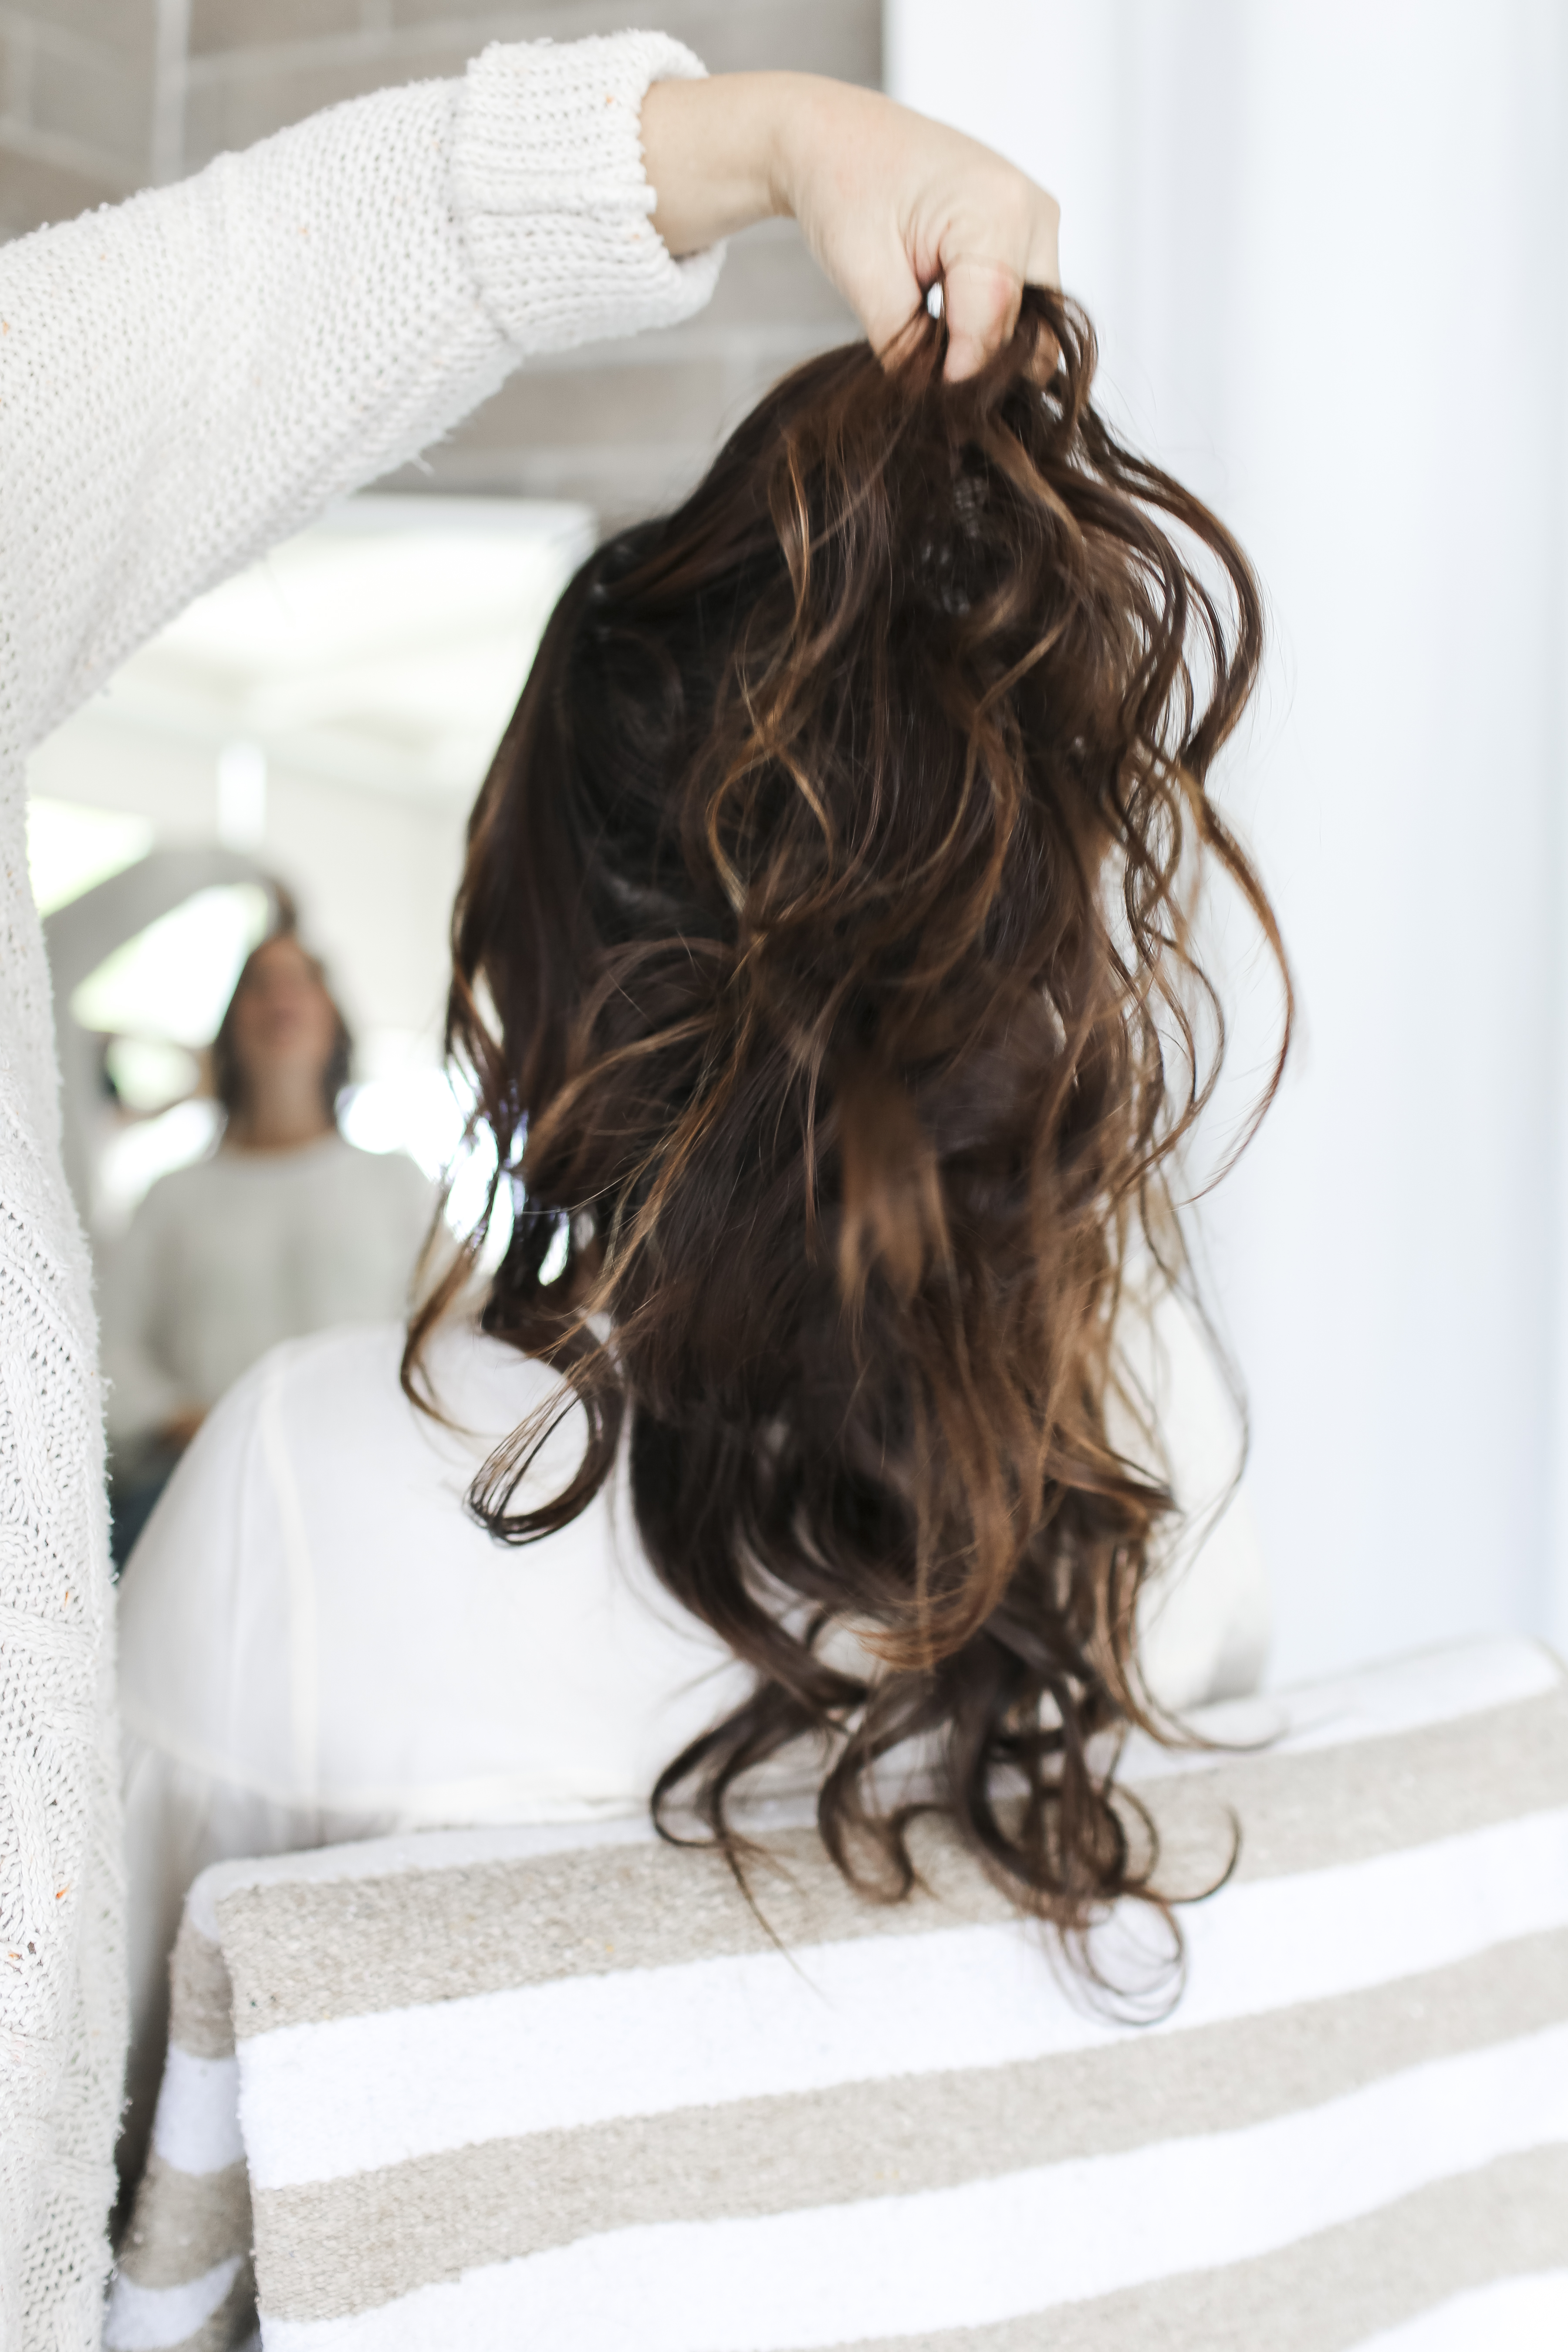
Choosing a hot tool of your size preference (larger the barrel, larger the curl), put some texture in the hair by curling the hair rotating the direction of the curls, always with the hair framing the face directed away from the face. Break up the curls and spray texturizing spray or a sea salt spray. For more fullness, you can add in a little texturizing/ volume enhancing powder at the roots and gently backcomb the hair.

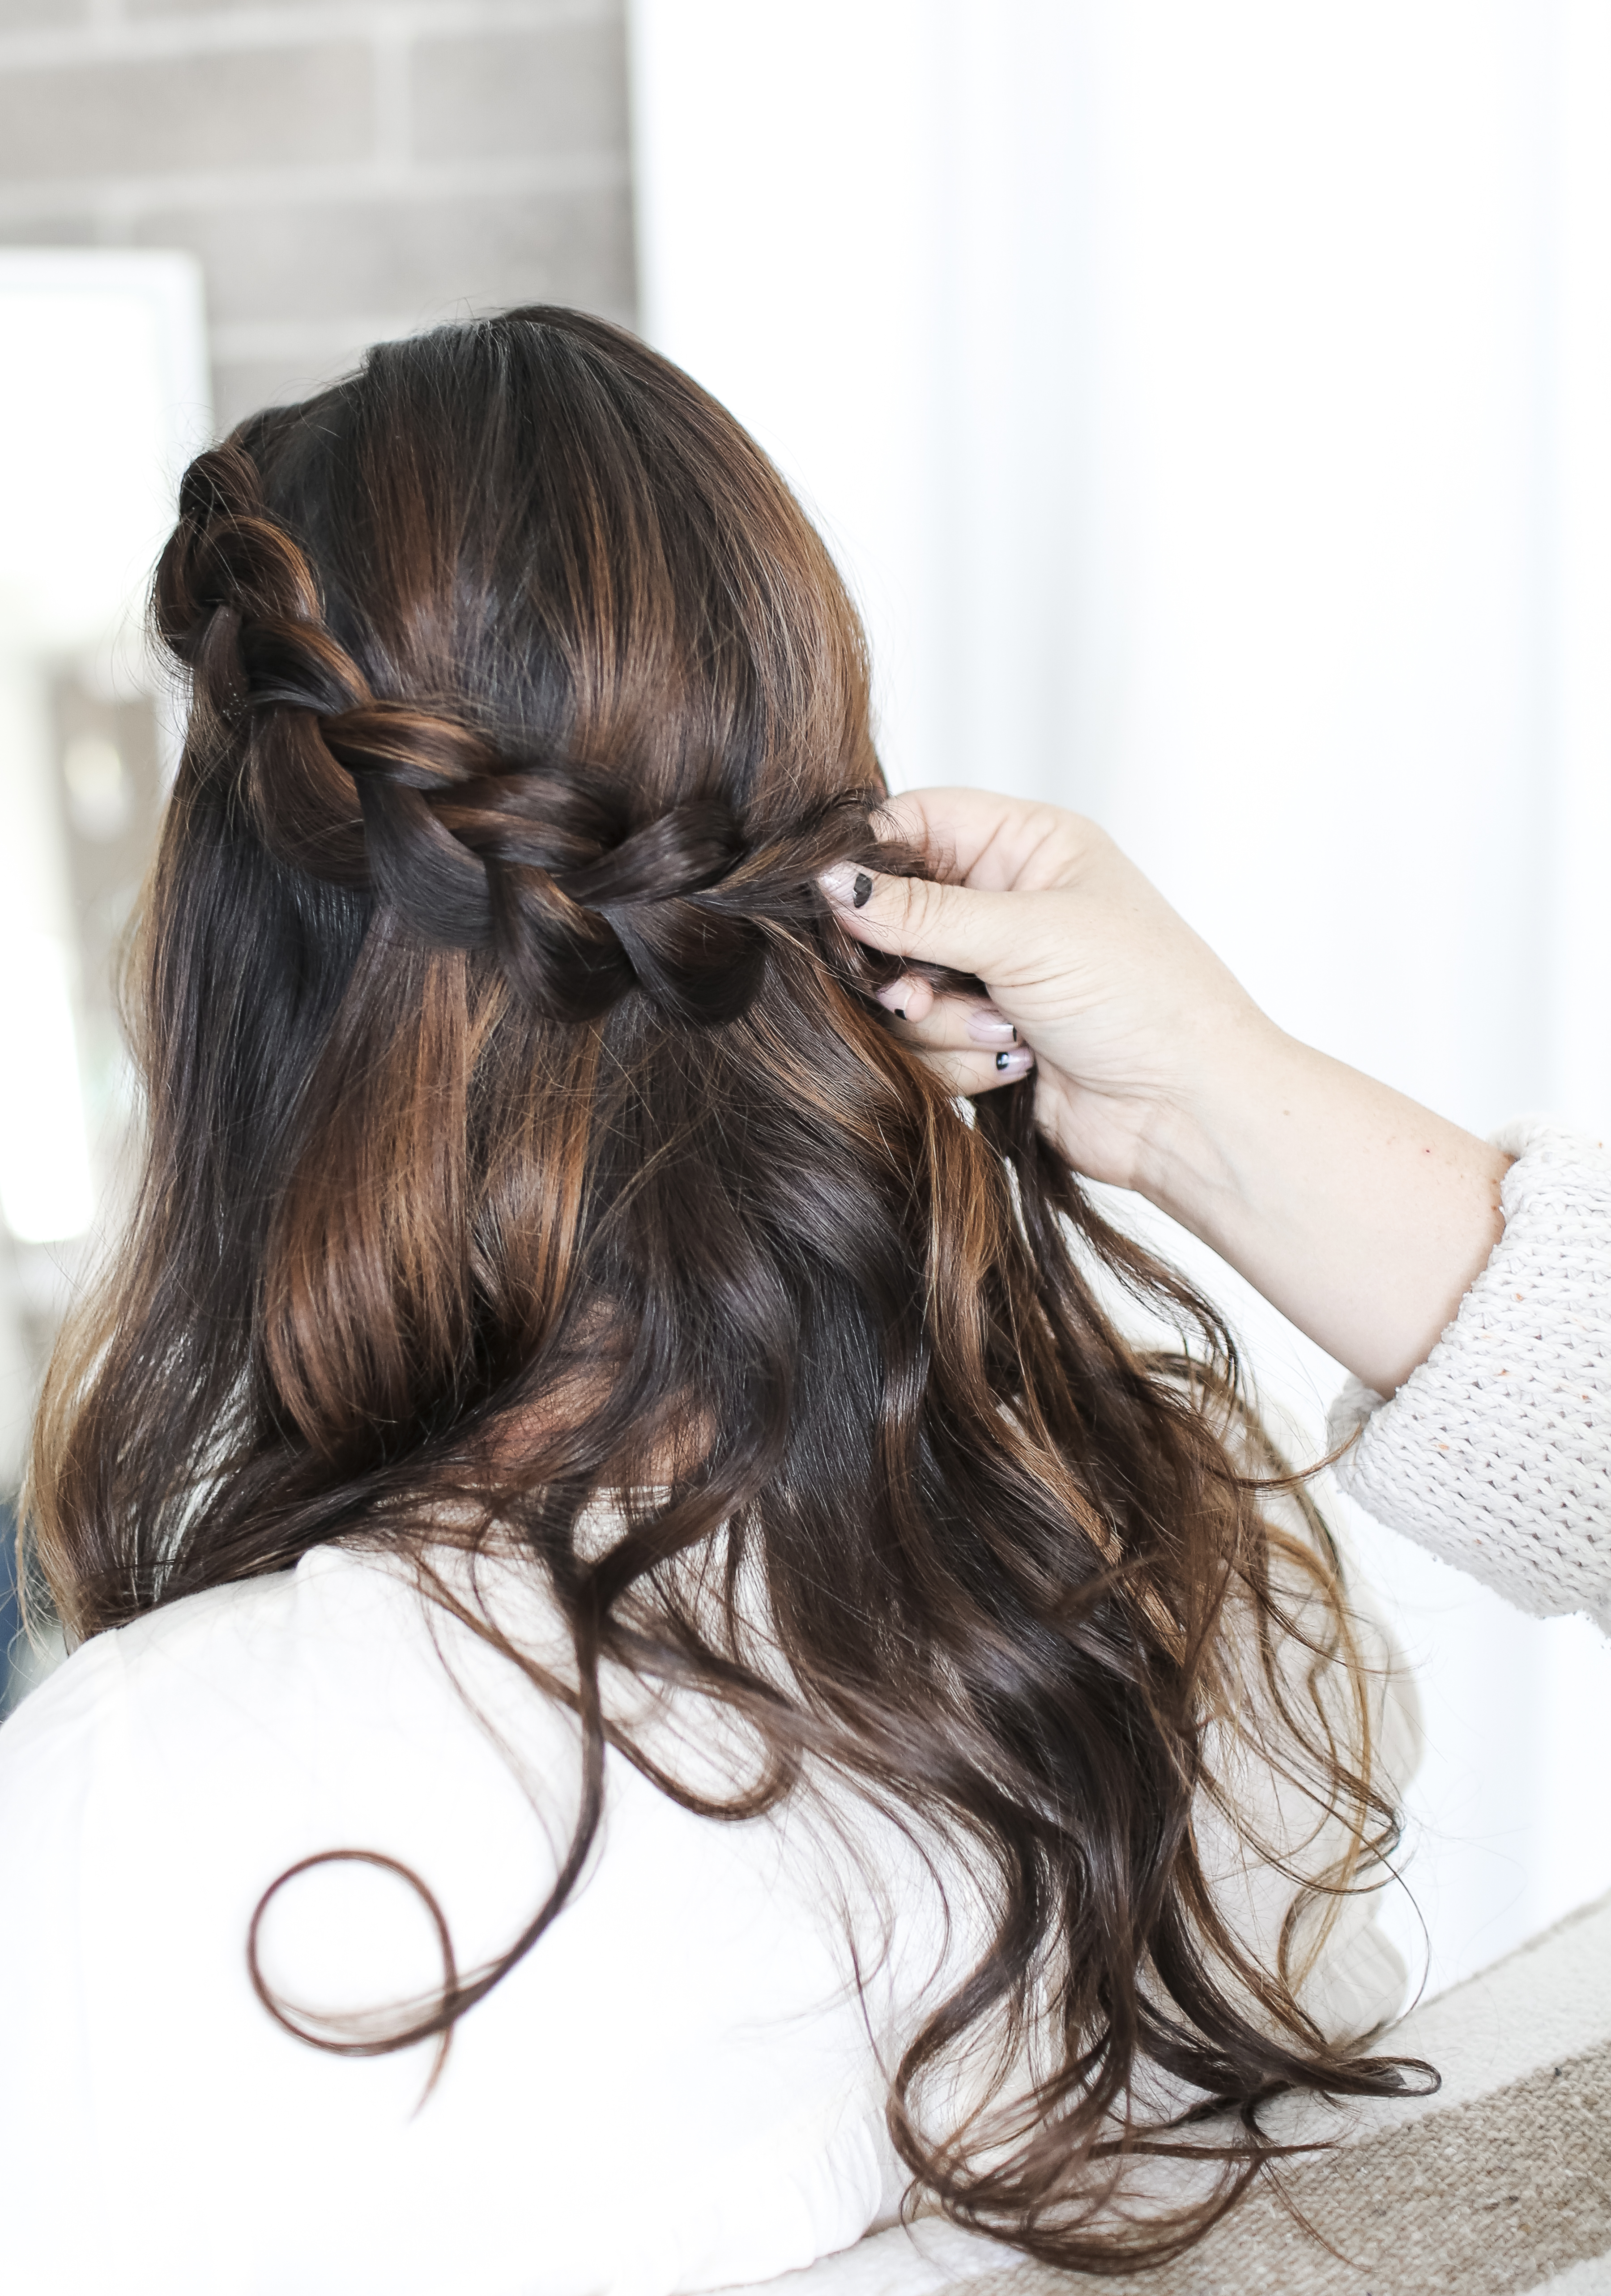
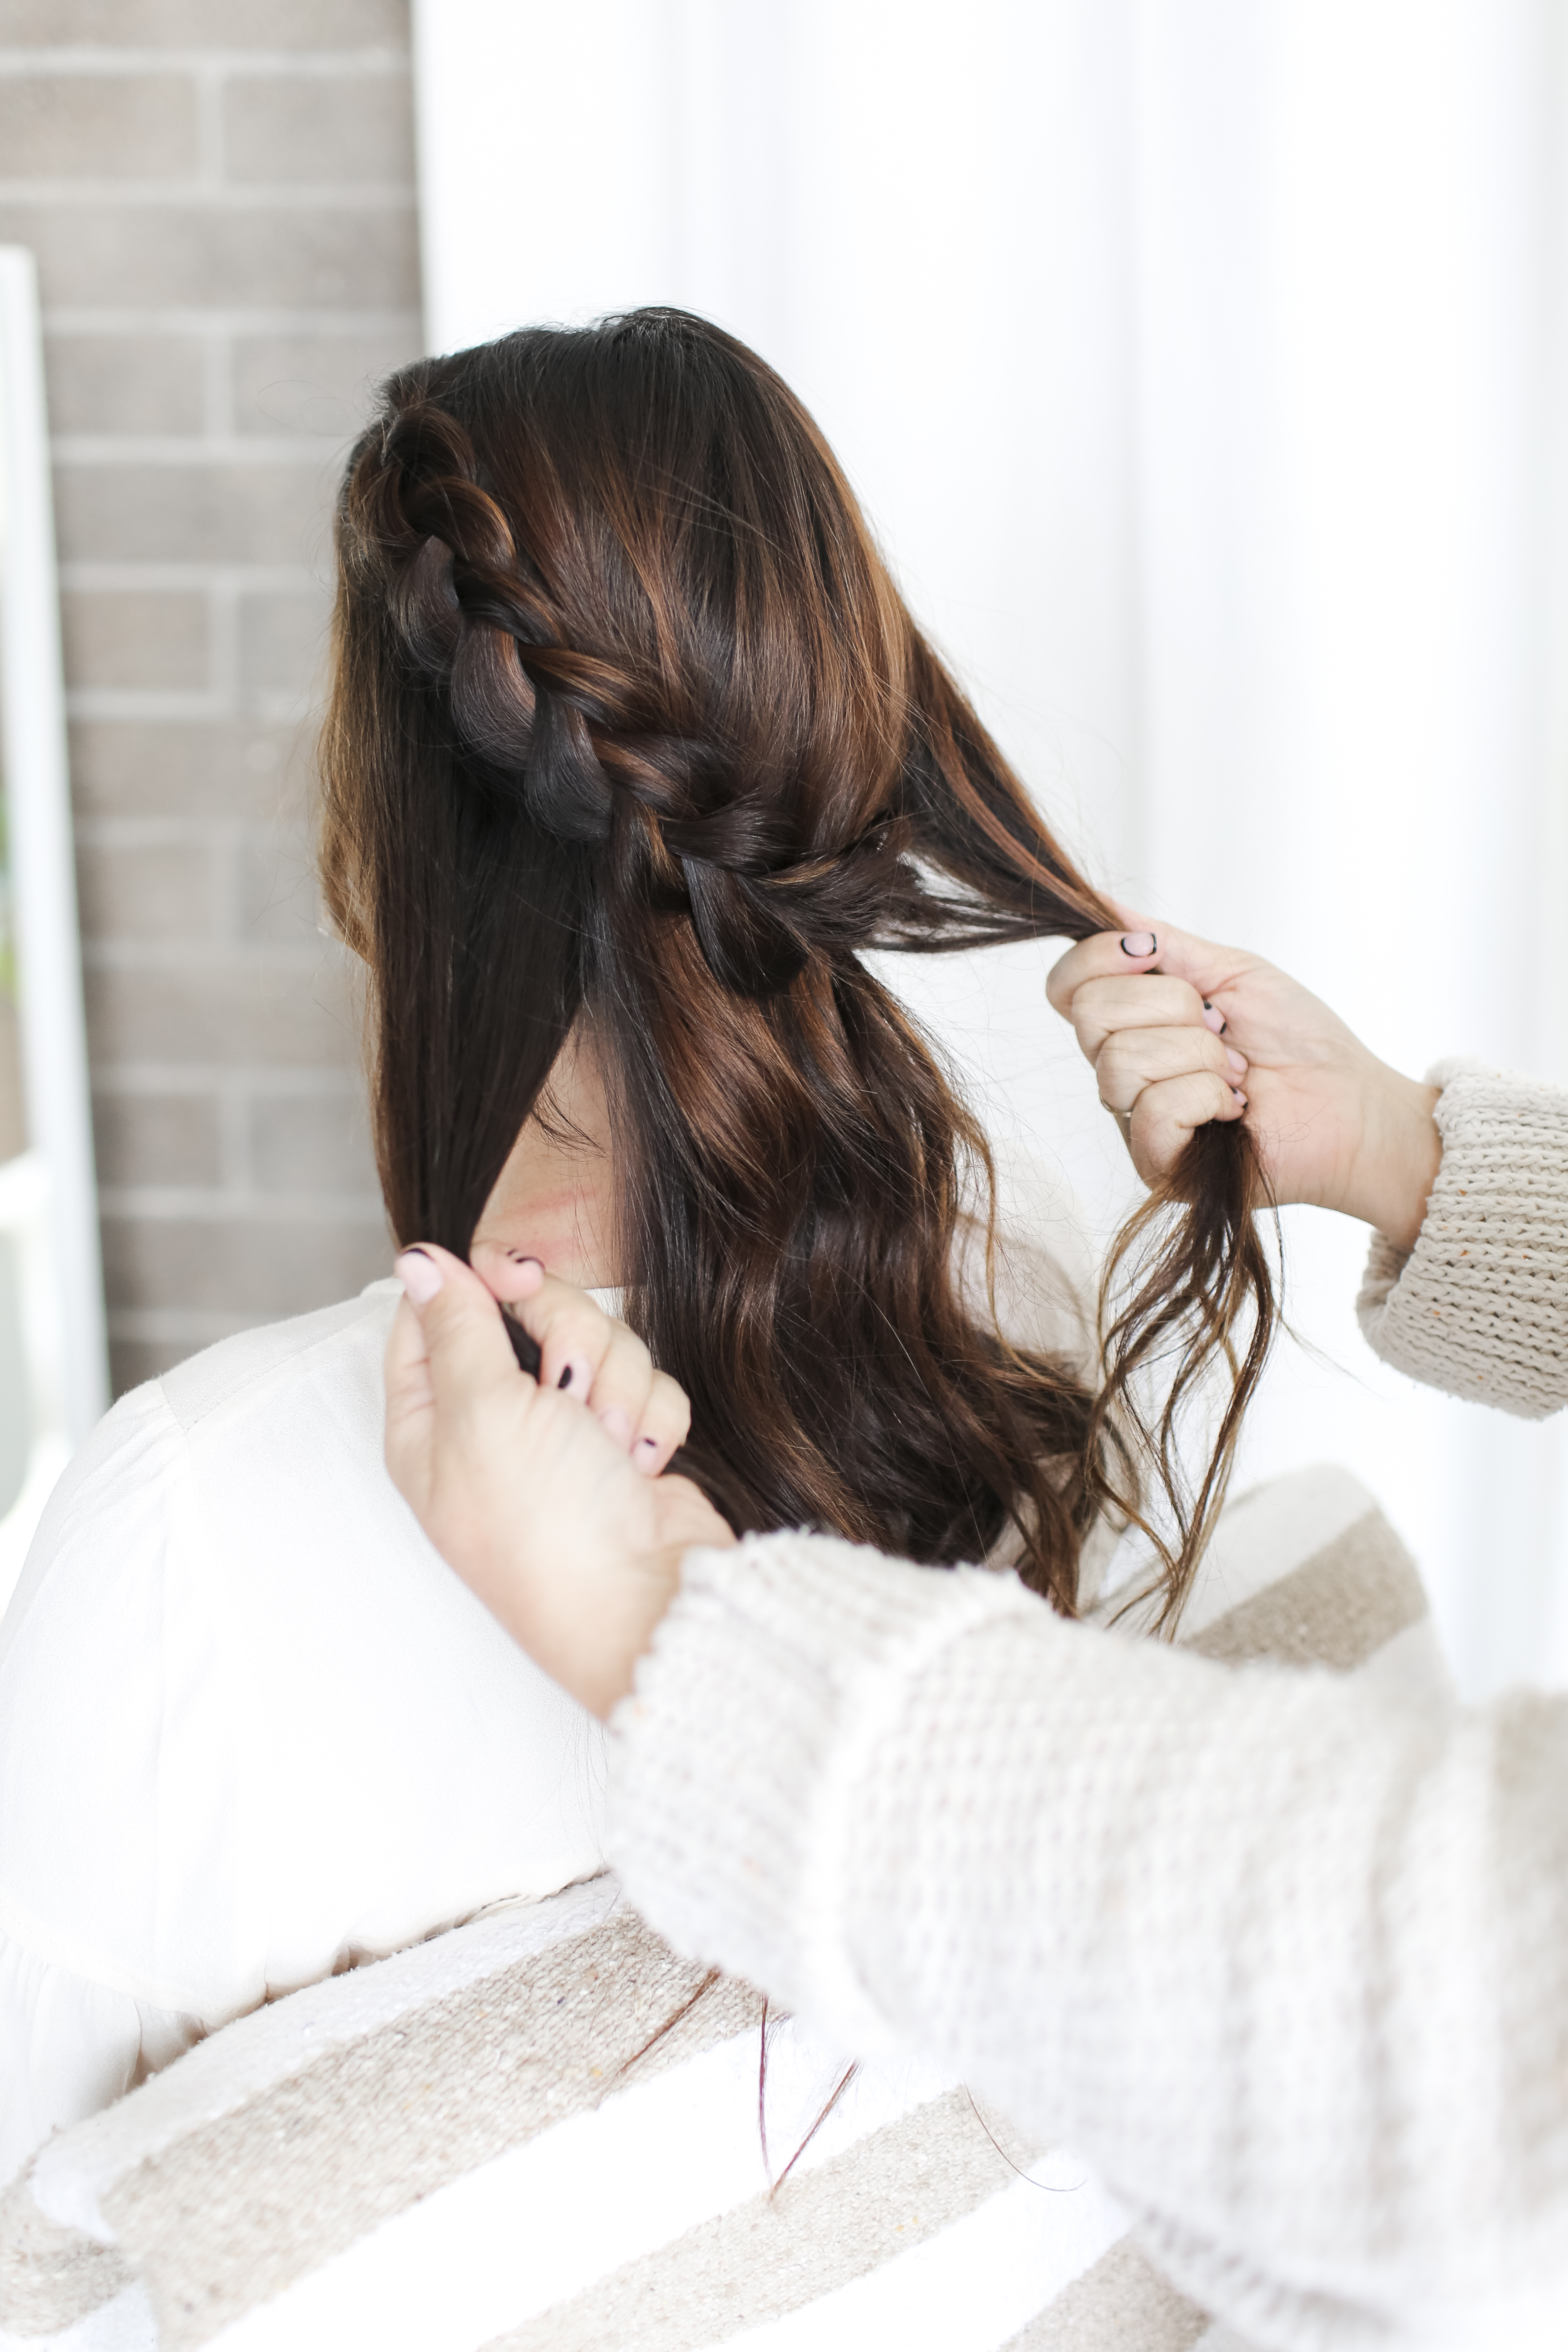
 Gather the hair at the top of your head, leaving a perimeter of hair out framing the face, and begin a dutch braid (inside out braid), keeping it fairly tight and directing it along the side and towards the back of the head as your braid. once you get to about the ear, finish the braid no longer gathering pieces.
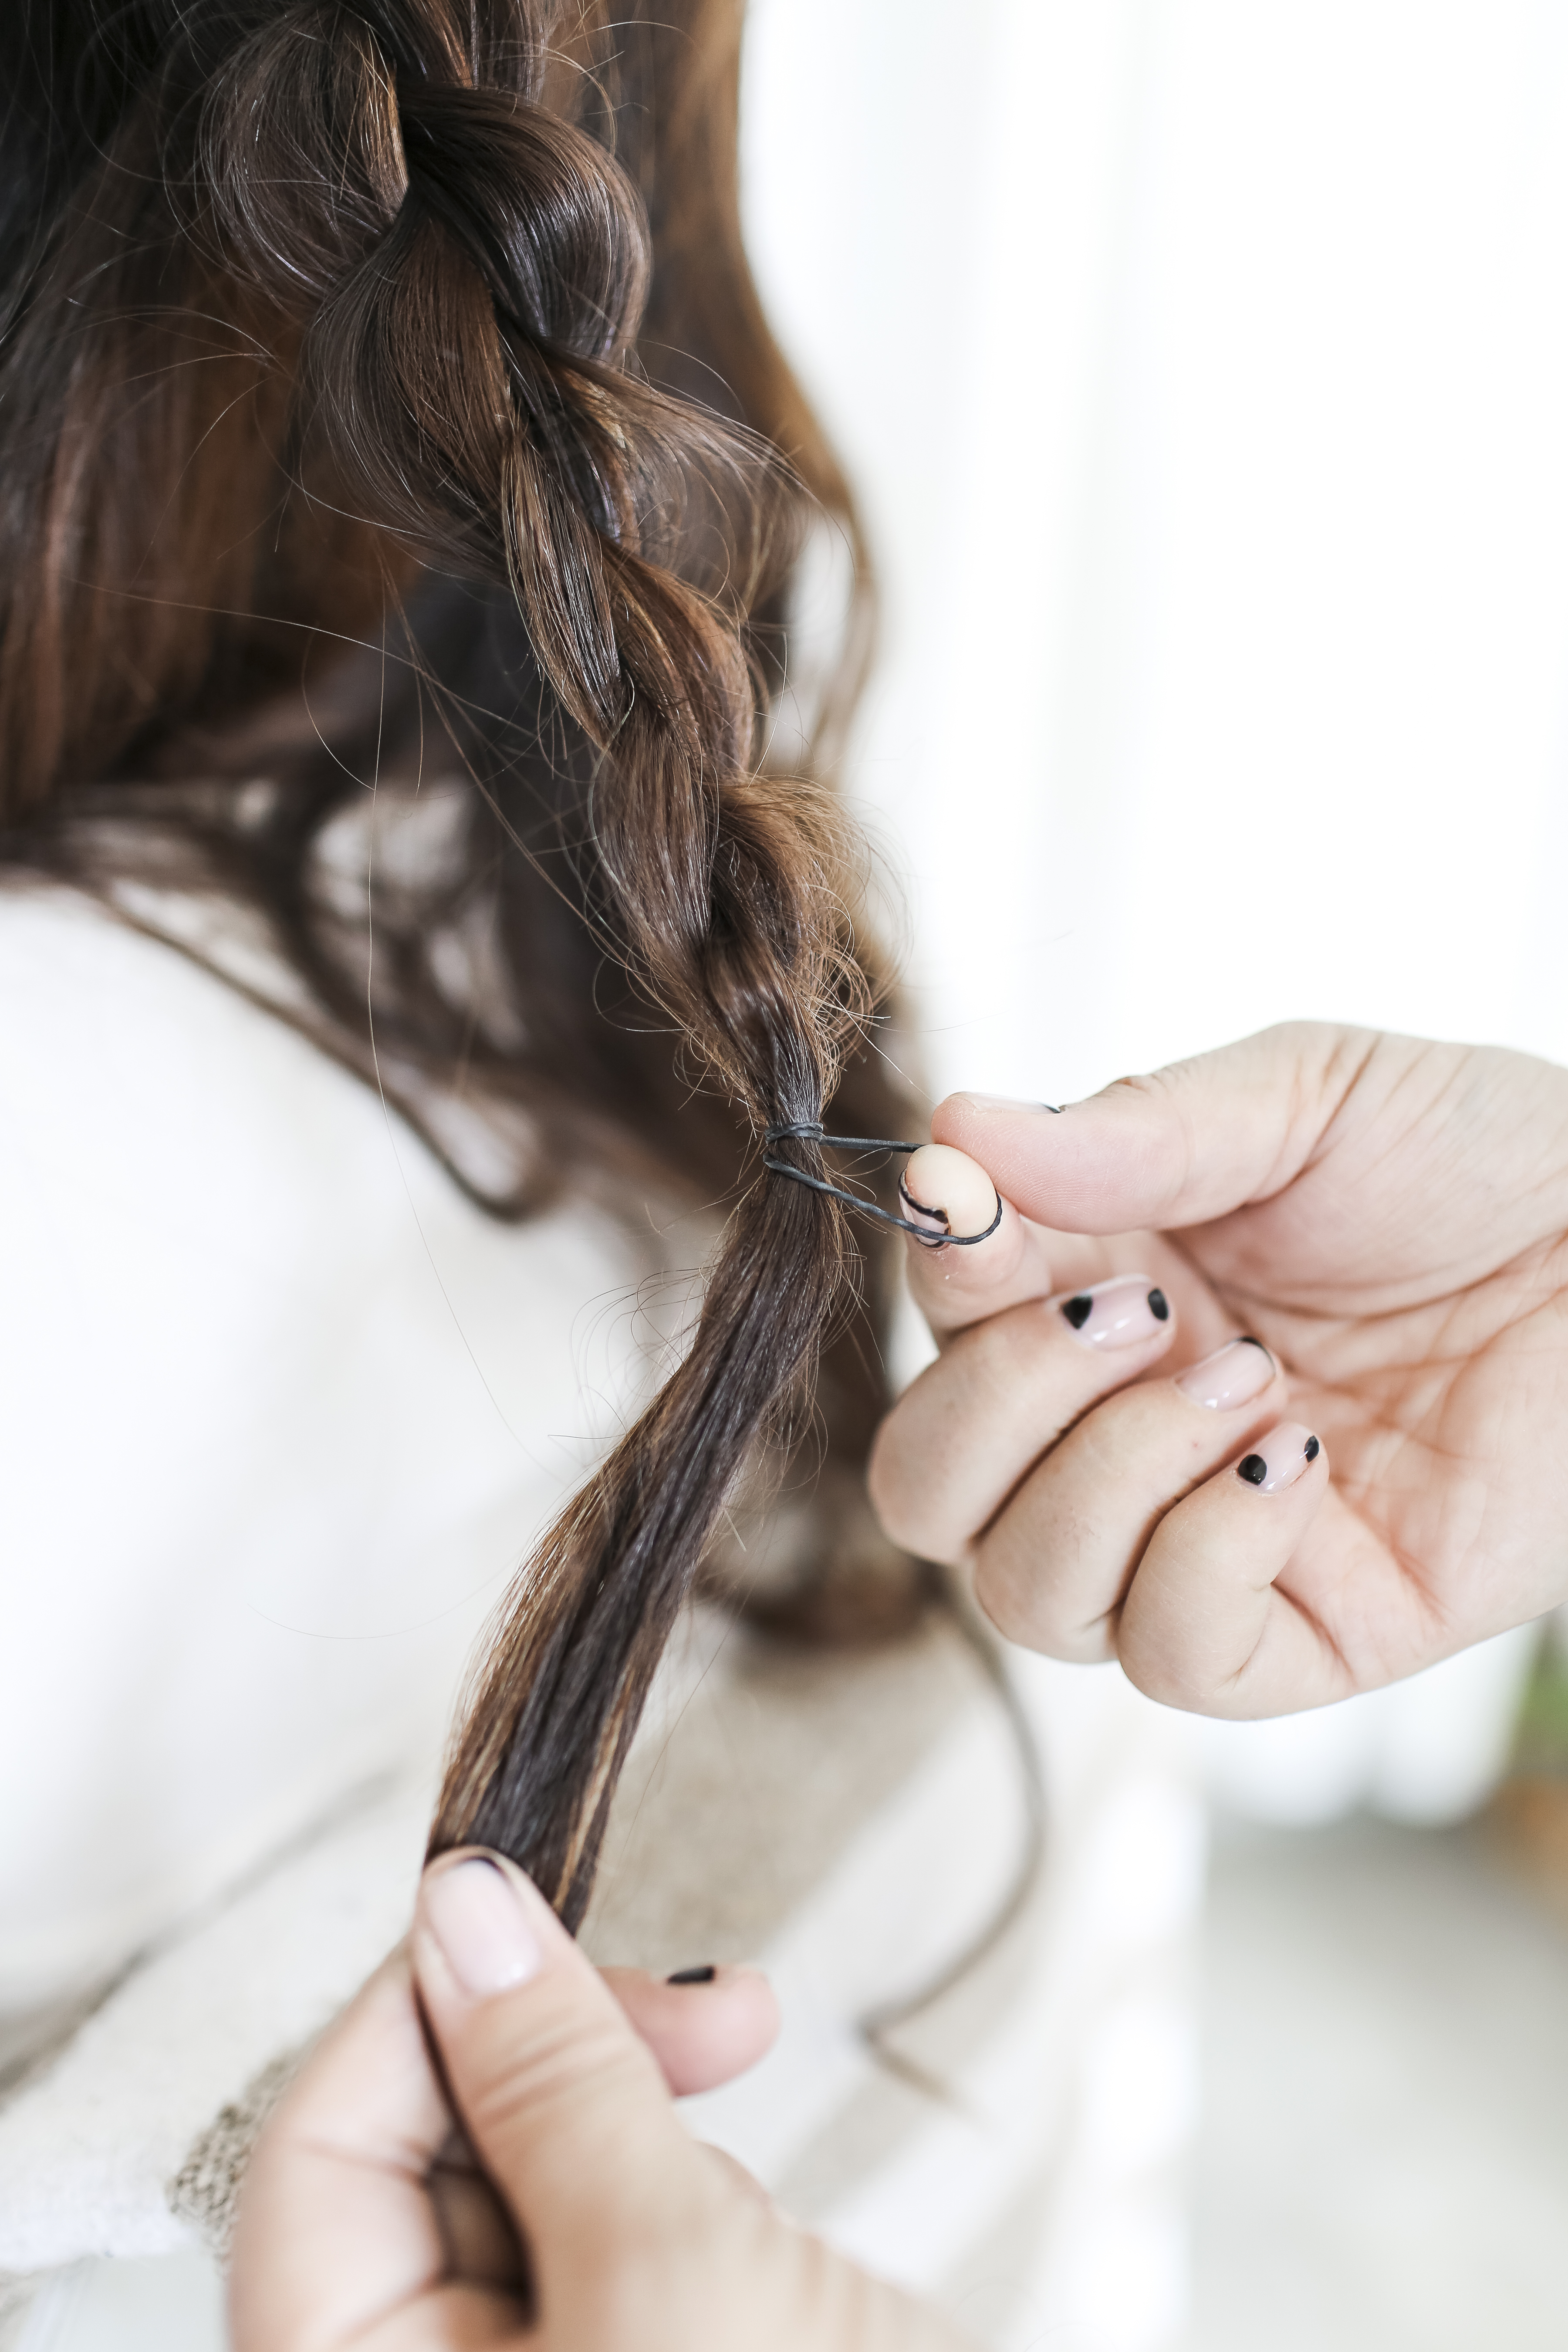
Starting at the ends pull and tug on the hair to loosen it with your pointer finger and thumb and work your way up the braid until you have reached your desired size of braid, and secure with a hair tie.


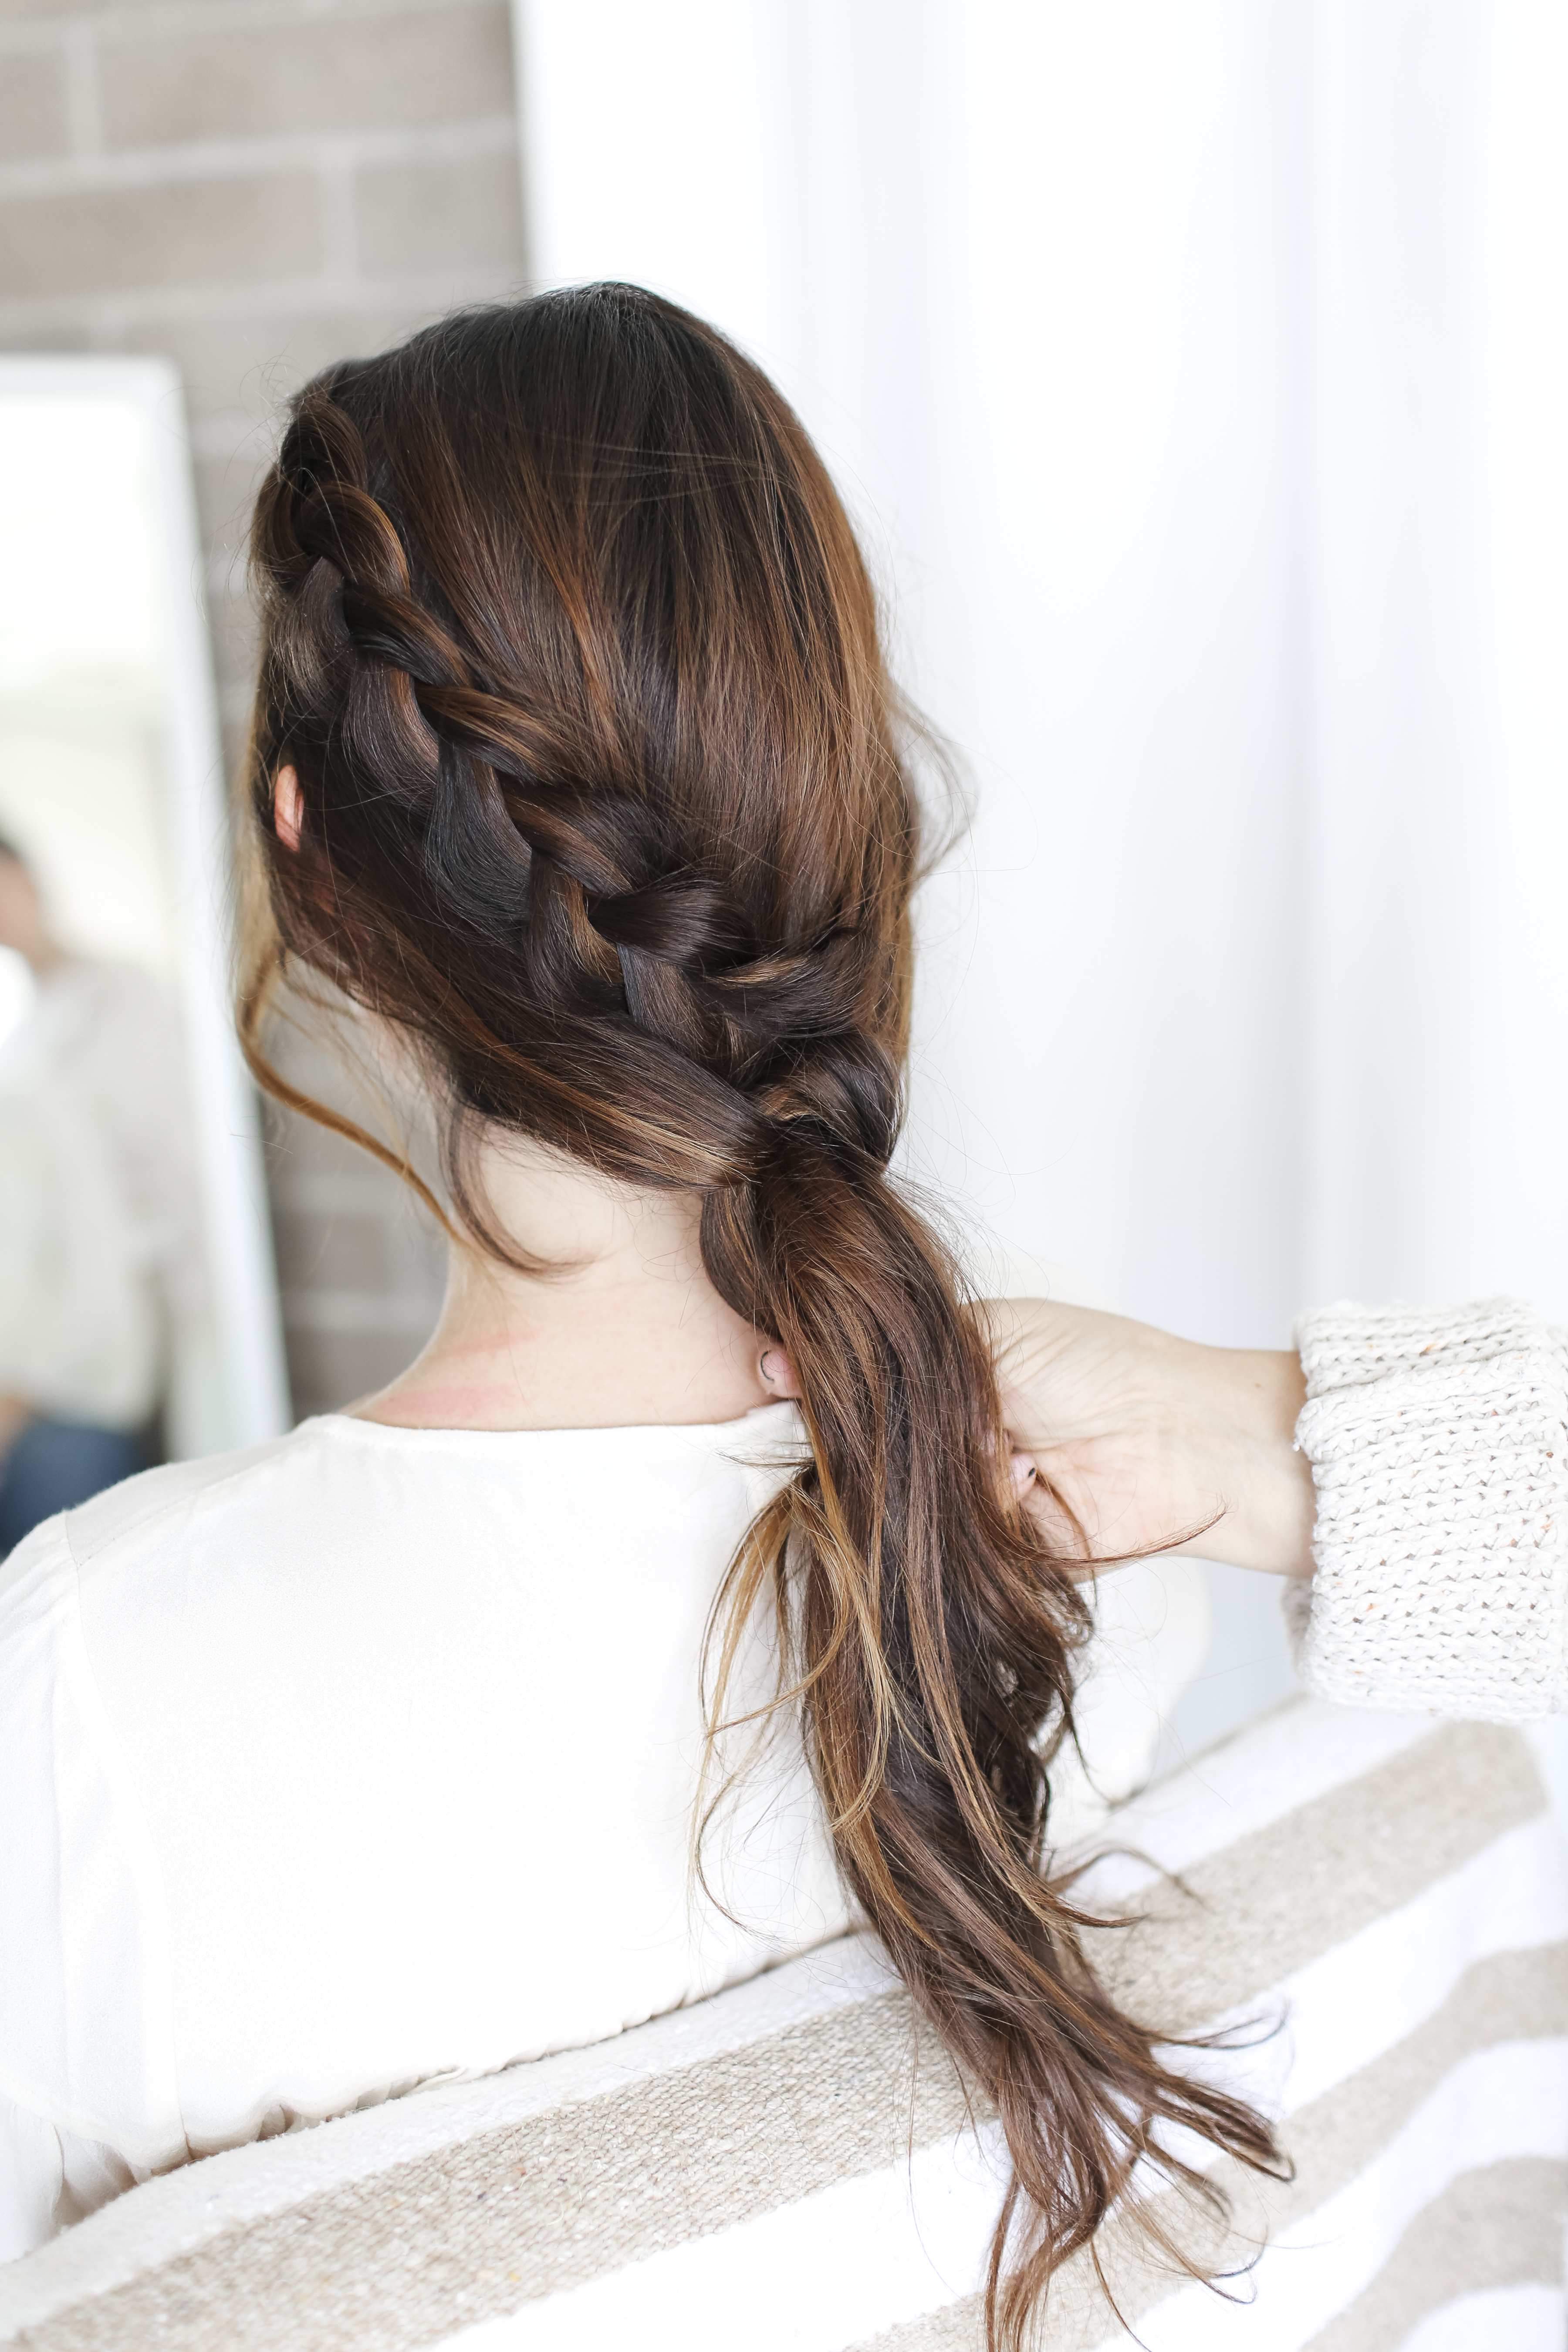
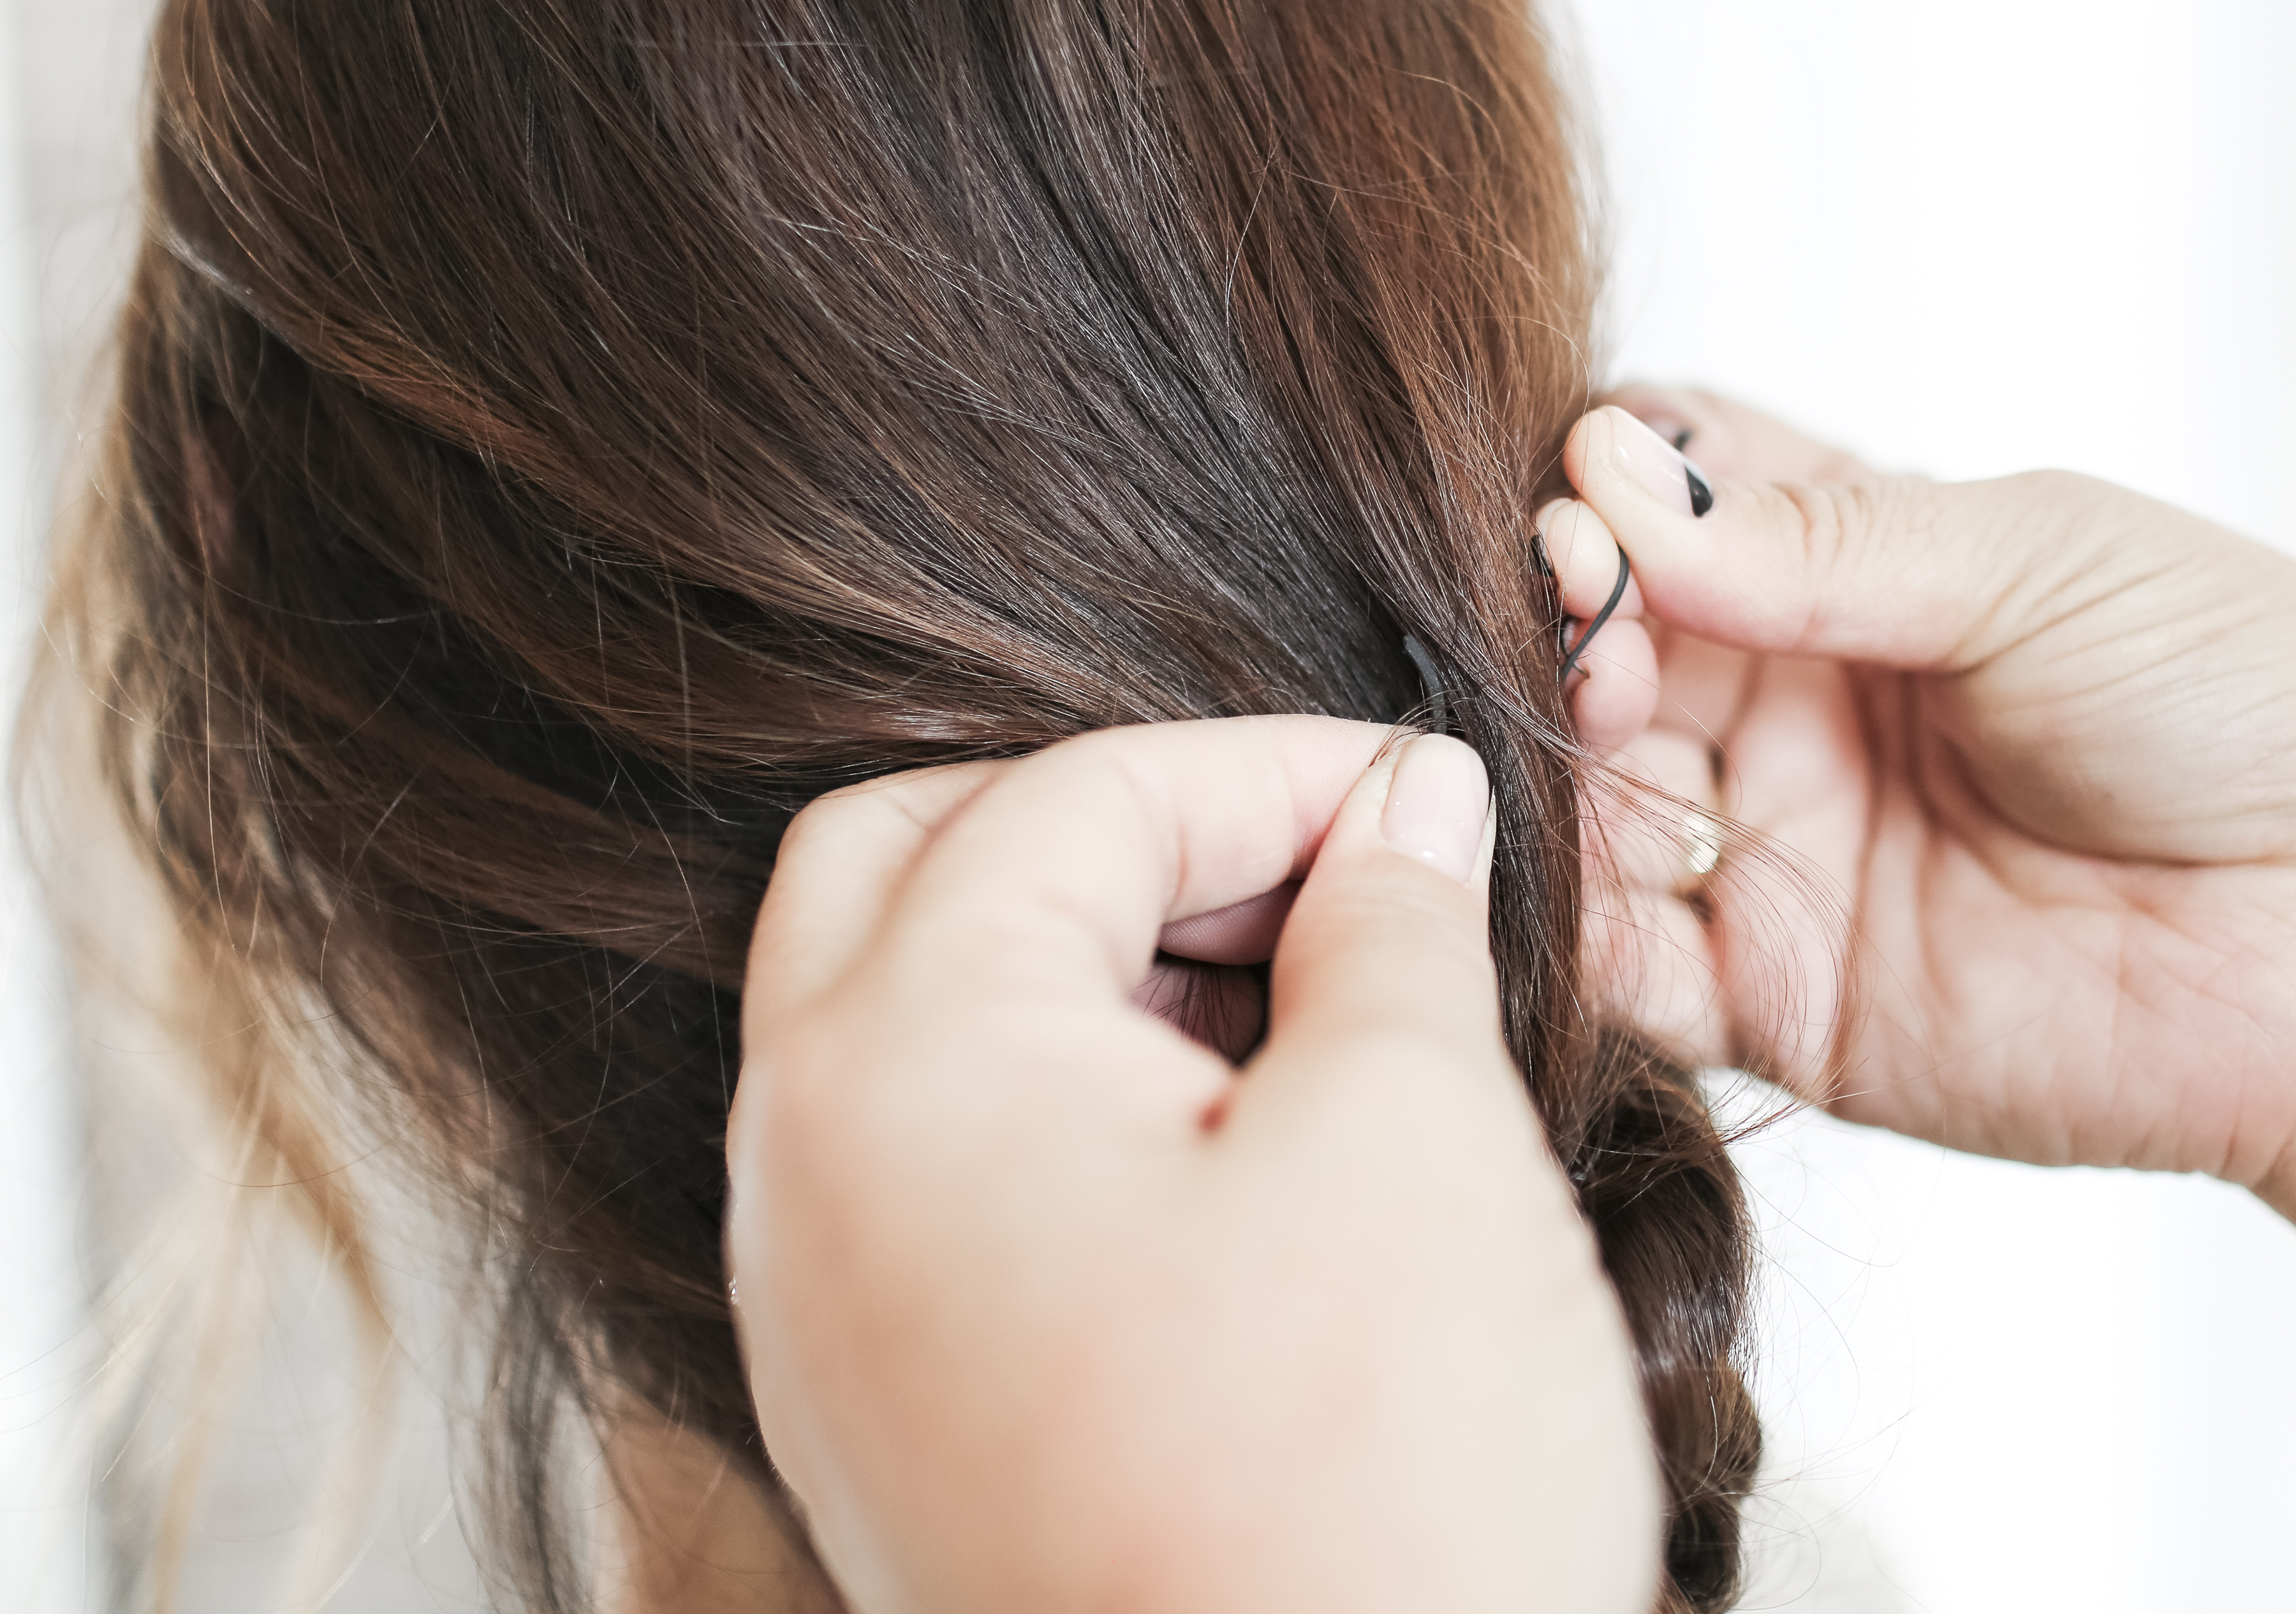
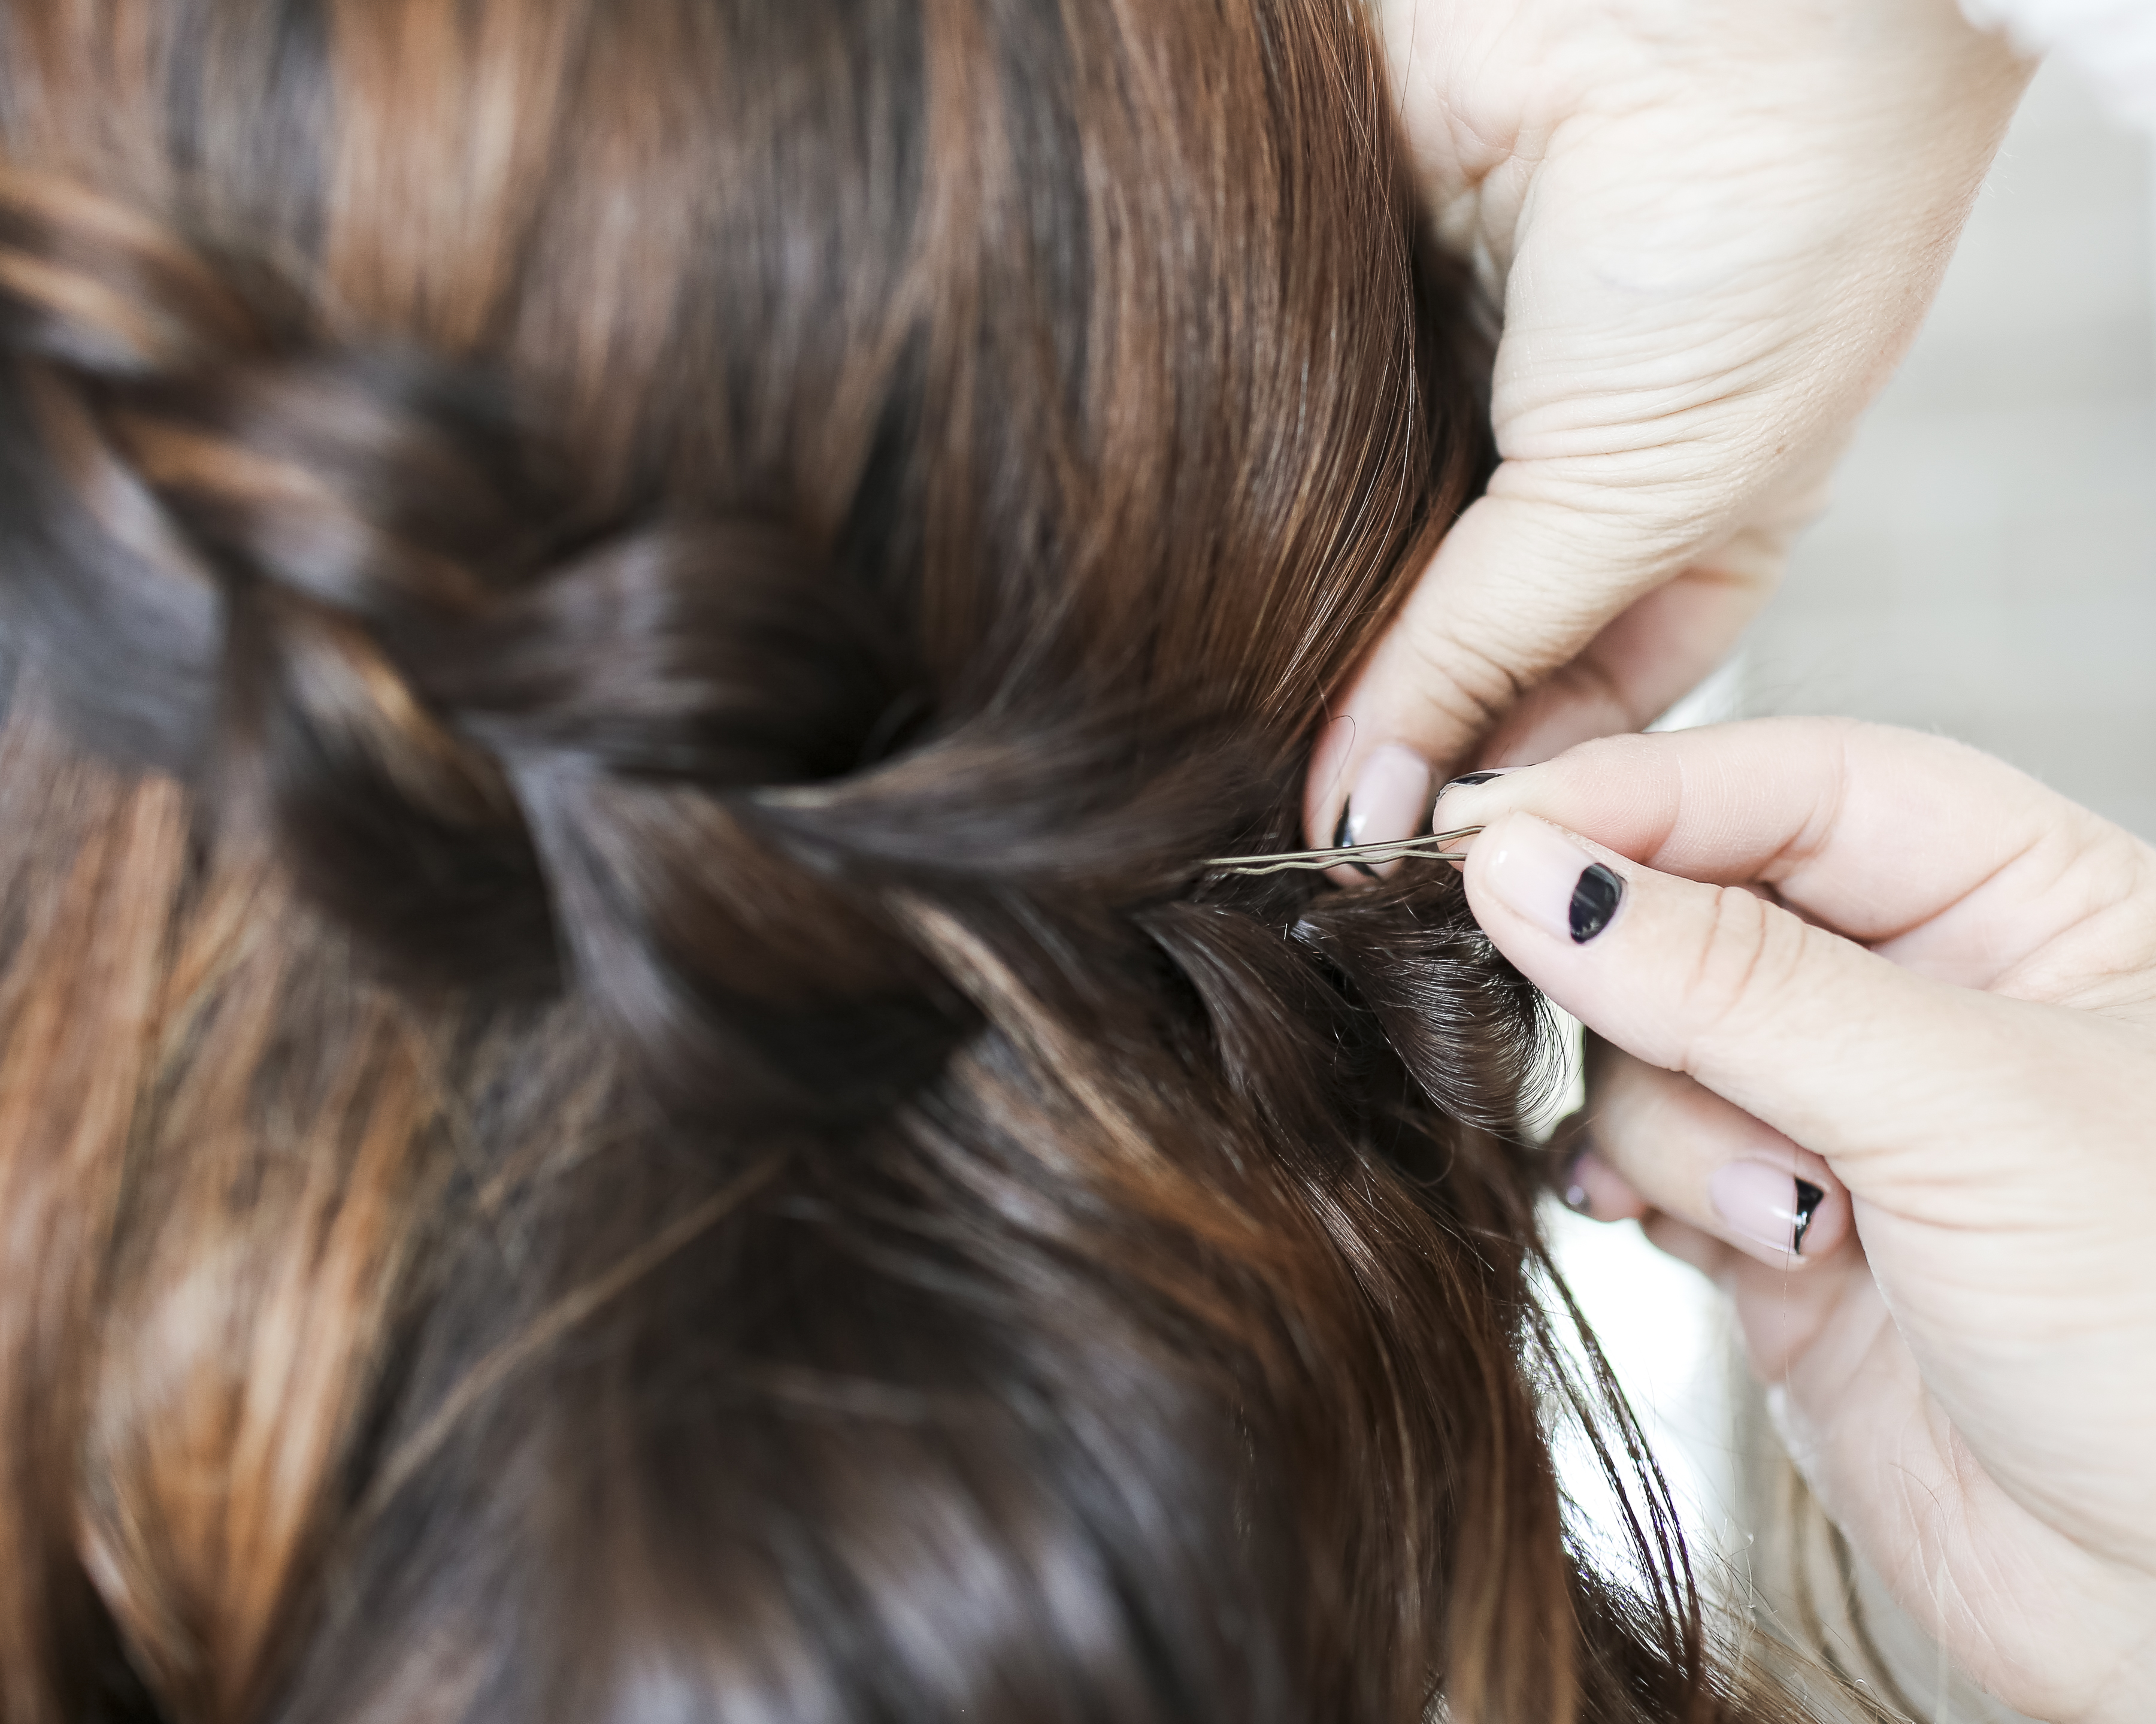 Take the end of the braid and direct it across the back of your head and secure it with a hairpin. Tuck the end of the braid back and under the portion you have secured and pin. Spray with finishing spray.

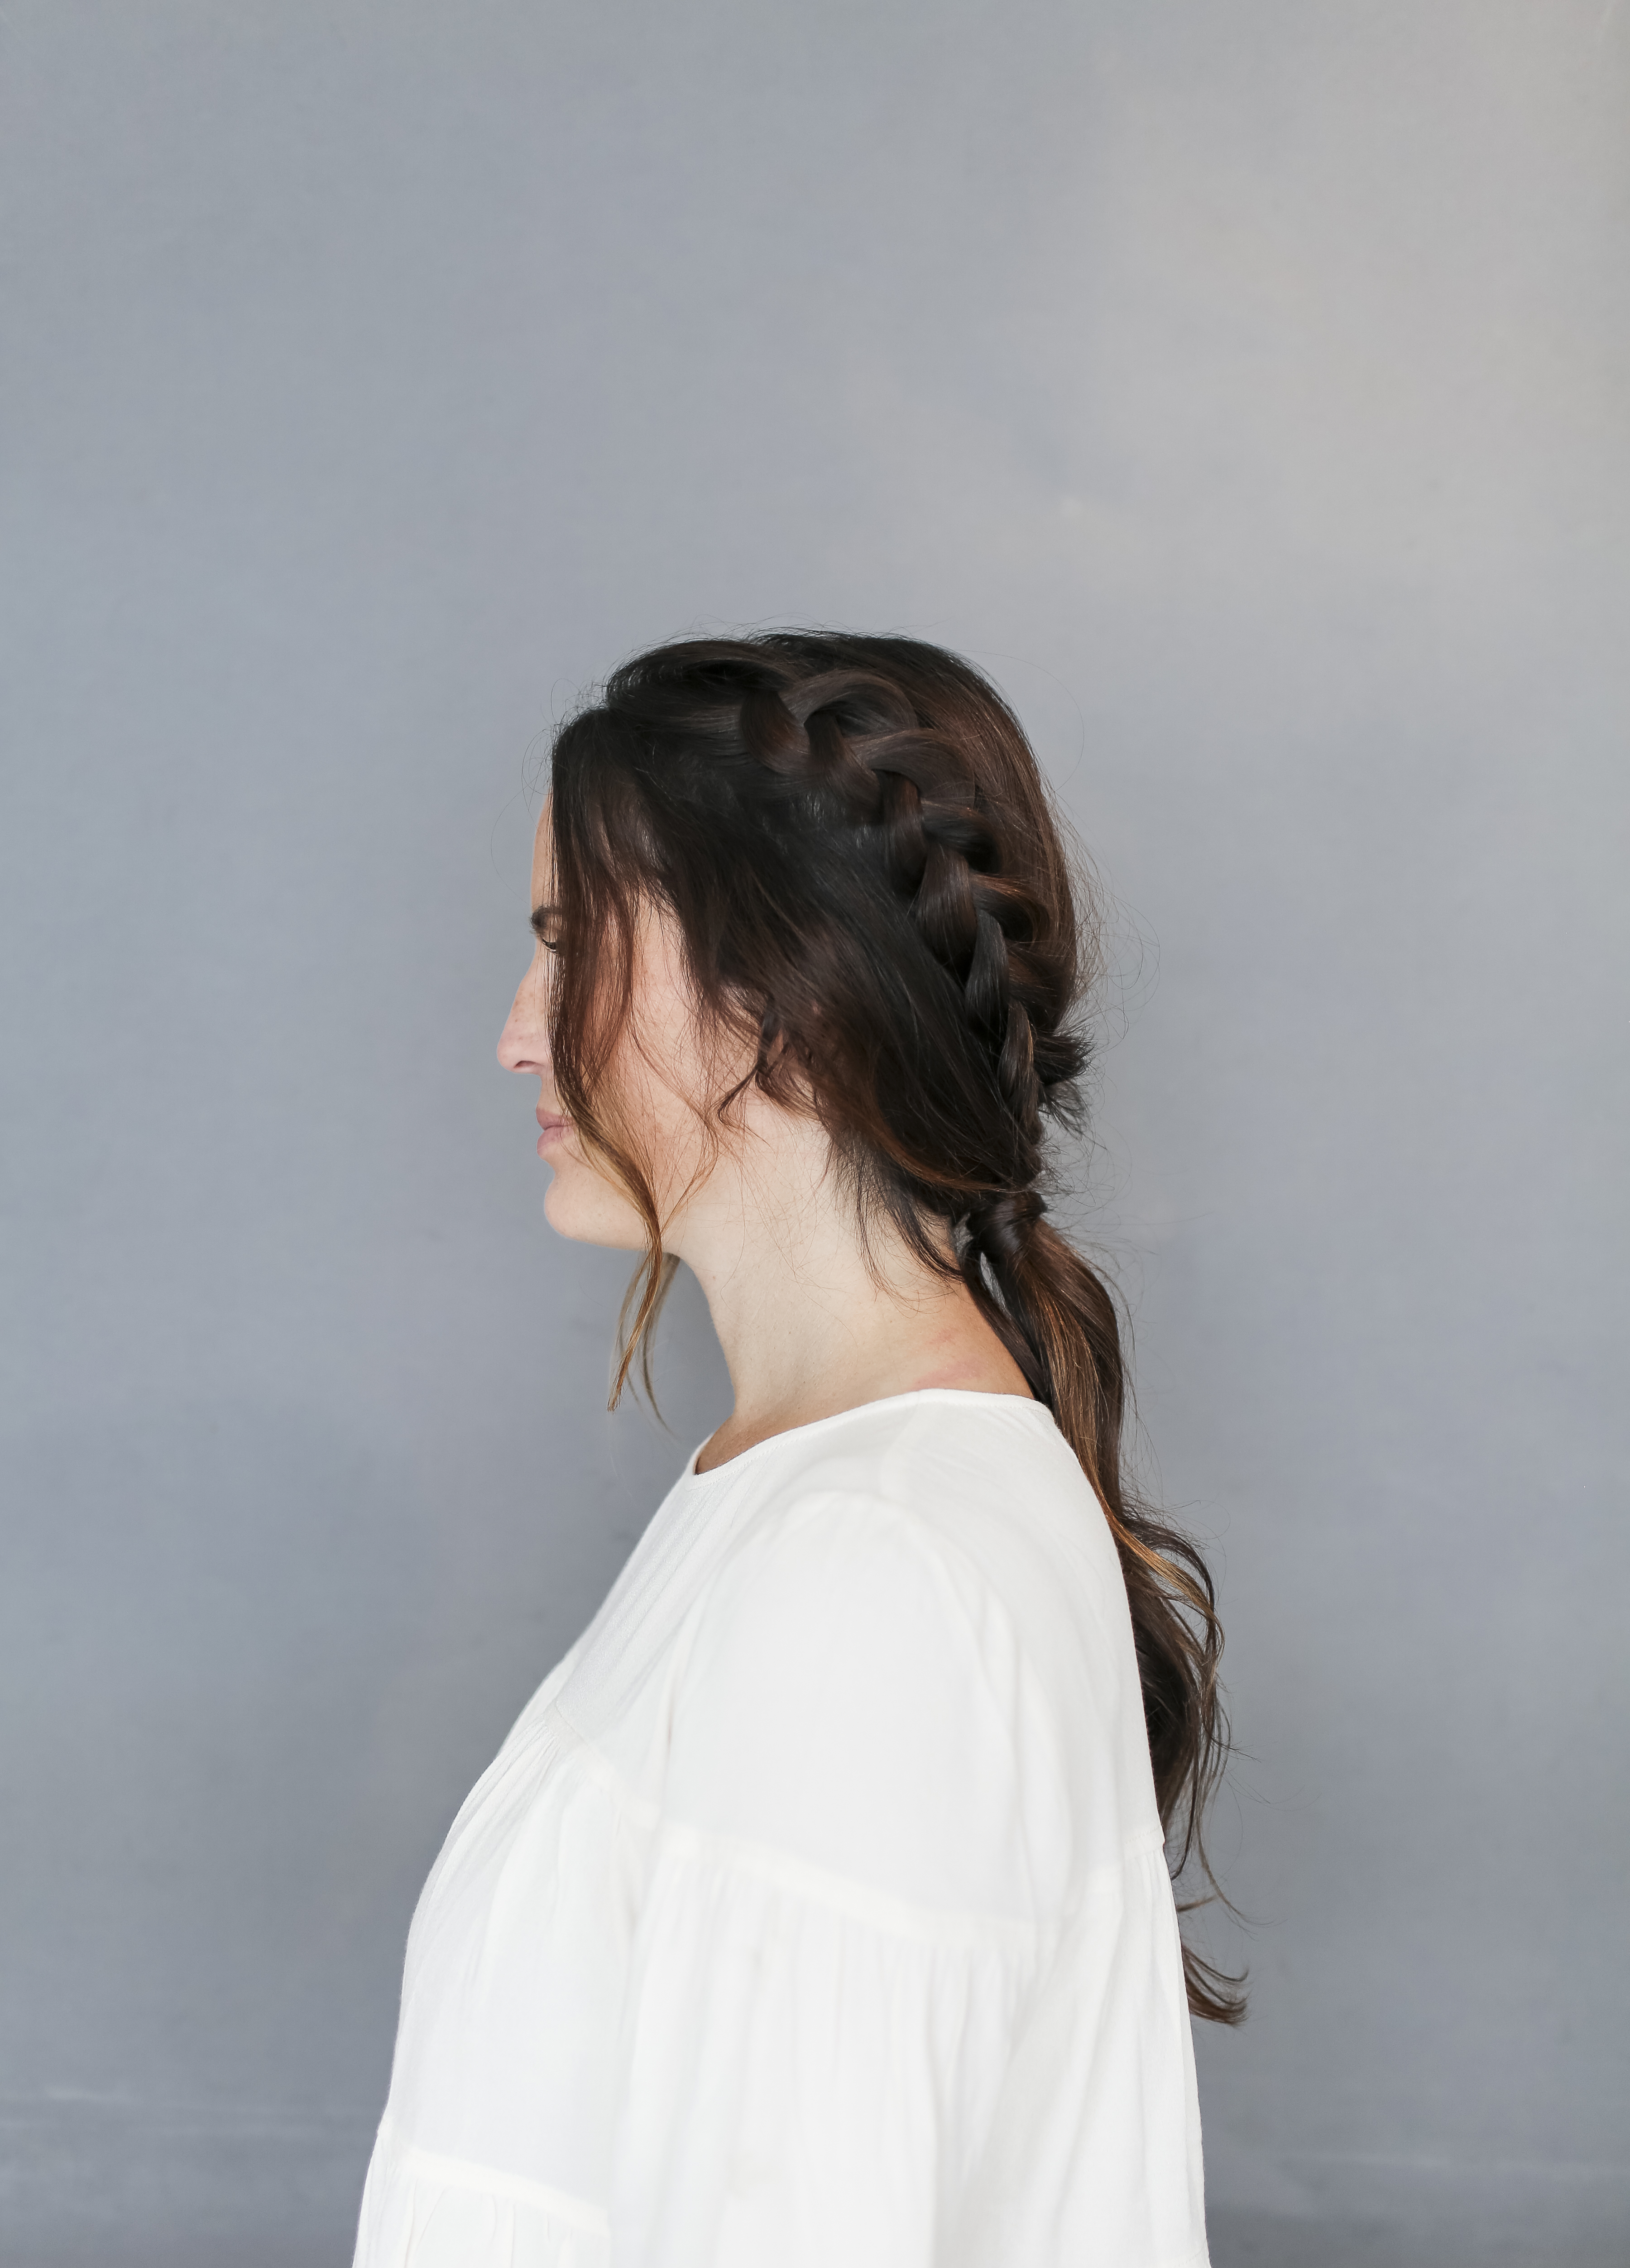
 STYLE 1 into 2
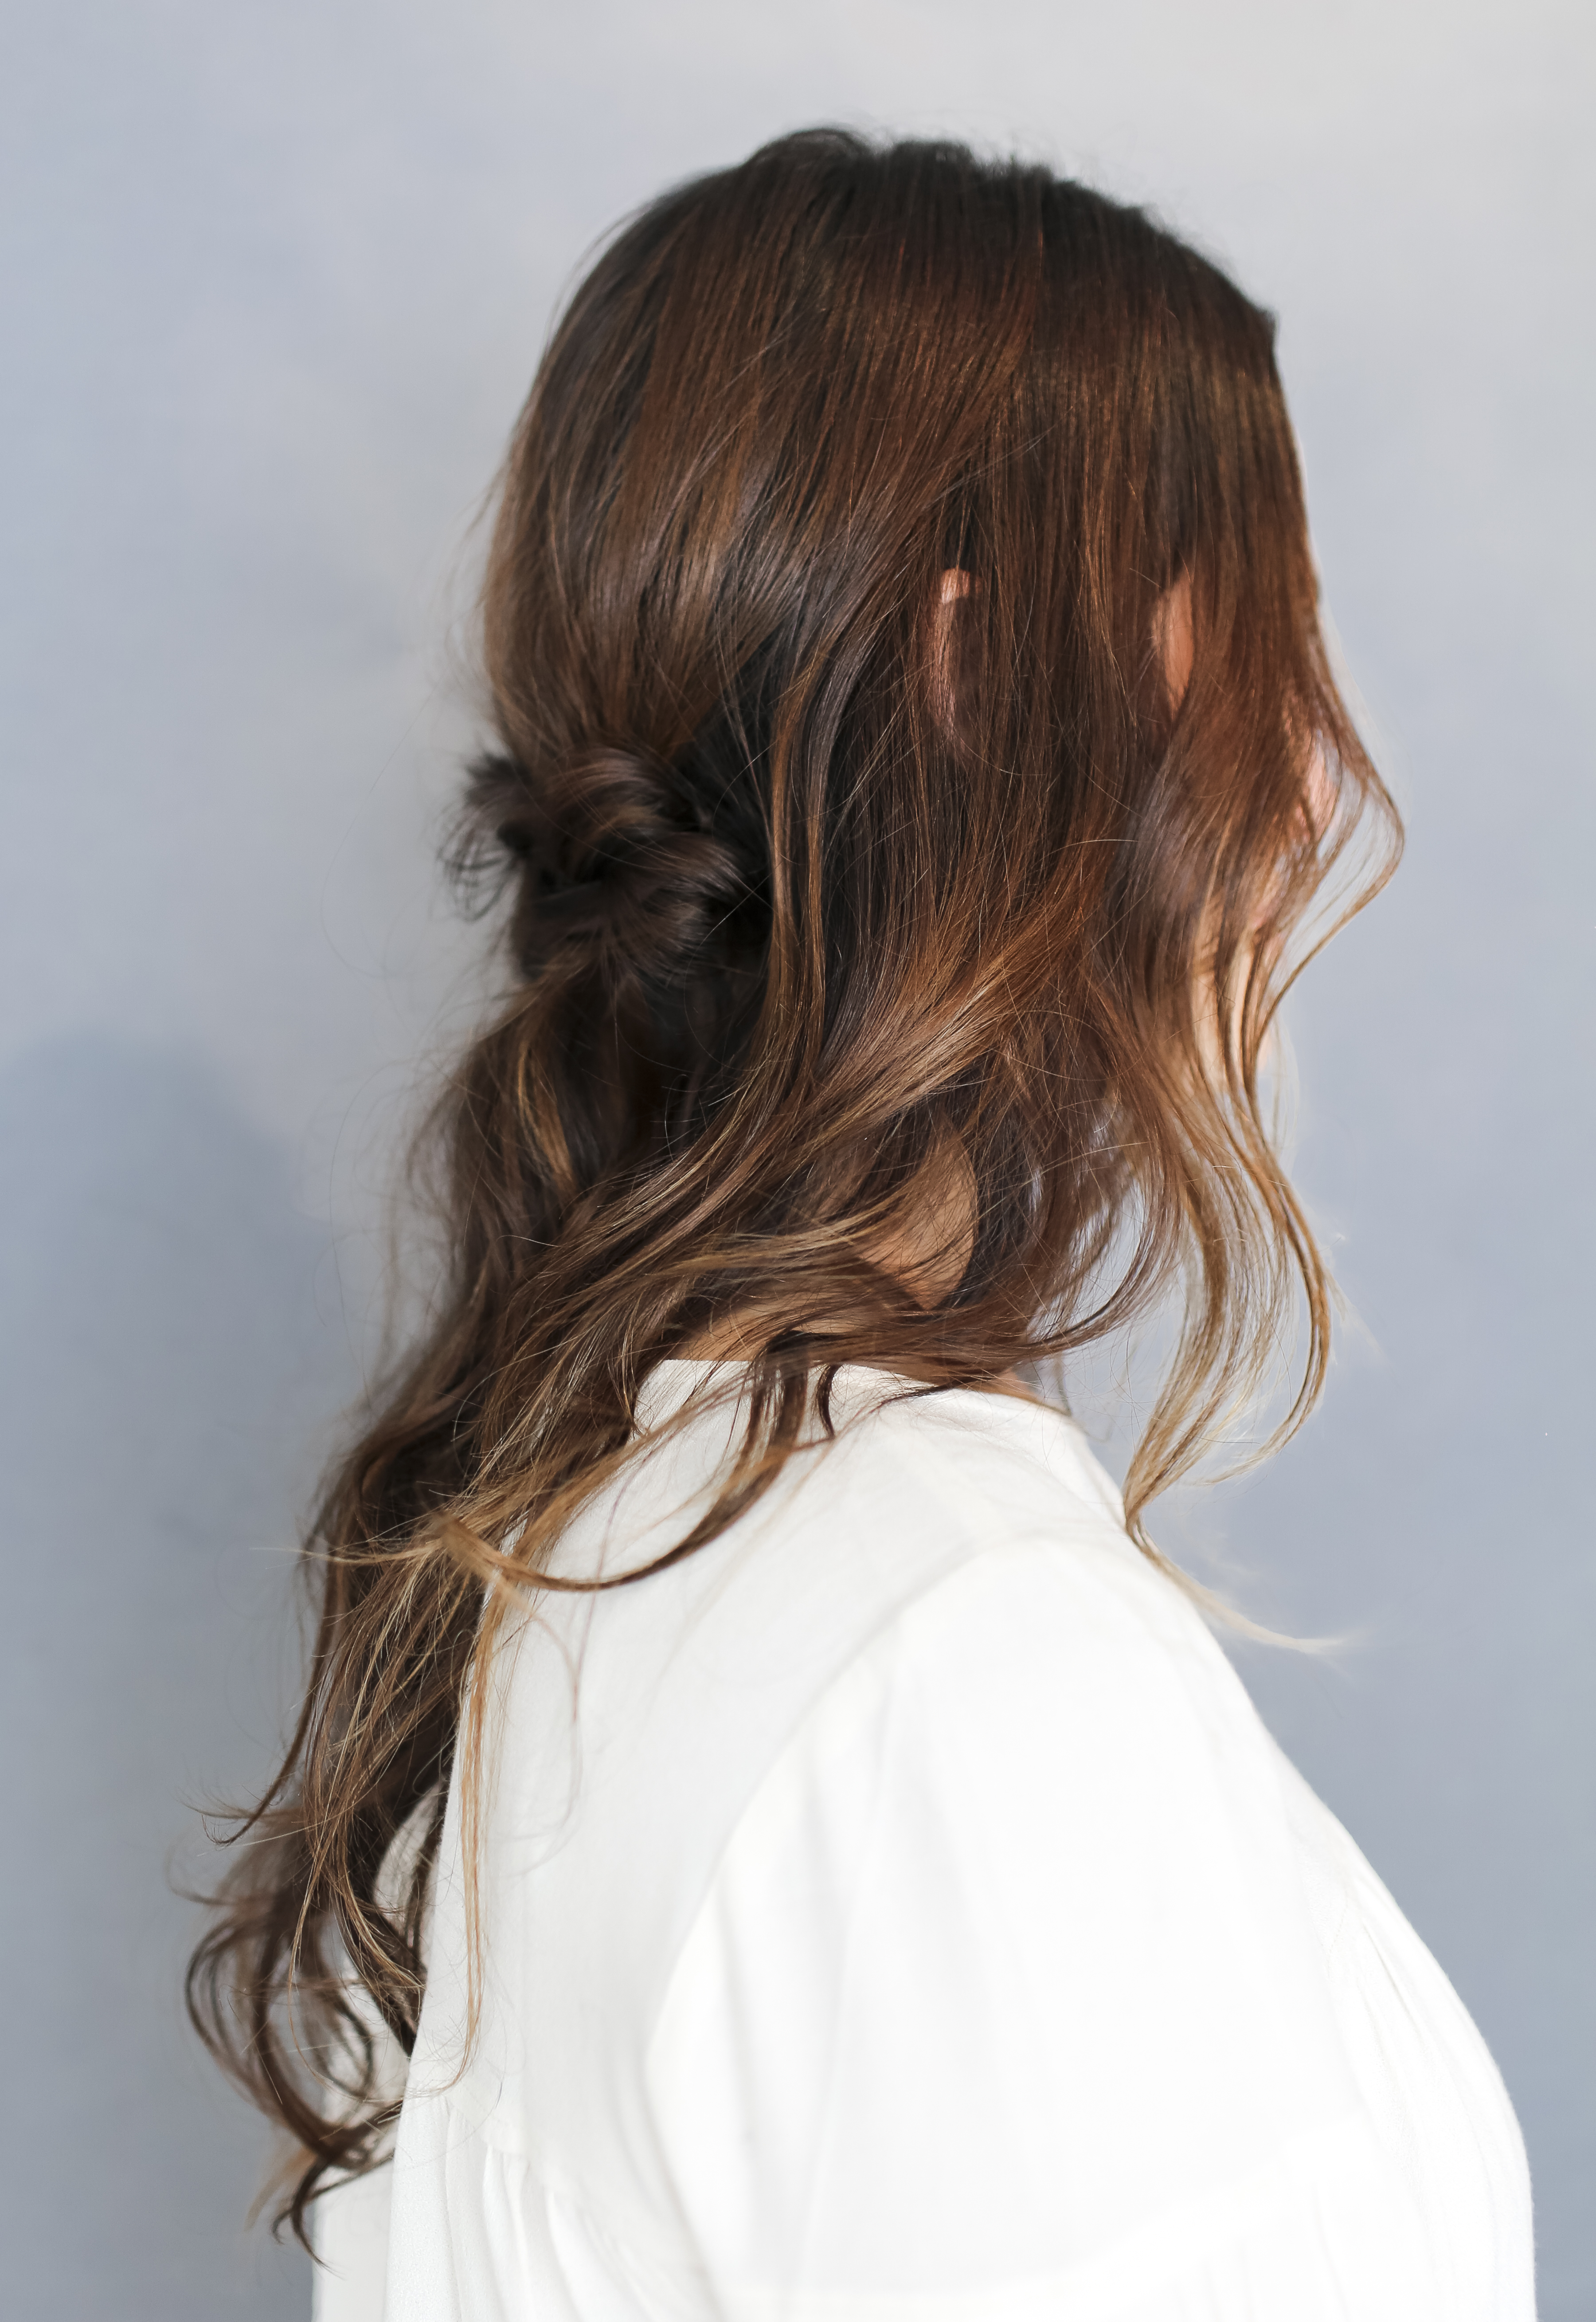
Braided Back and Pony
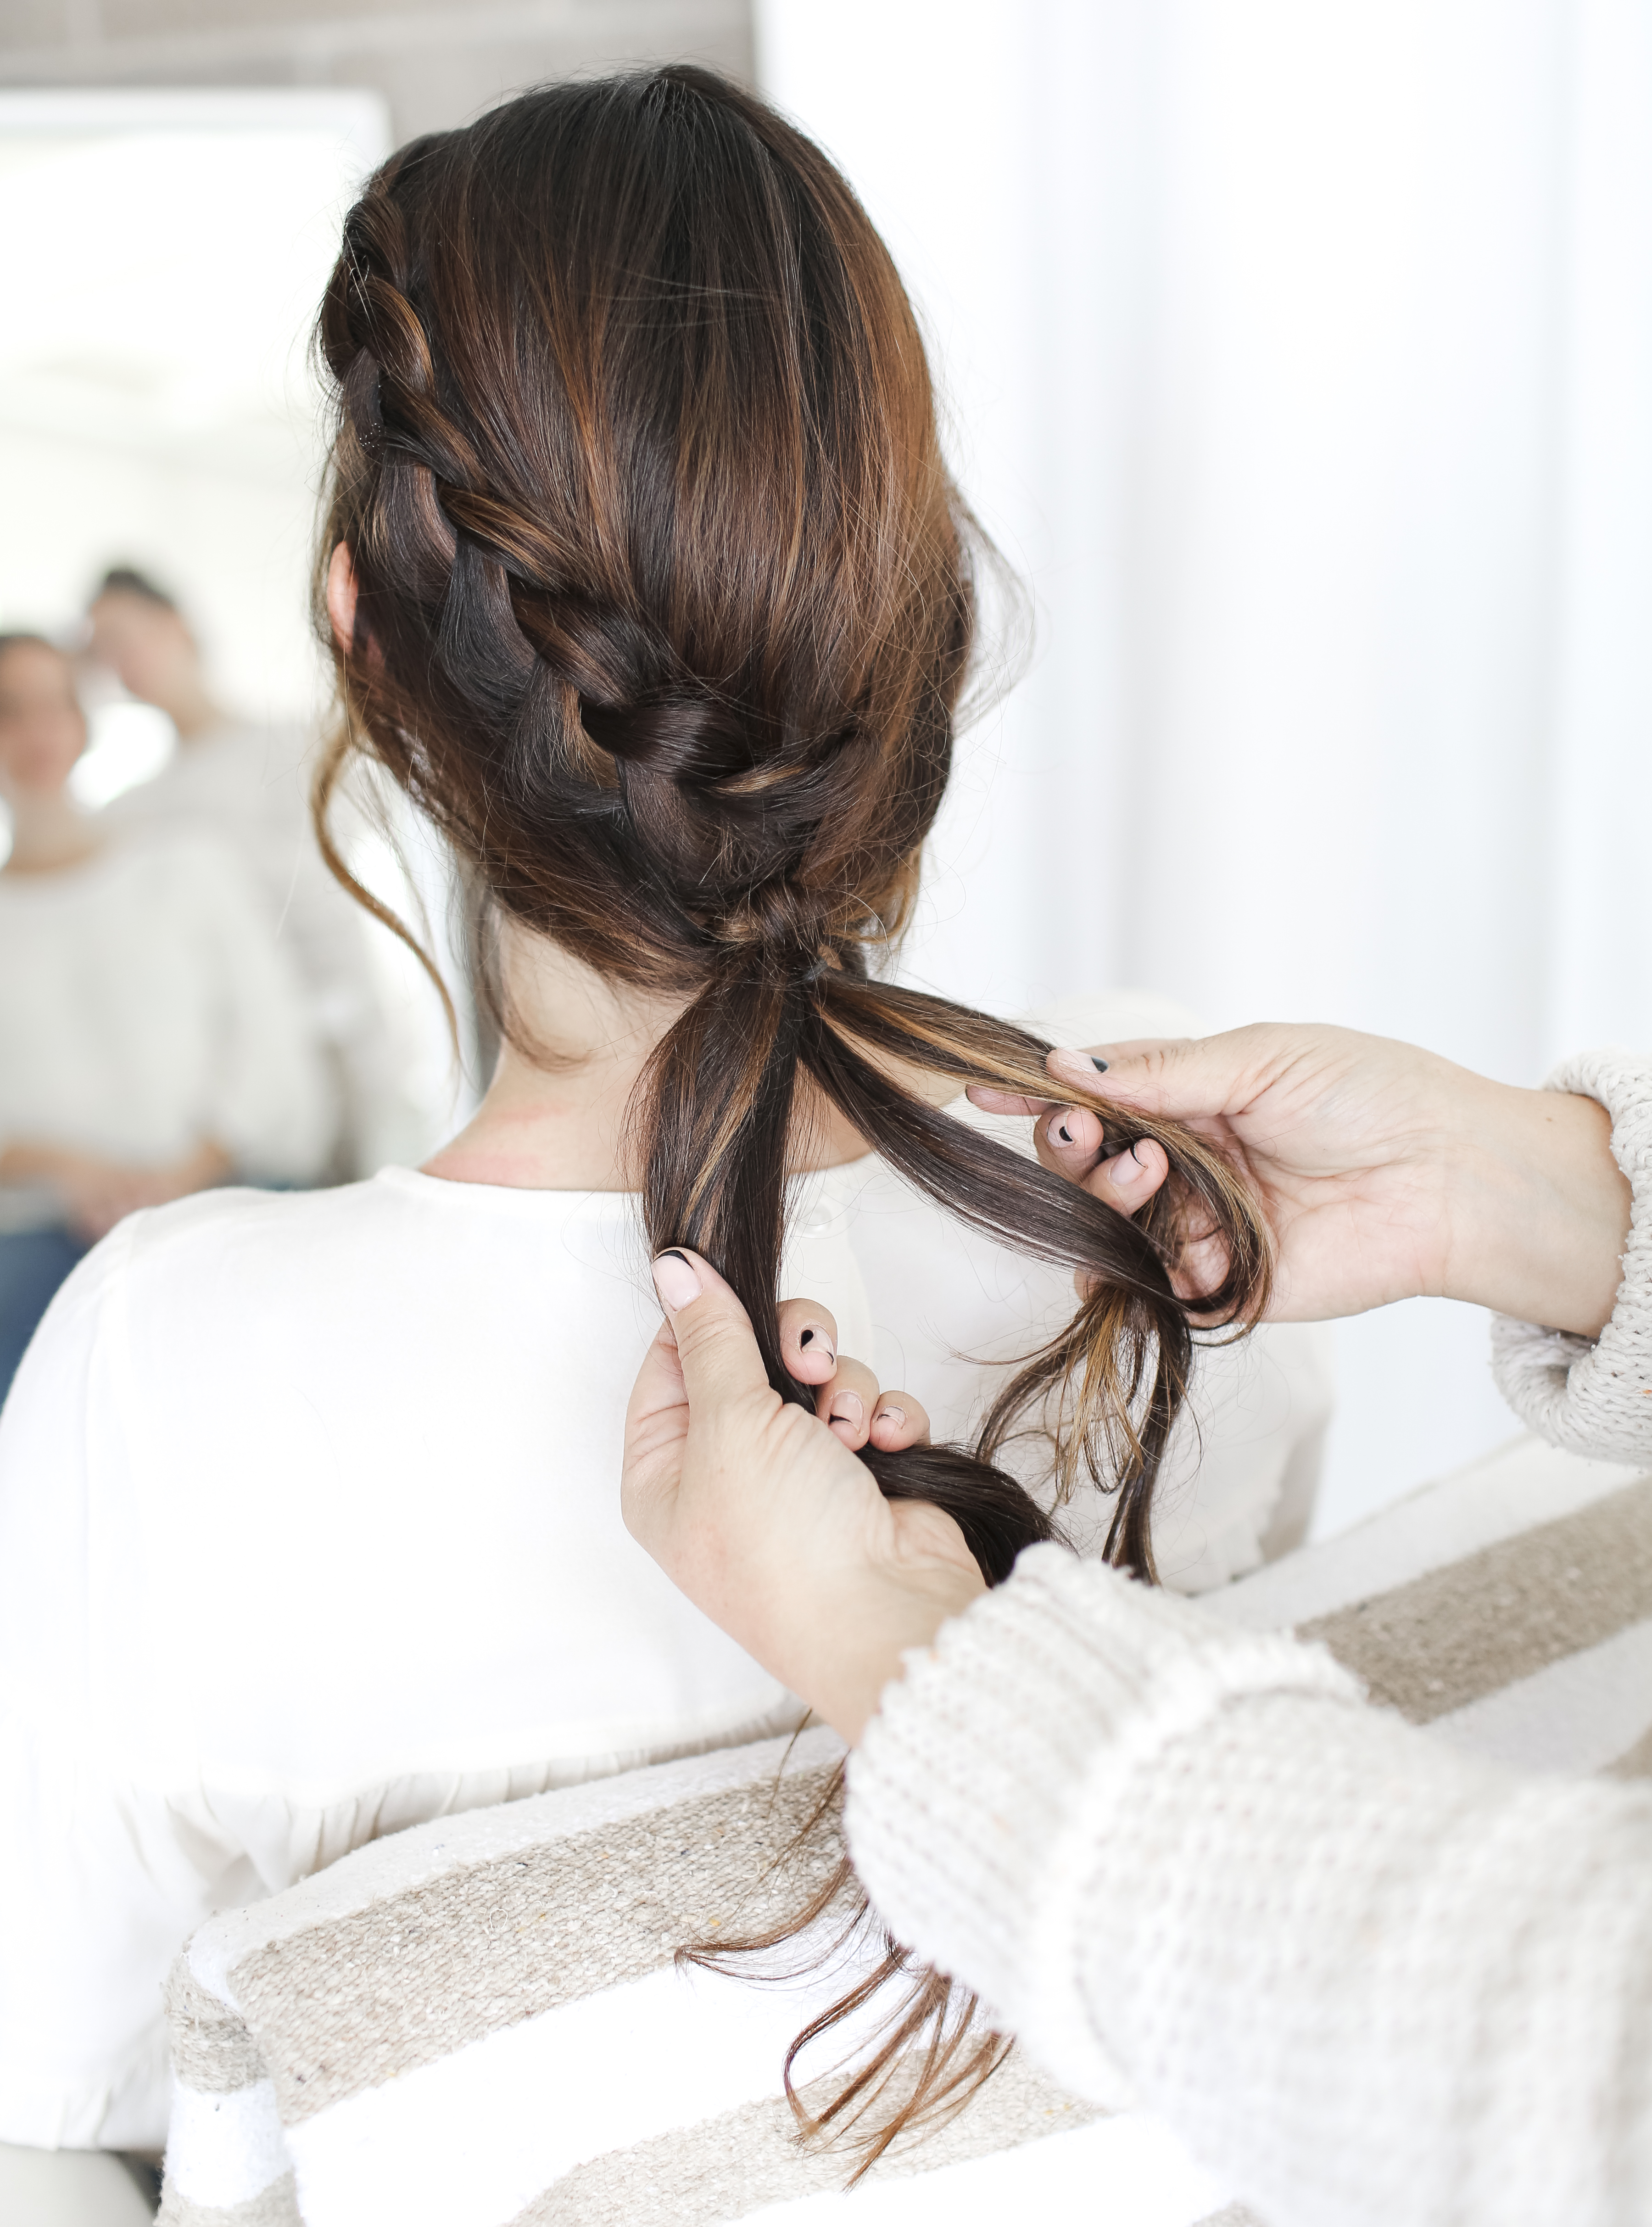
Take the remaining portion of hair that is down and gather a section of each side and cross the two sections, one over the other. Loop the hair into a knot and pull the knot tight. Take each side and wrap around to the back side of the hair that has remained down, and secure it with a hair tie. Take a small section of hair and wrap it around the hair to cover any hair ties and securing with a hair pin underneath.


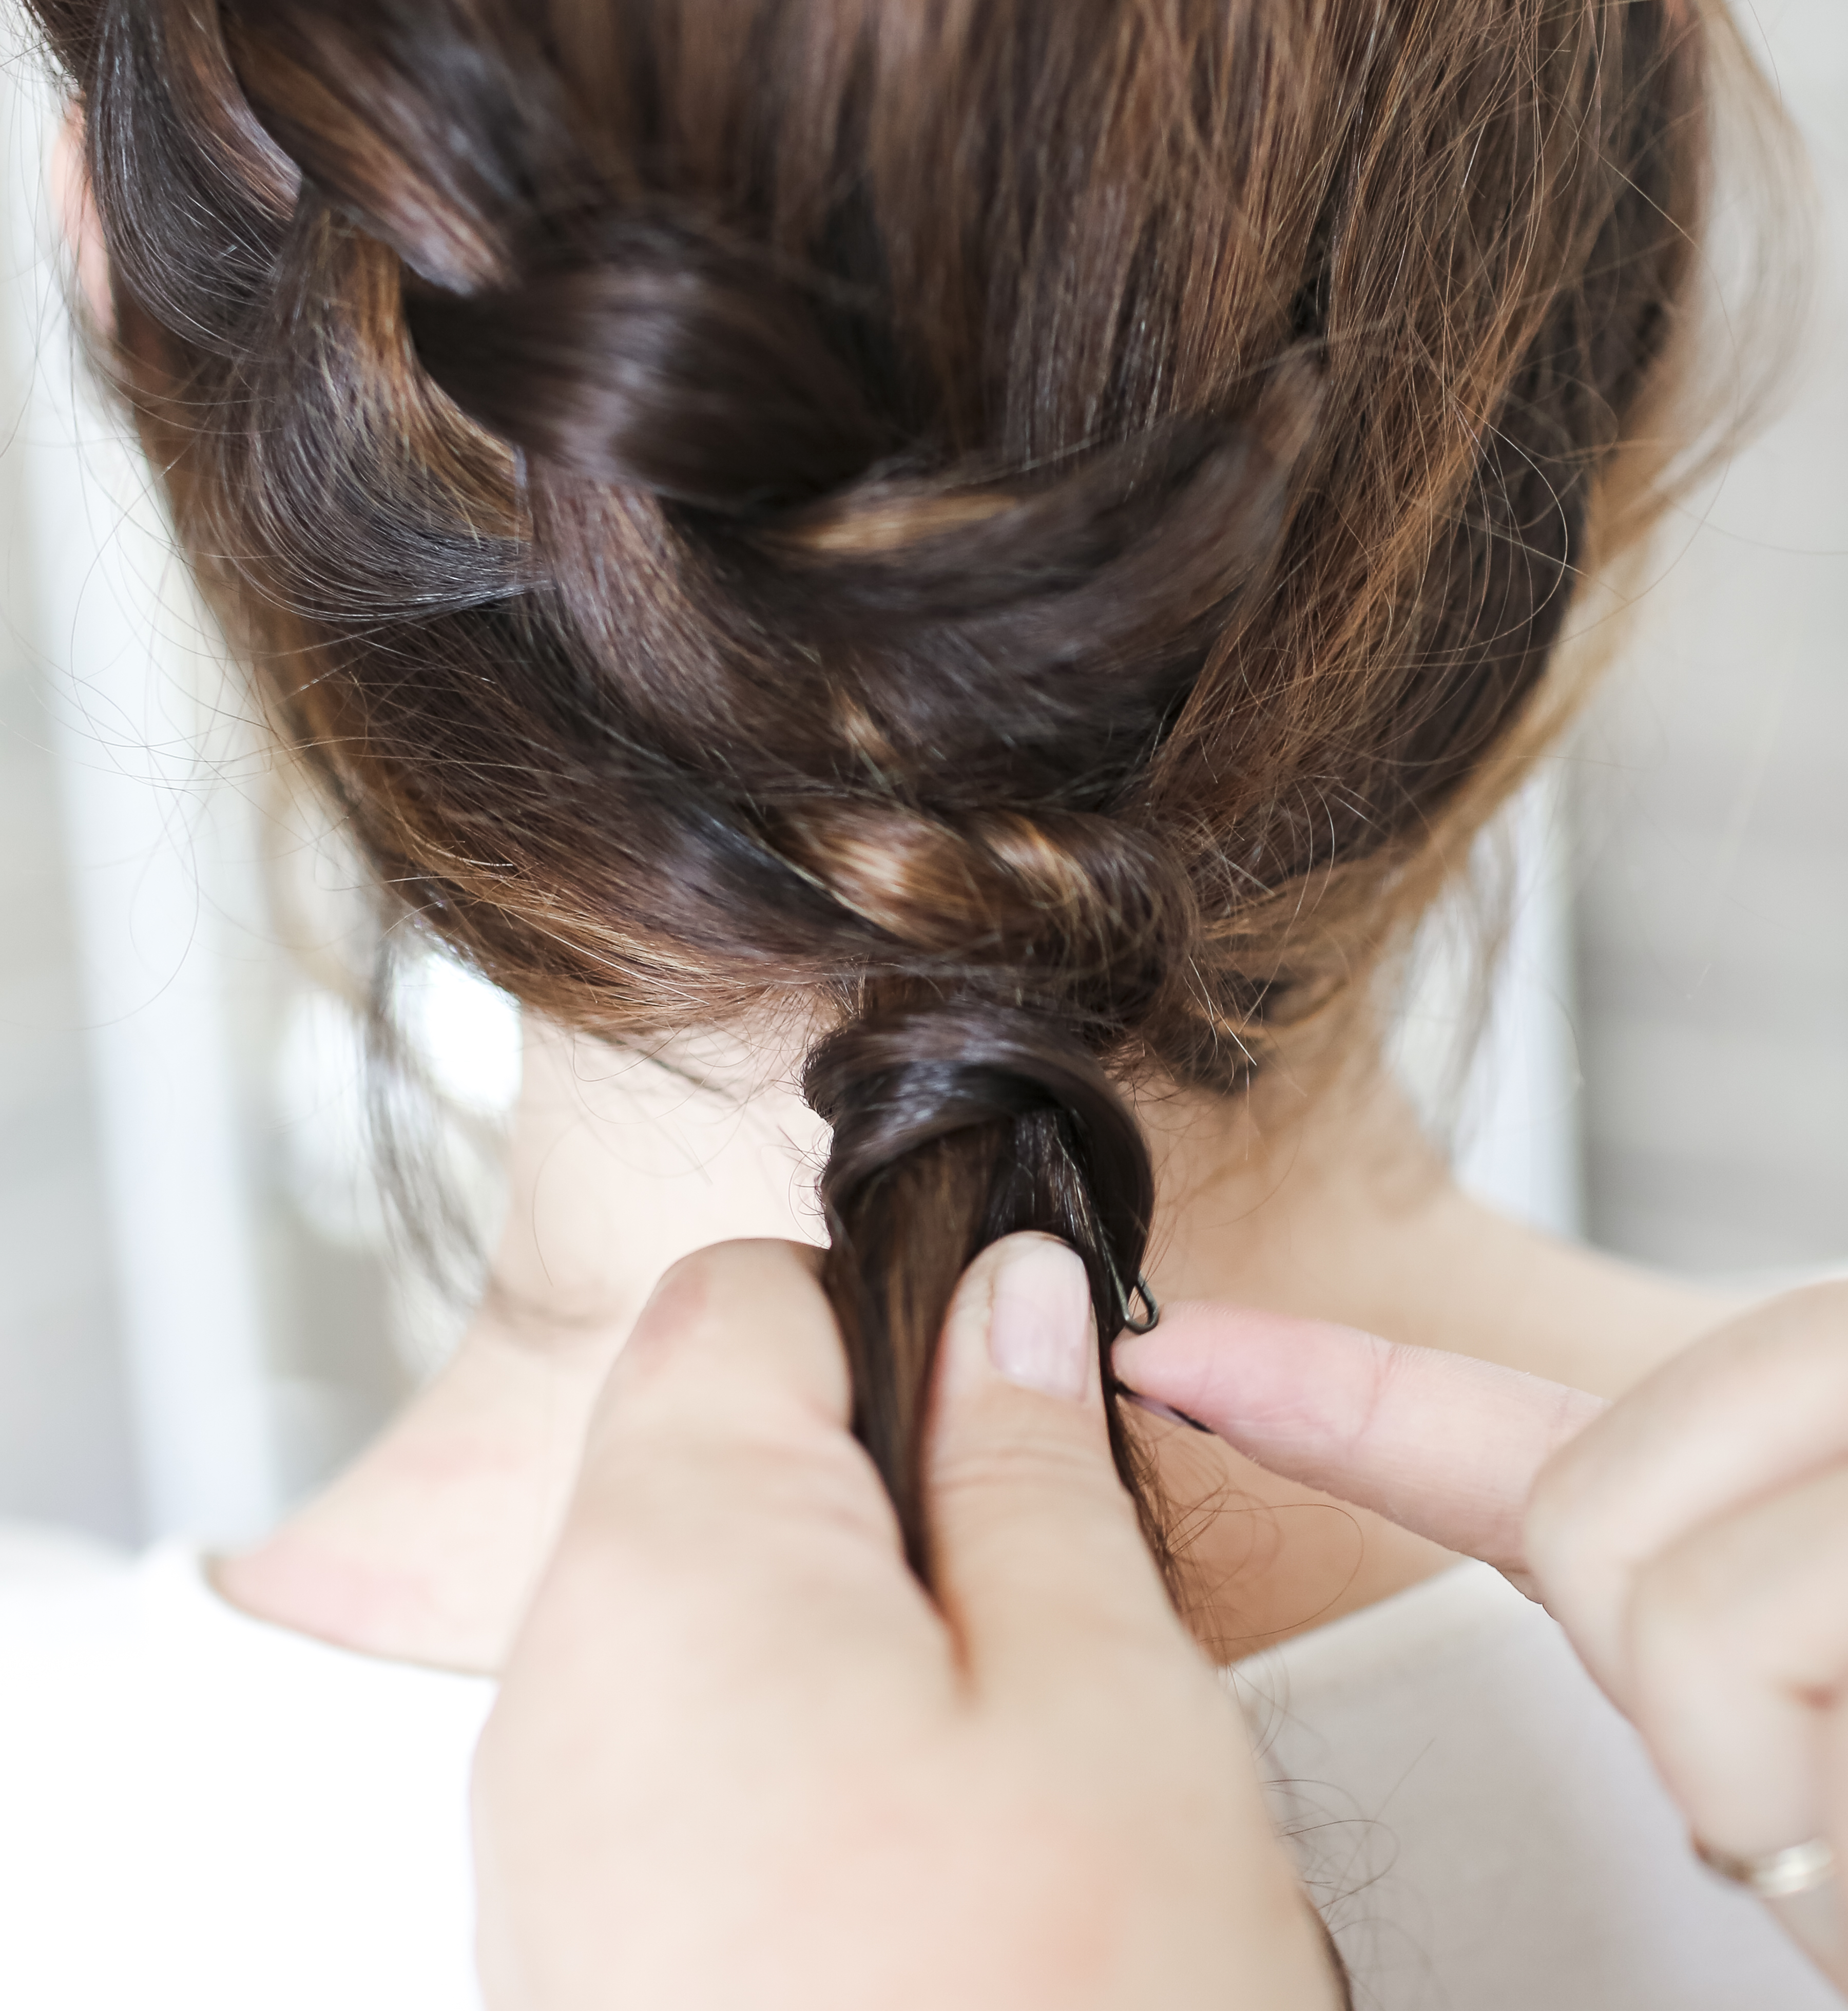
 While you wrap the hair around the pony tail, you can also loop the hair through the wrapped portion, placing the end of the hair under the rubber band, and pulling it through. This will hide the rubber band while also using it to help hold the hair secure. Spray with finishing spray.


 STYLE 3
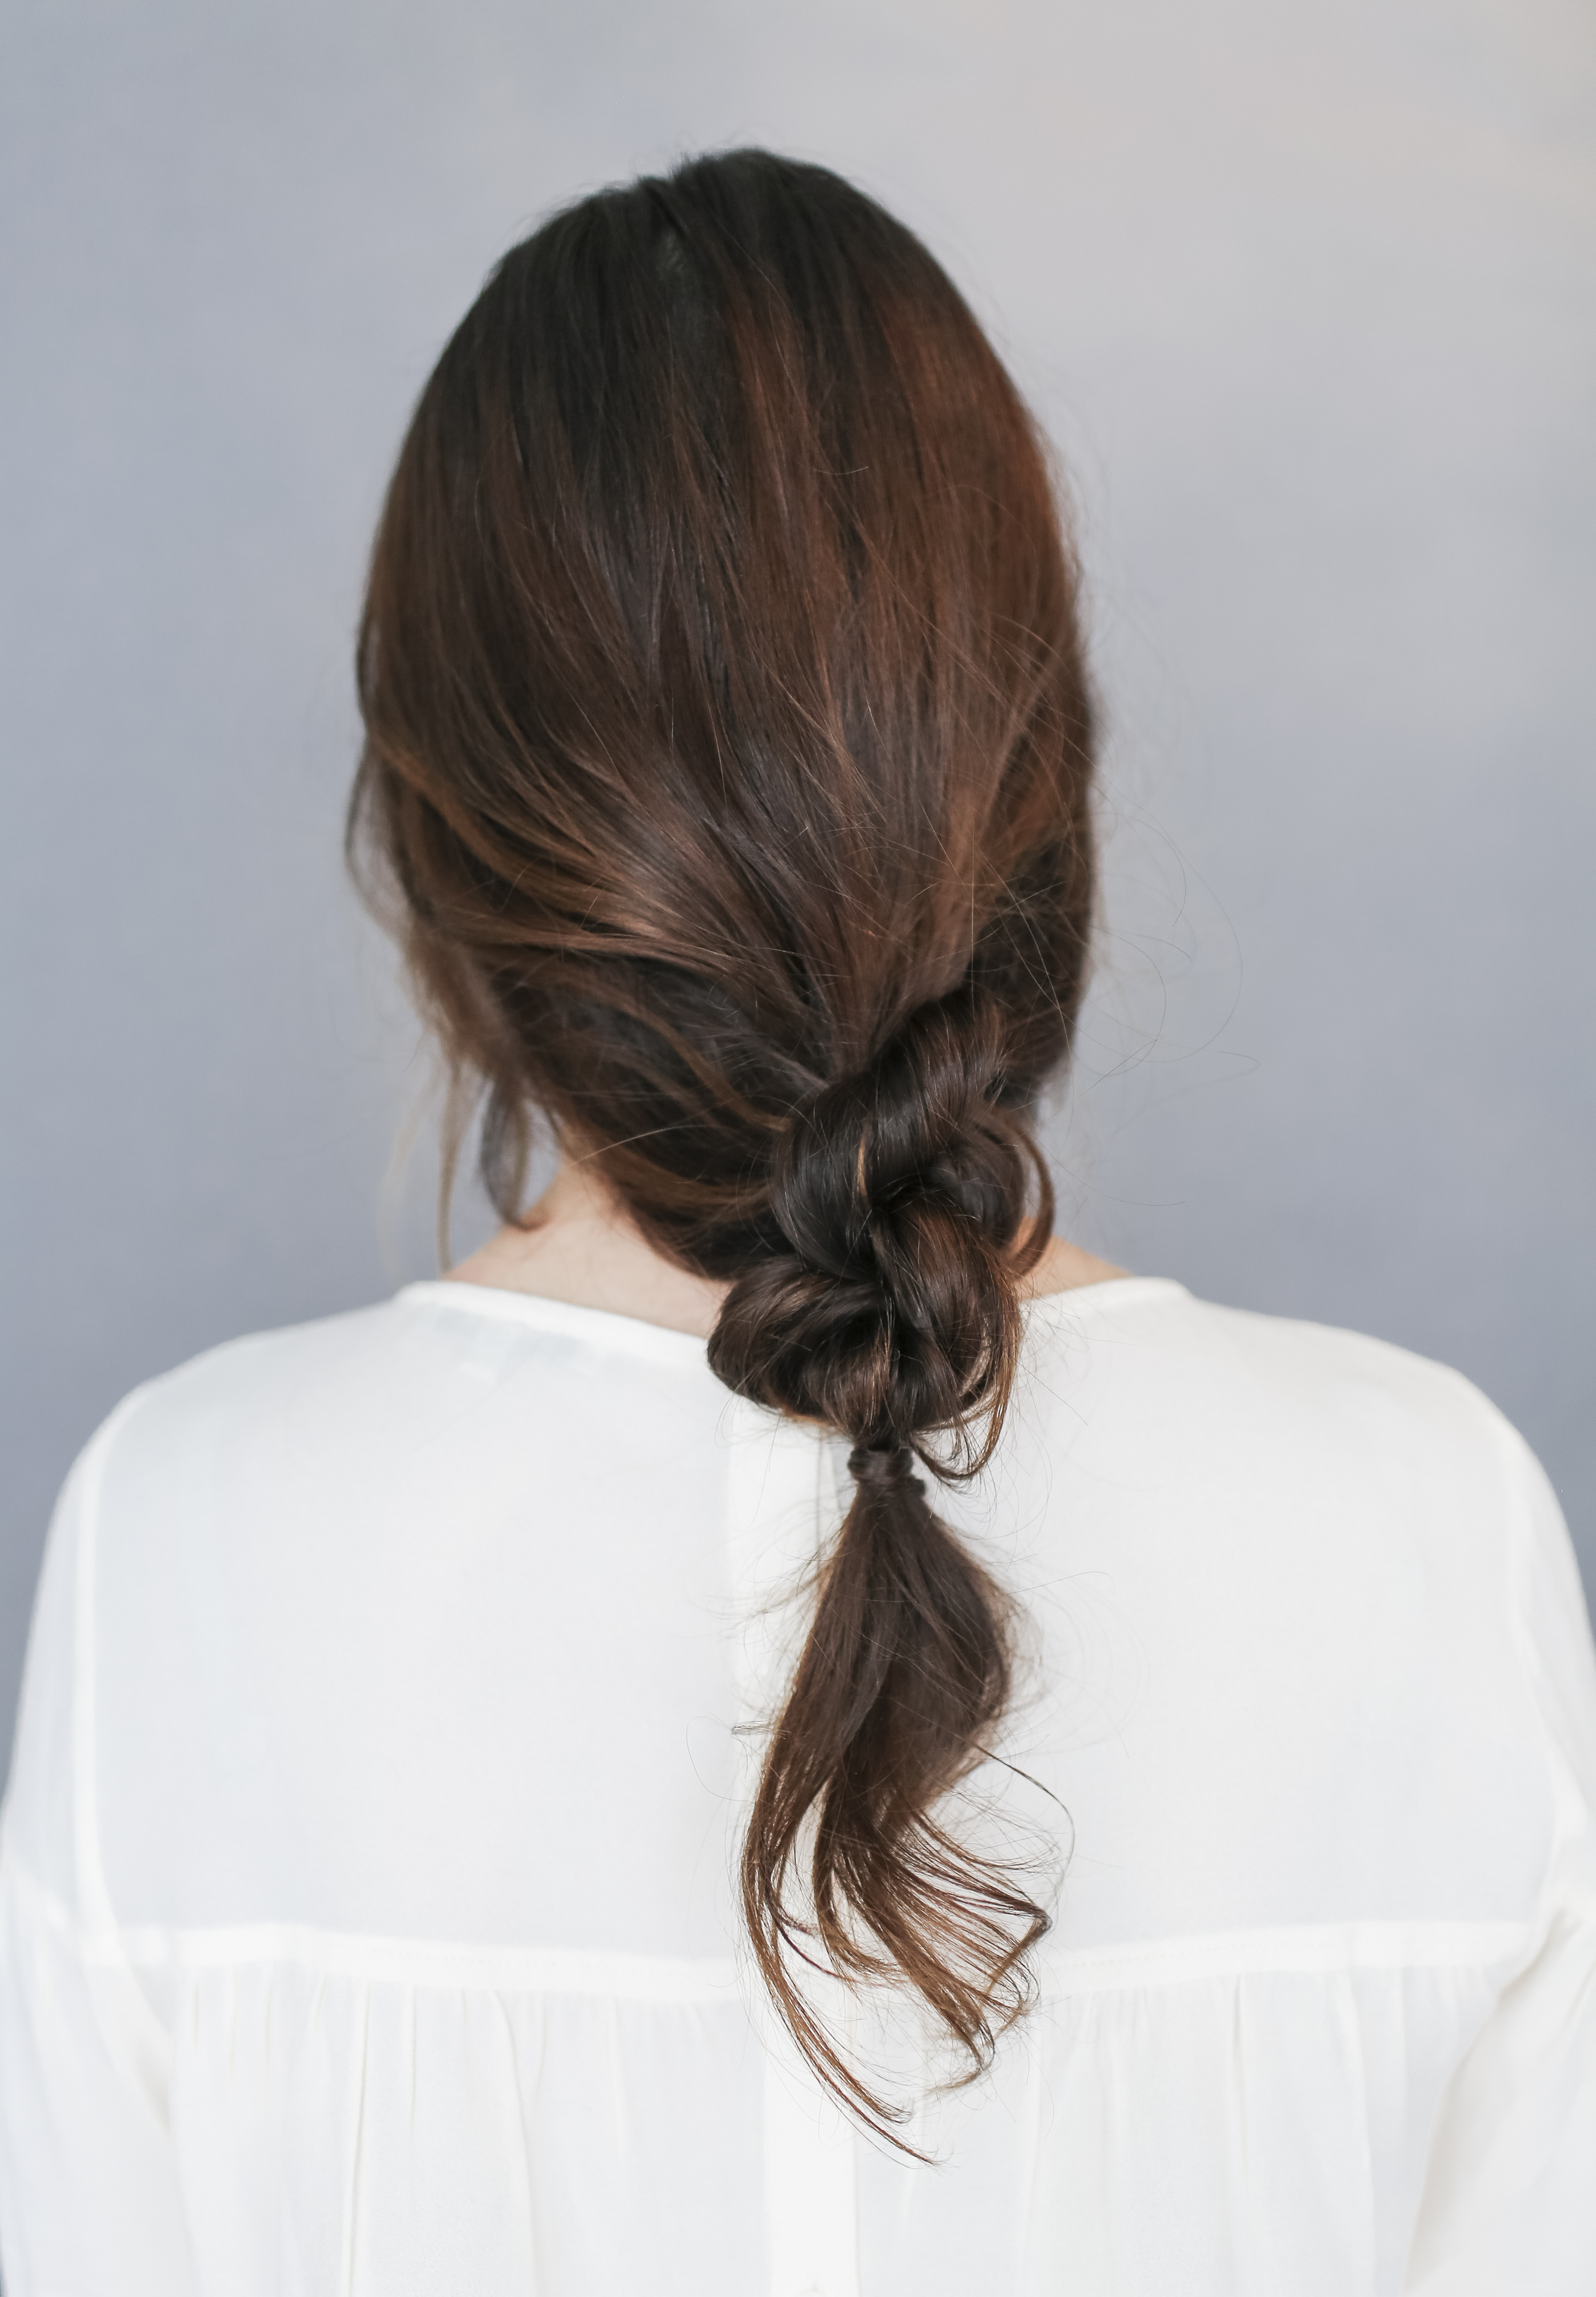
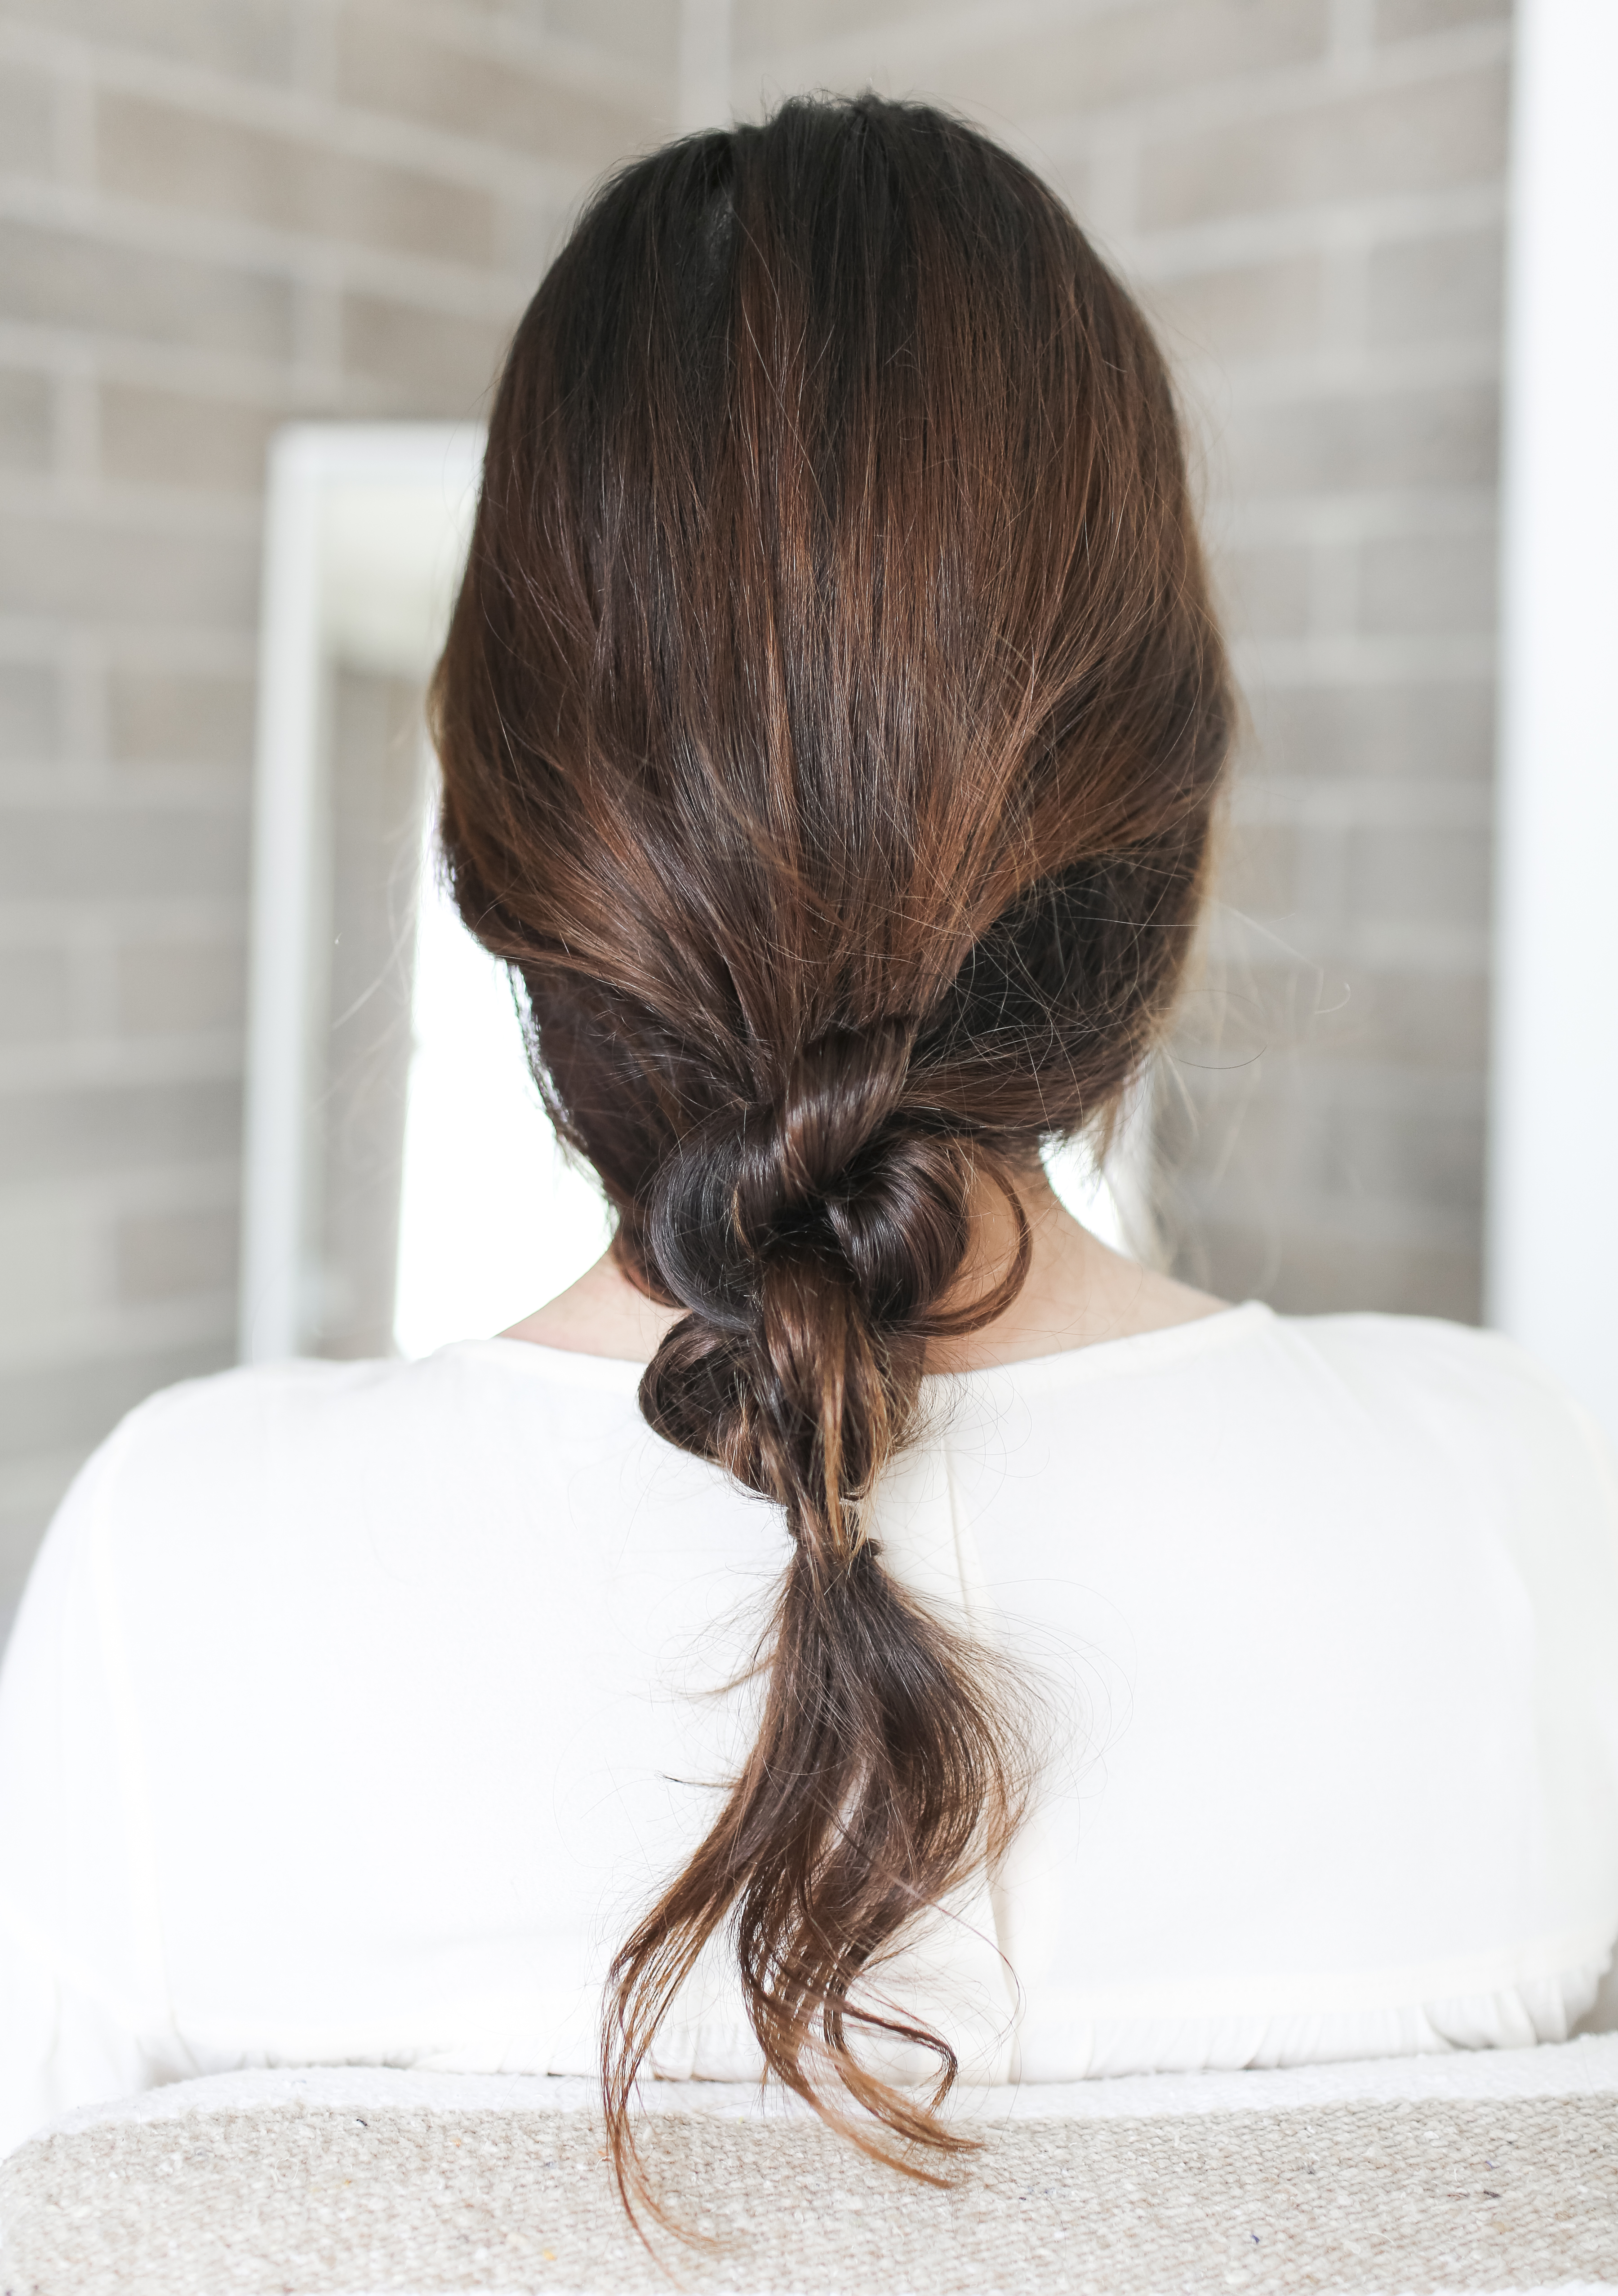
Knotted Cozy “Braid”
Same first steps as the first style…
Choosing a hot tool of your size preference (larger the barrel, larger the curl), put some texture in the hair by curling the hair rotating the direction of the curls, always with the hair framing the face directed away from the face. Break up the curls and spray texturizing spray or a sea salt spray. For more fullness, you can add in a little texturizing/ volume enhancing powder at the roots and gently backcomb the hair.
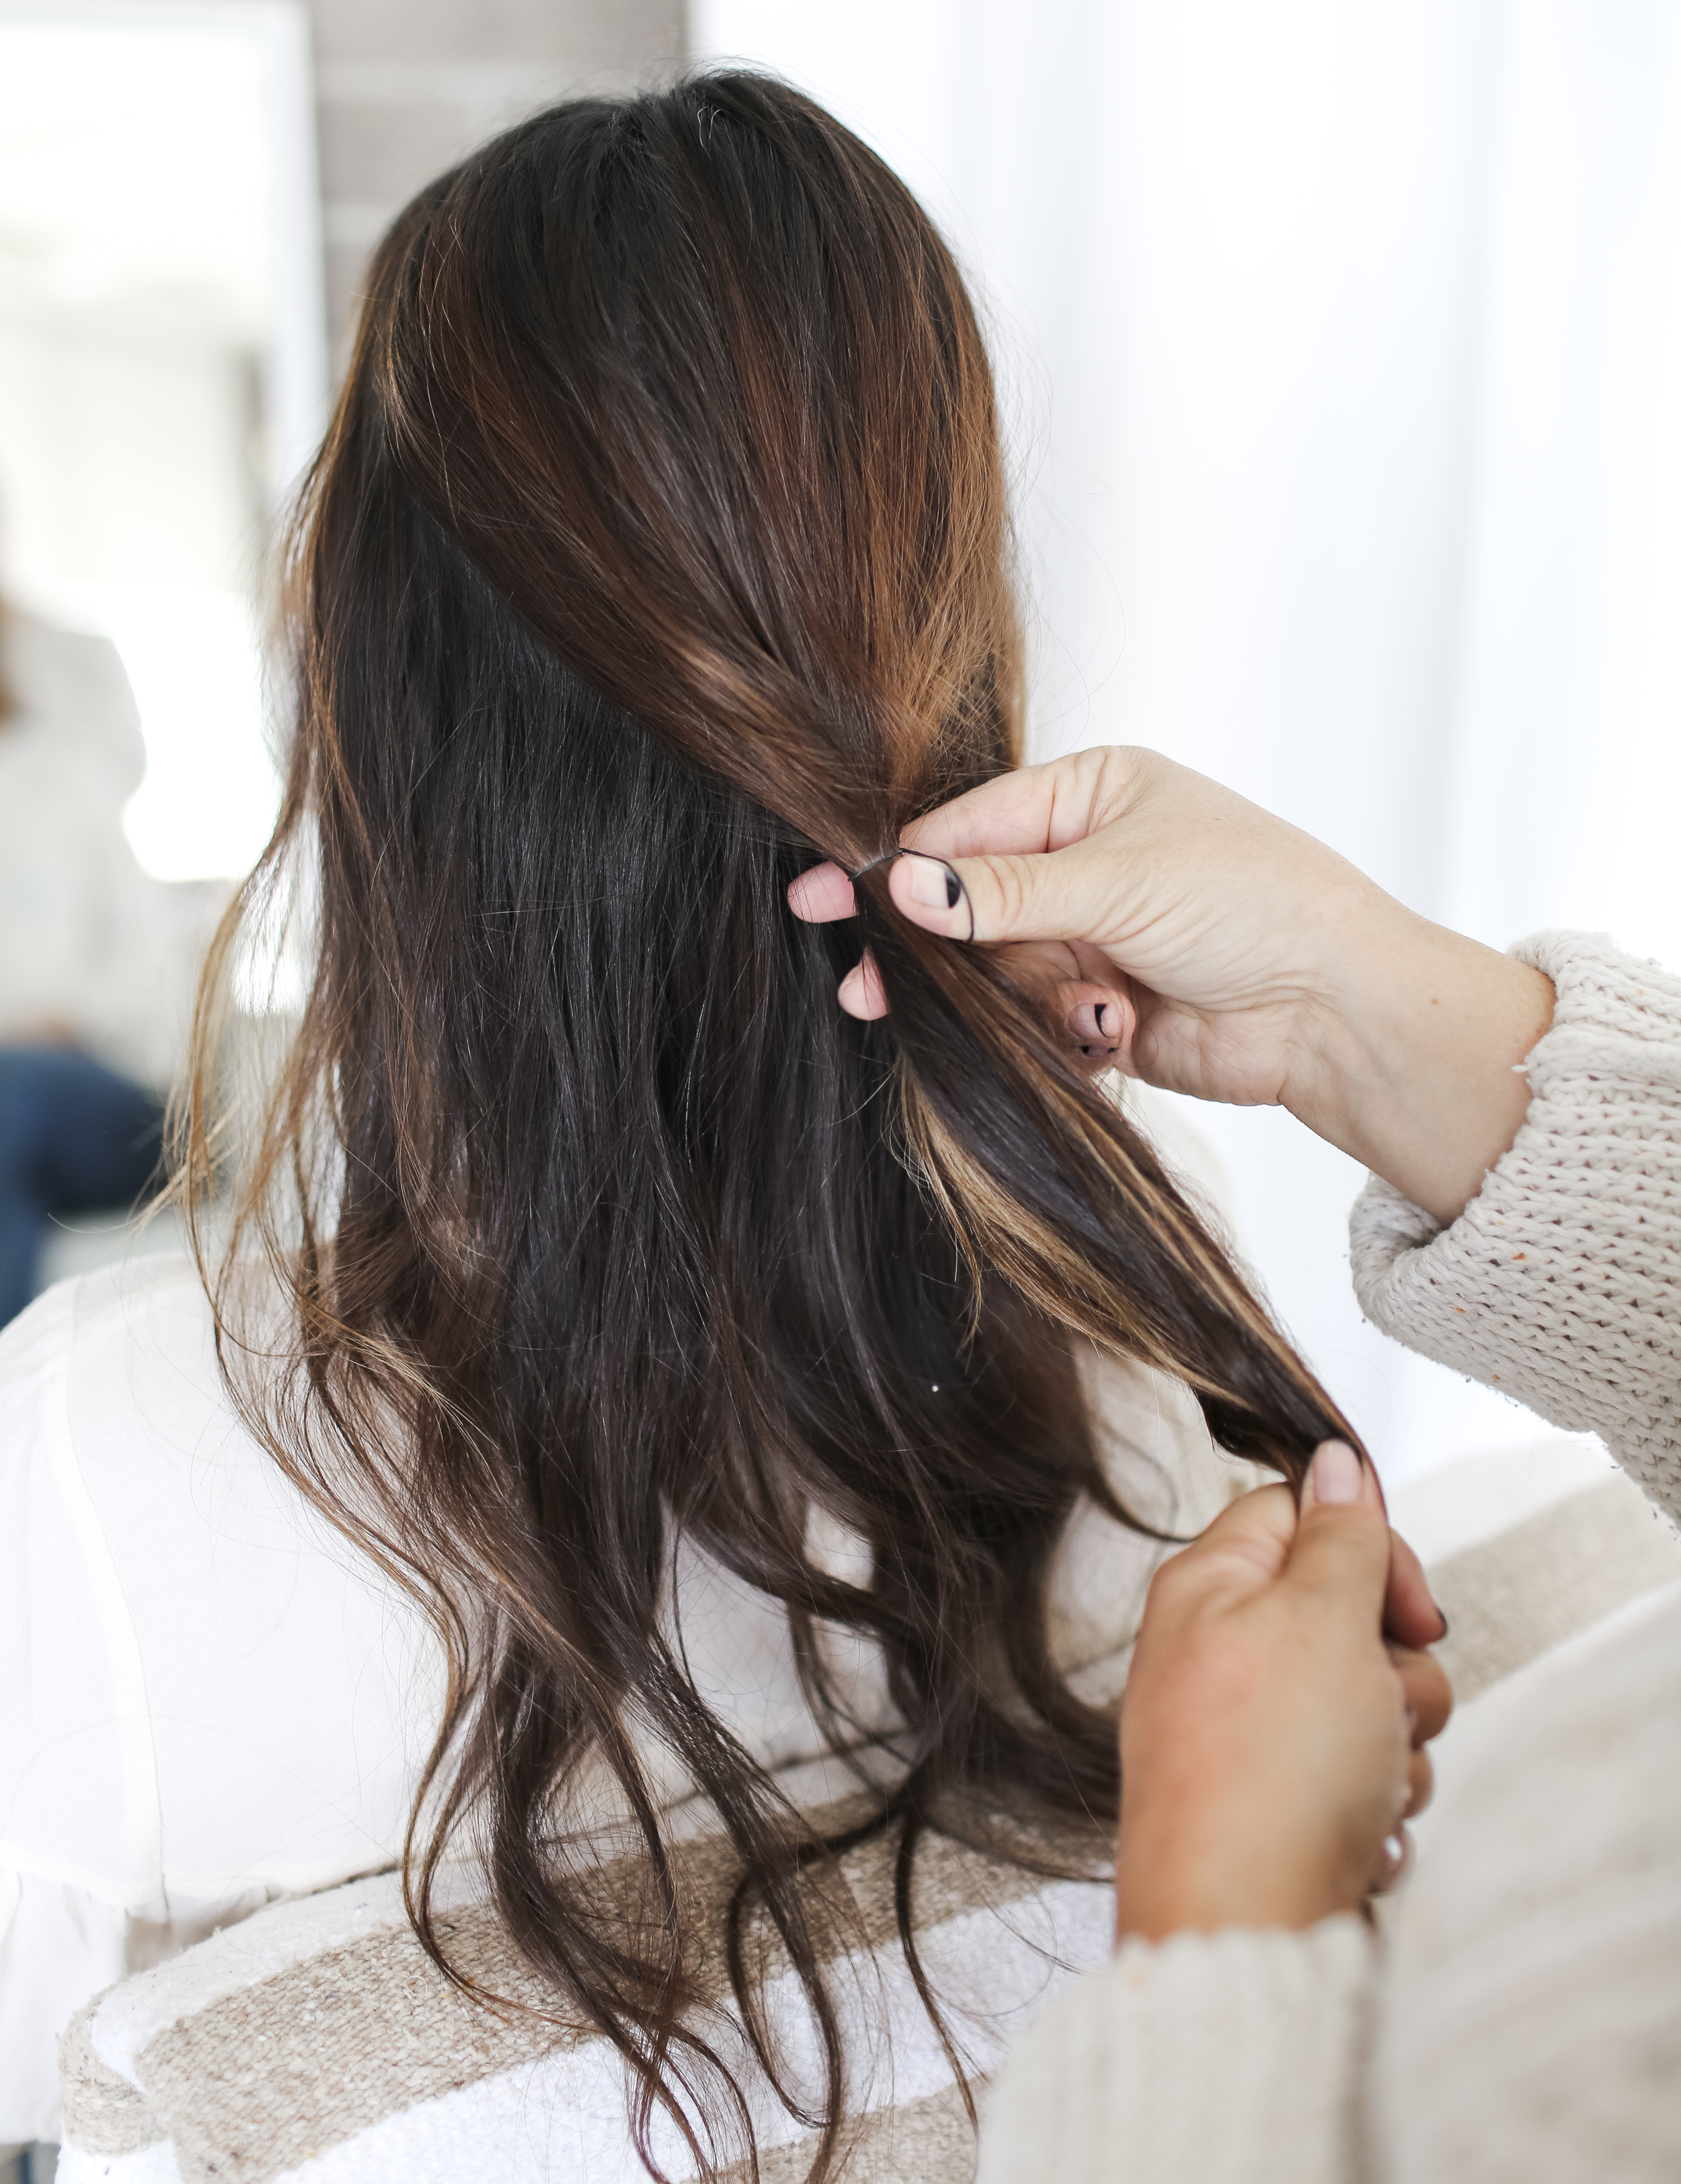
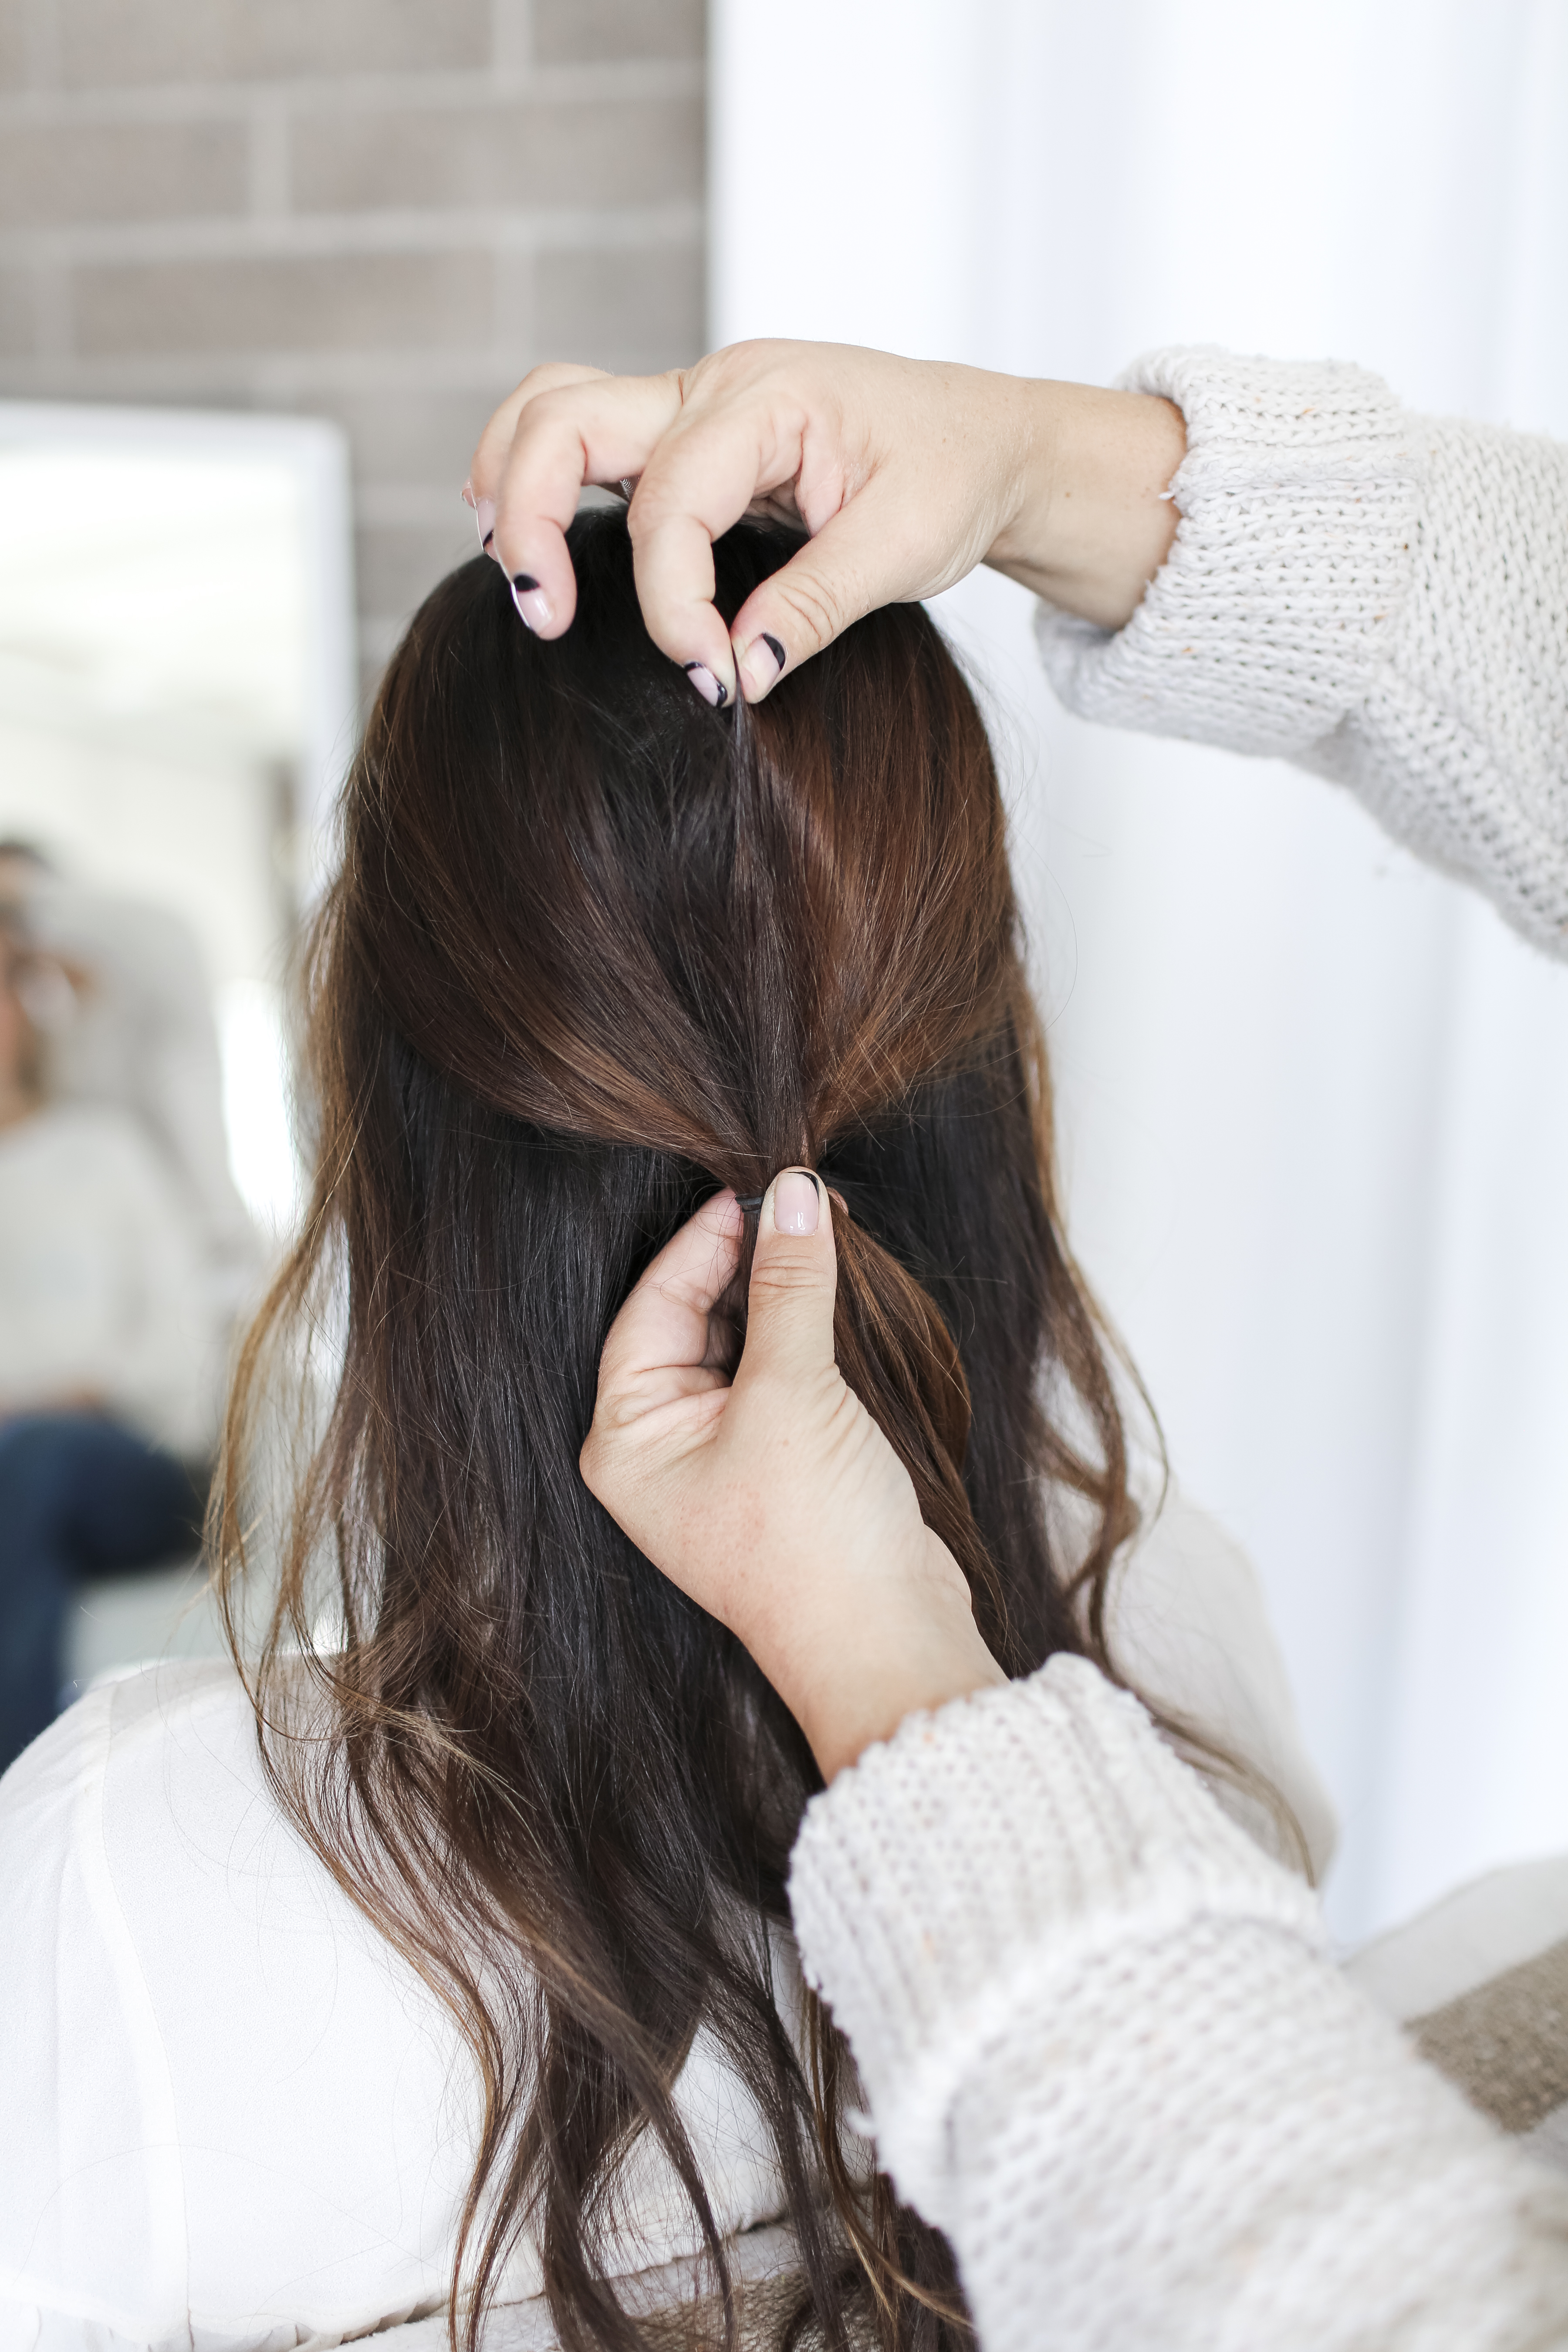
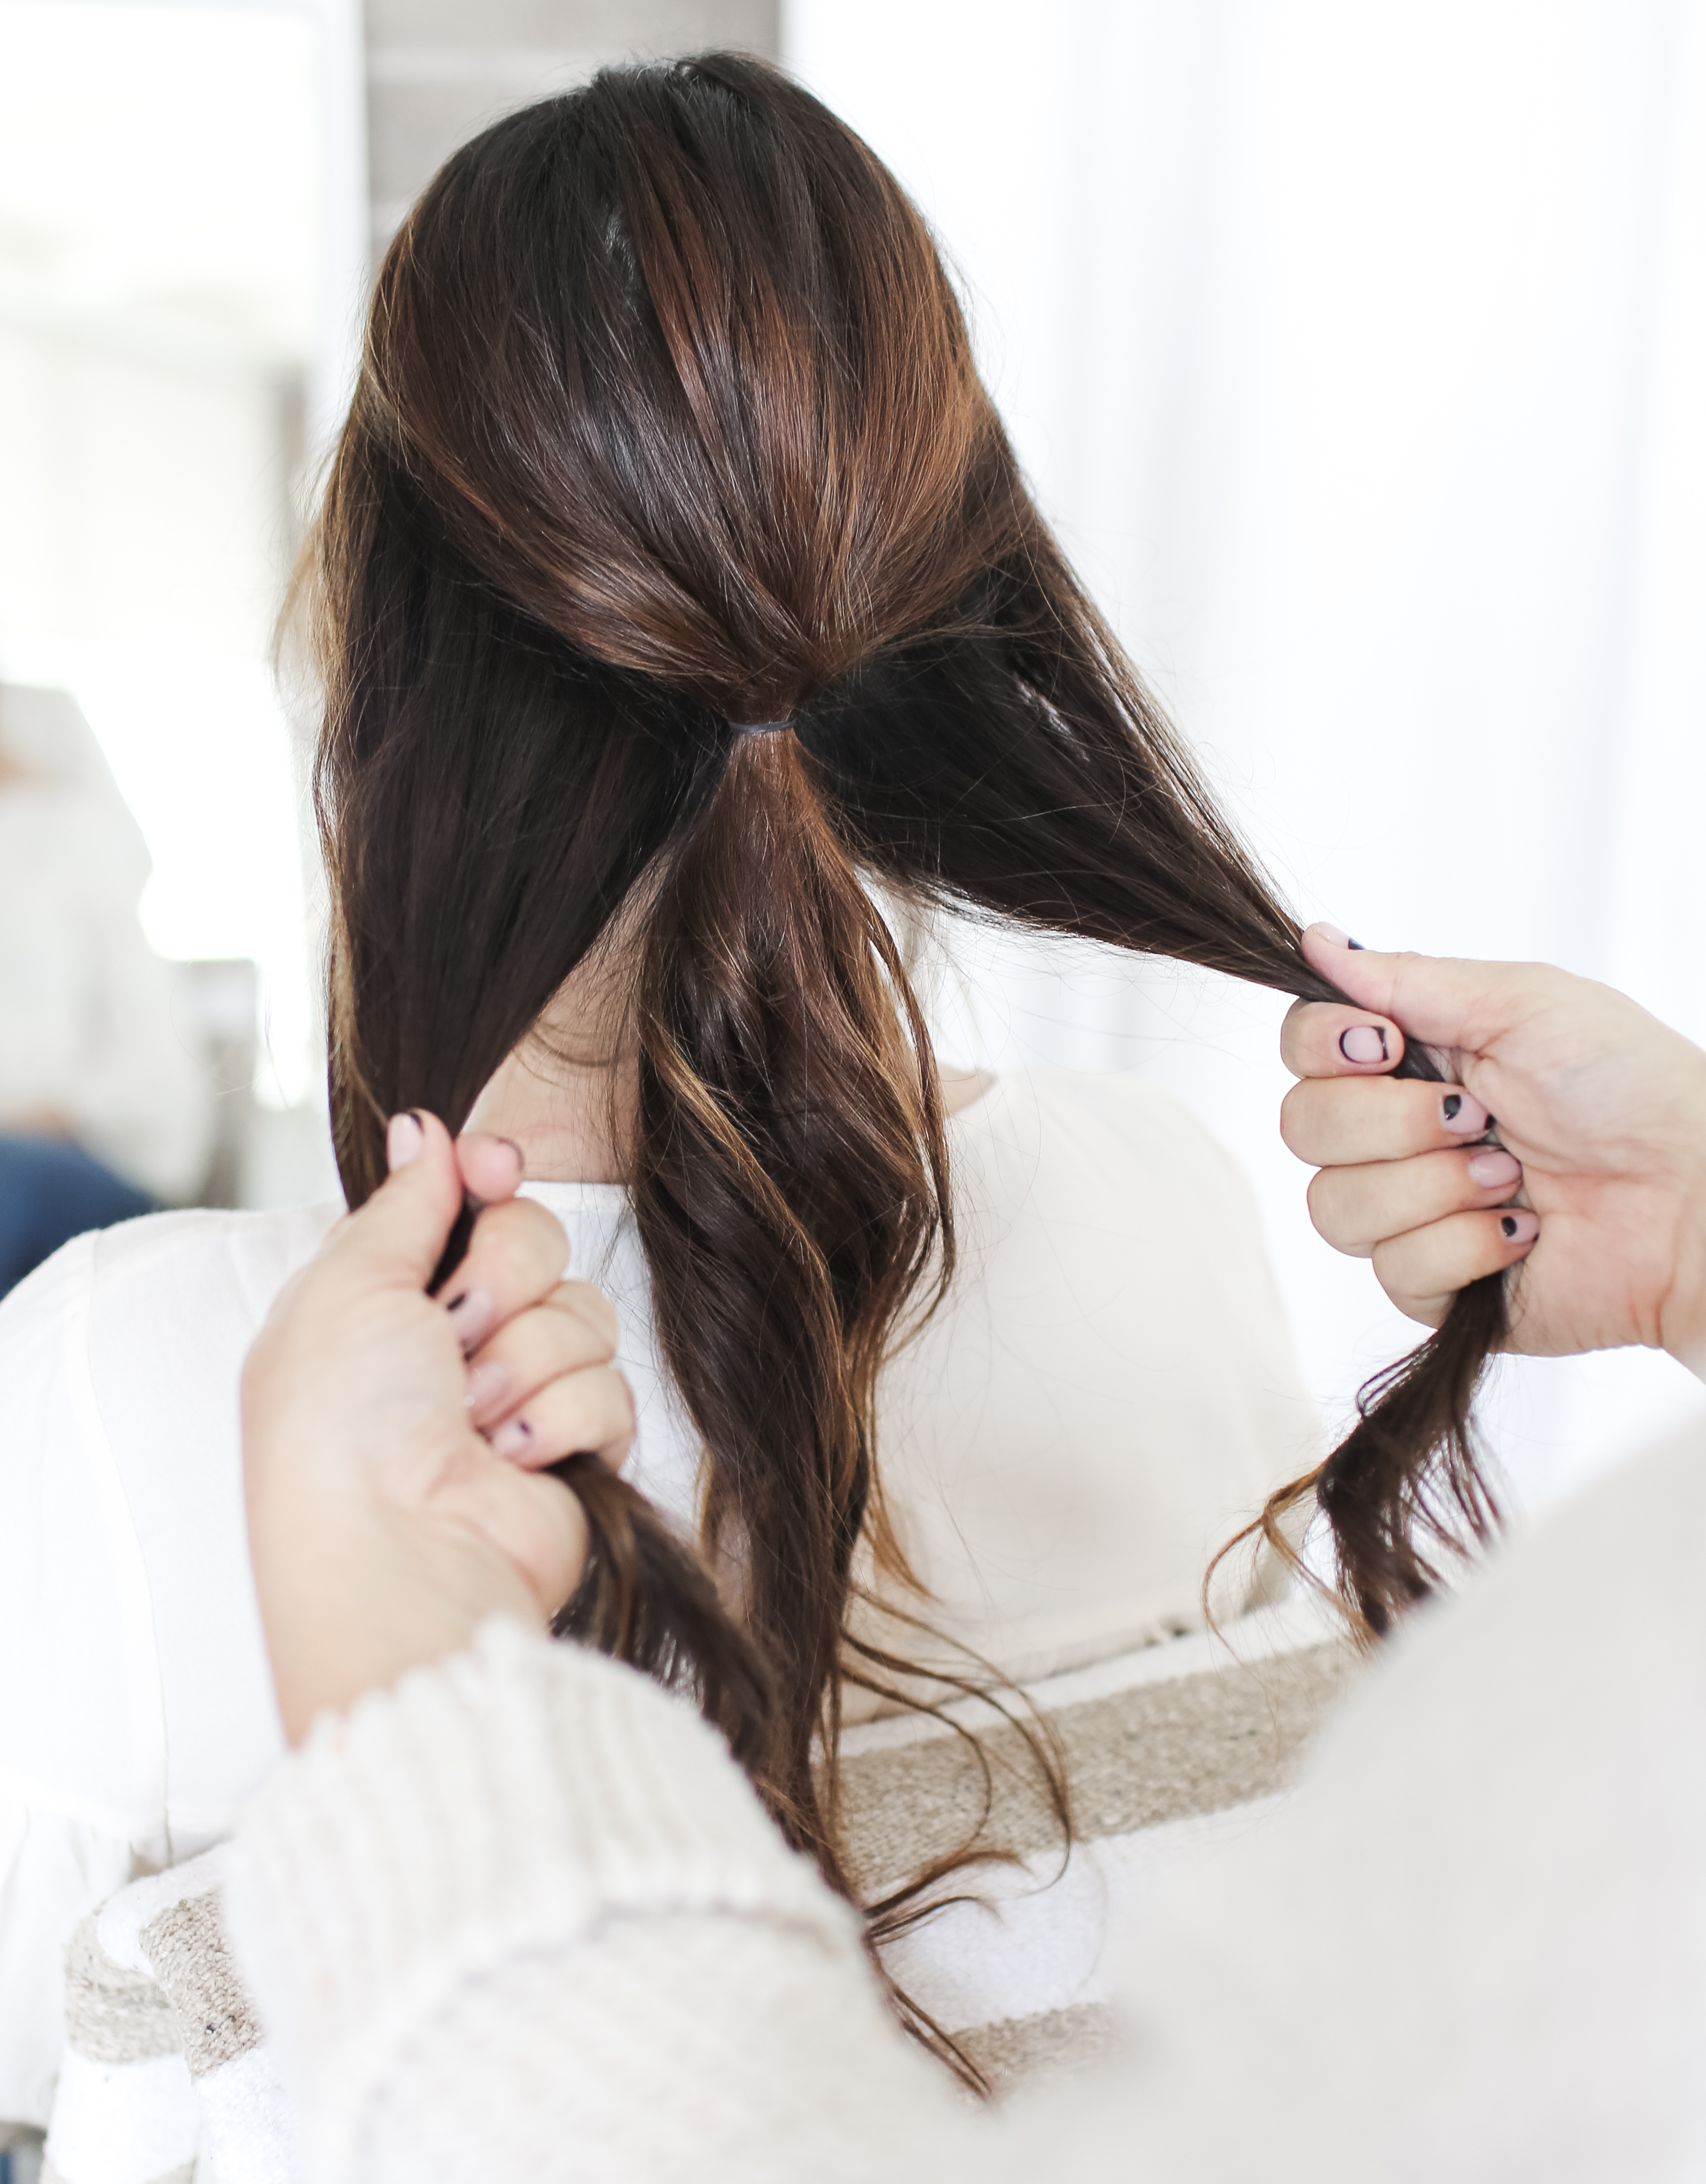
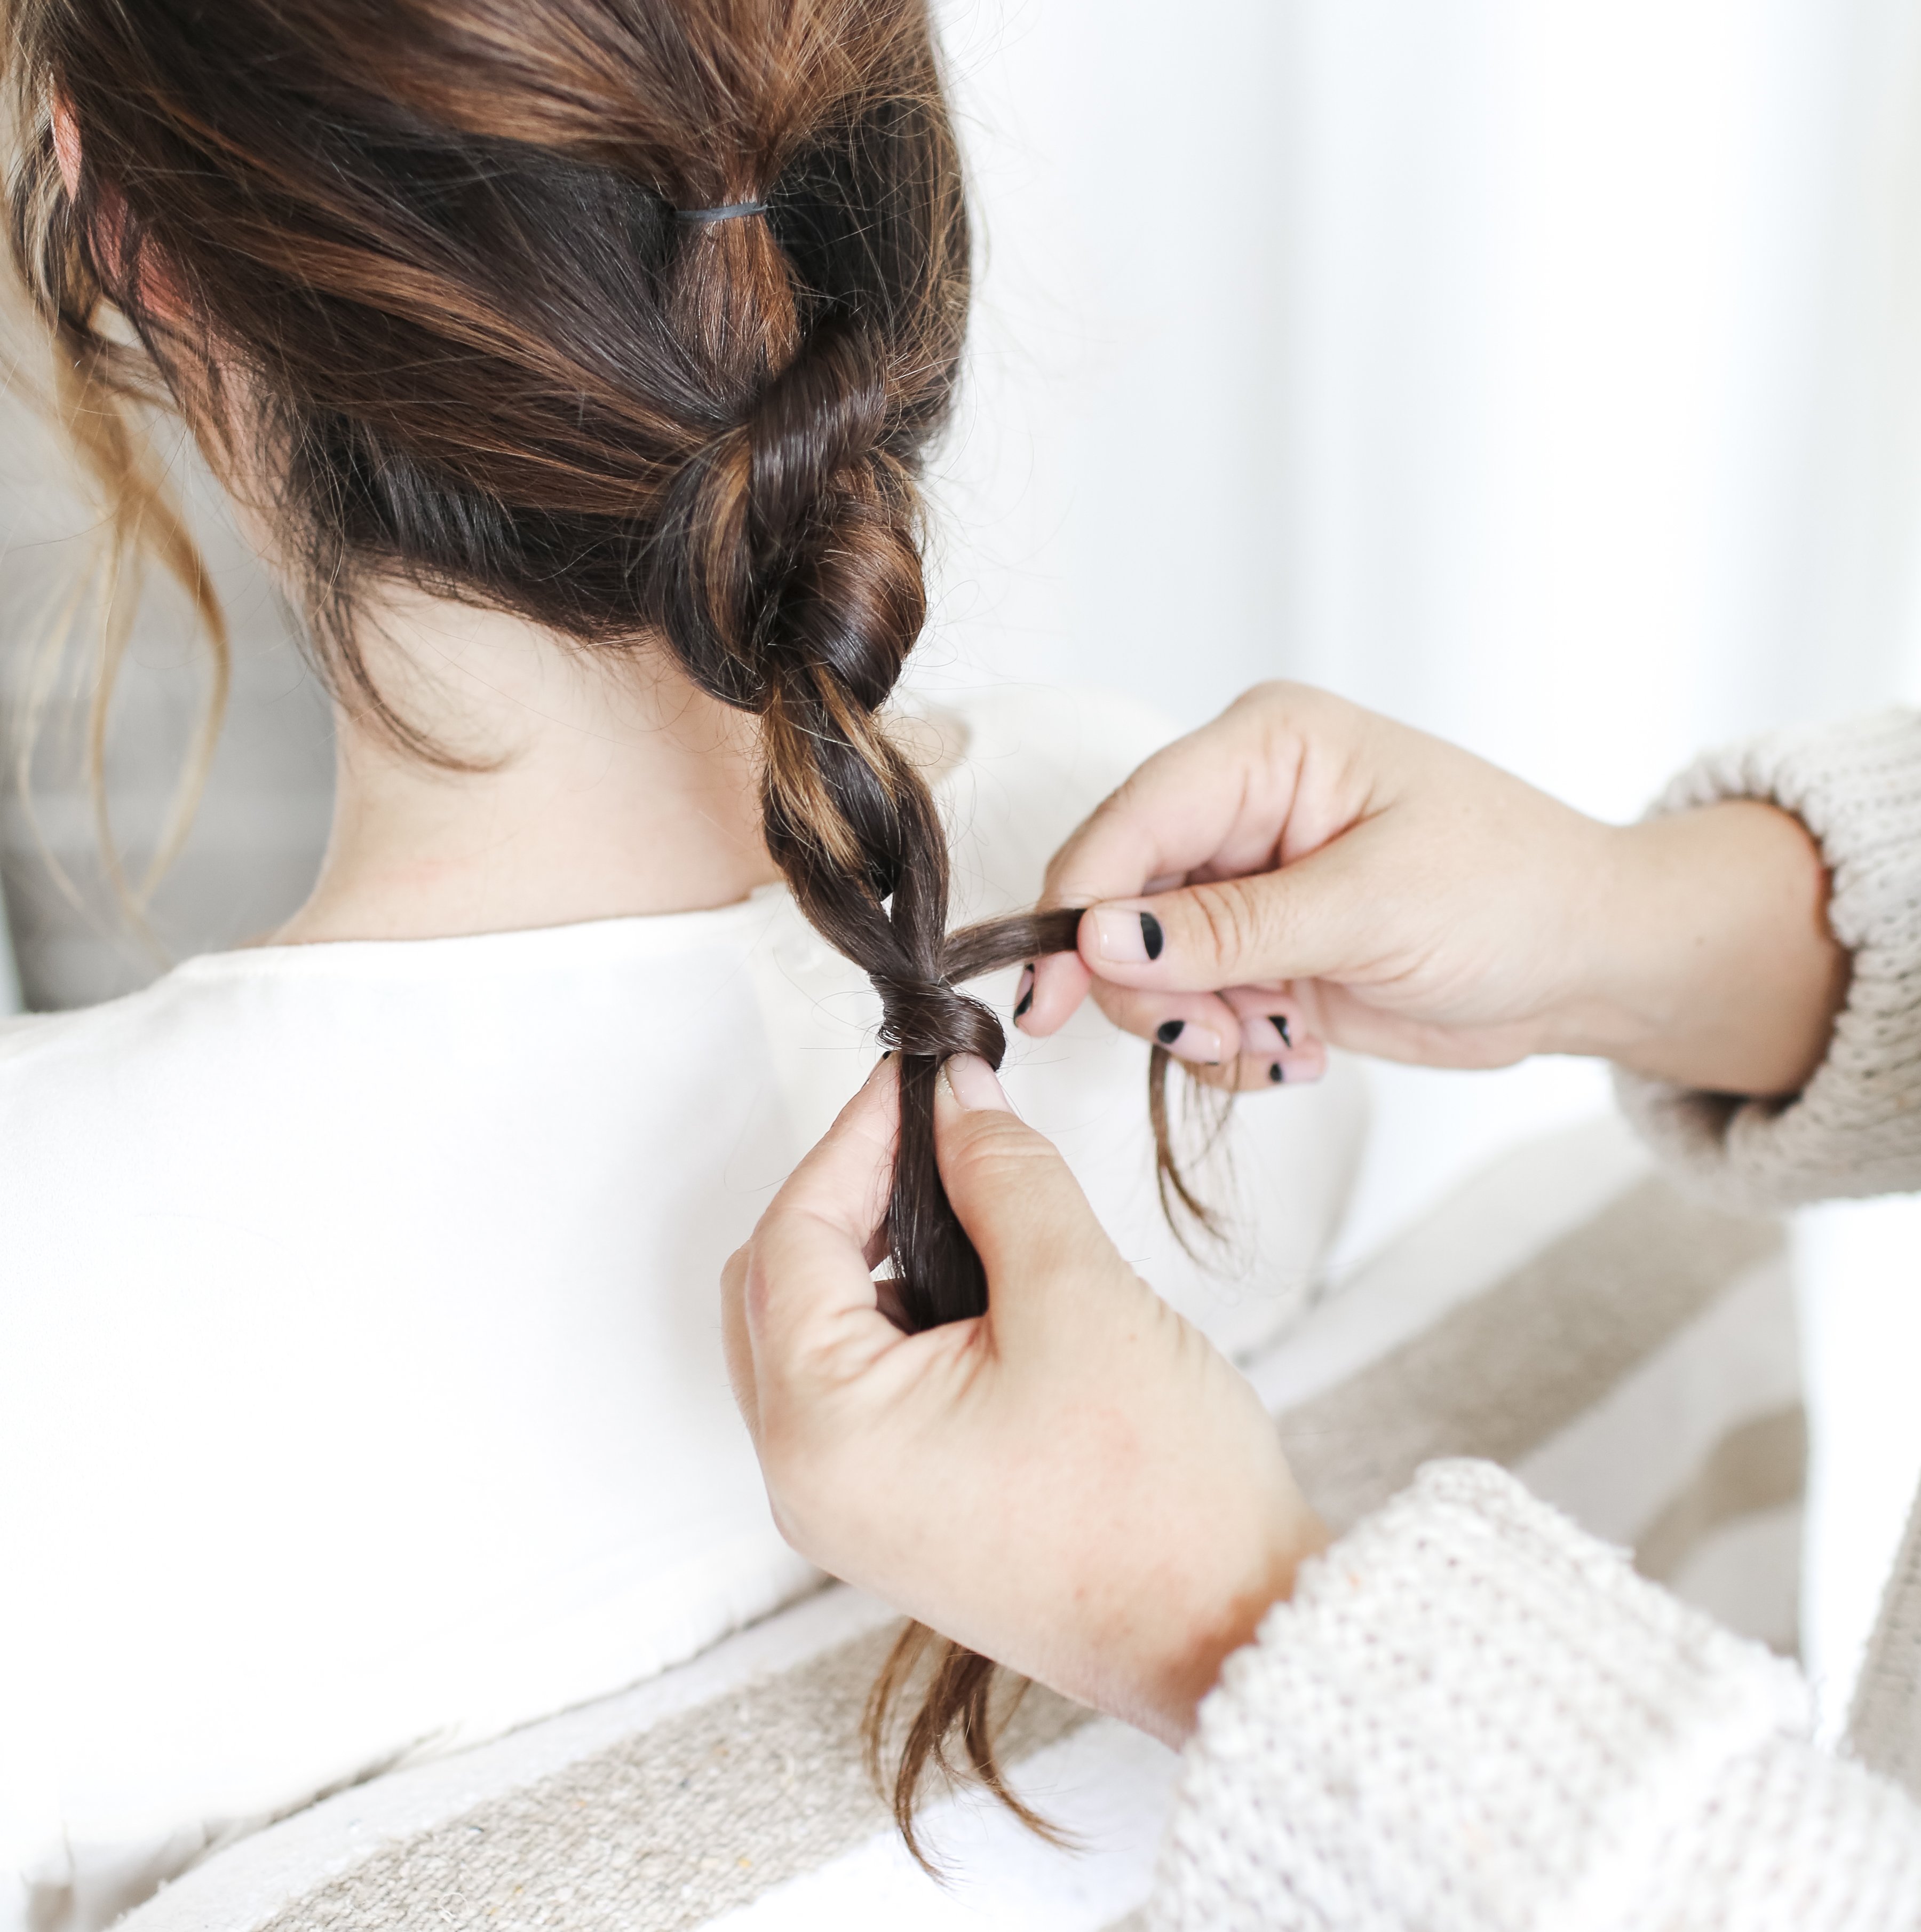
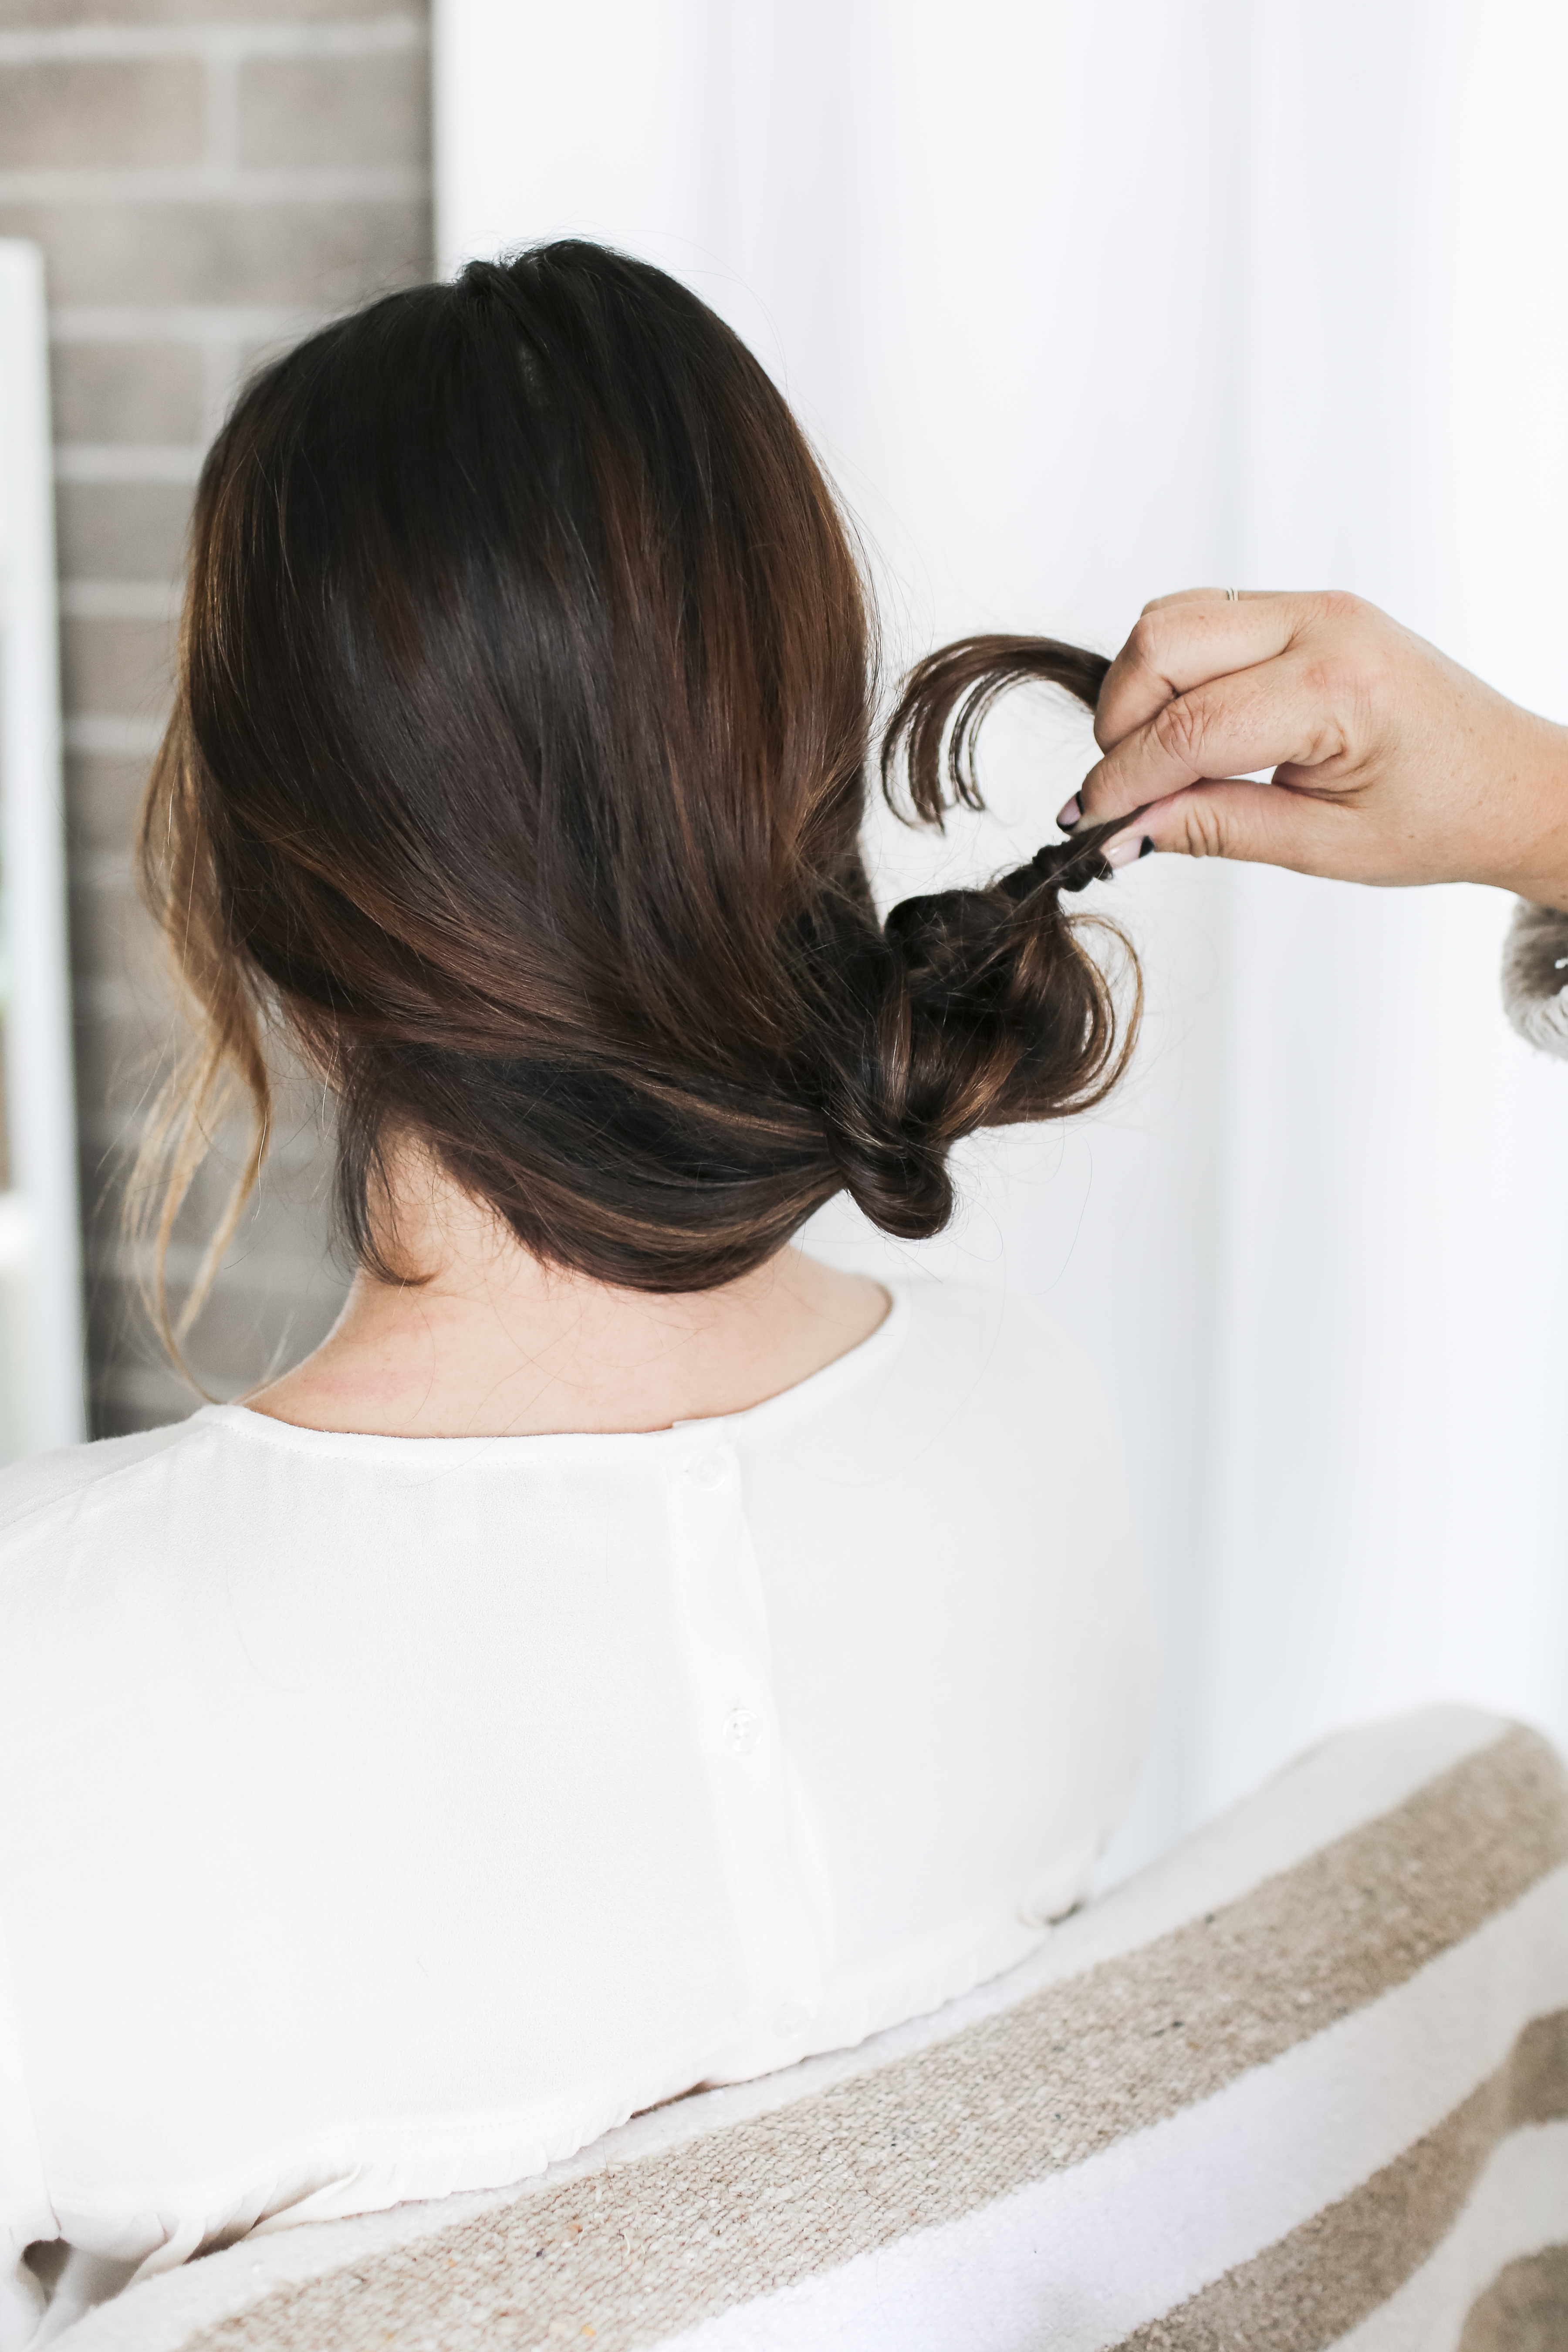
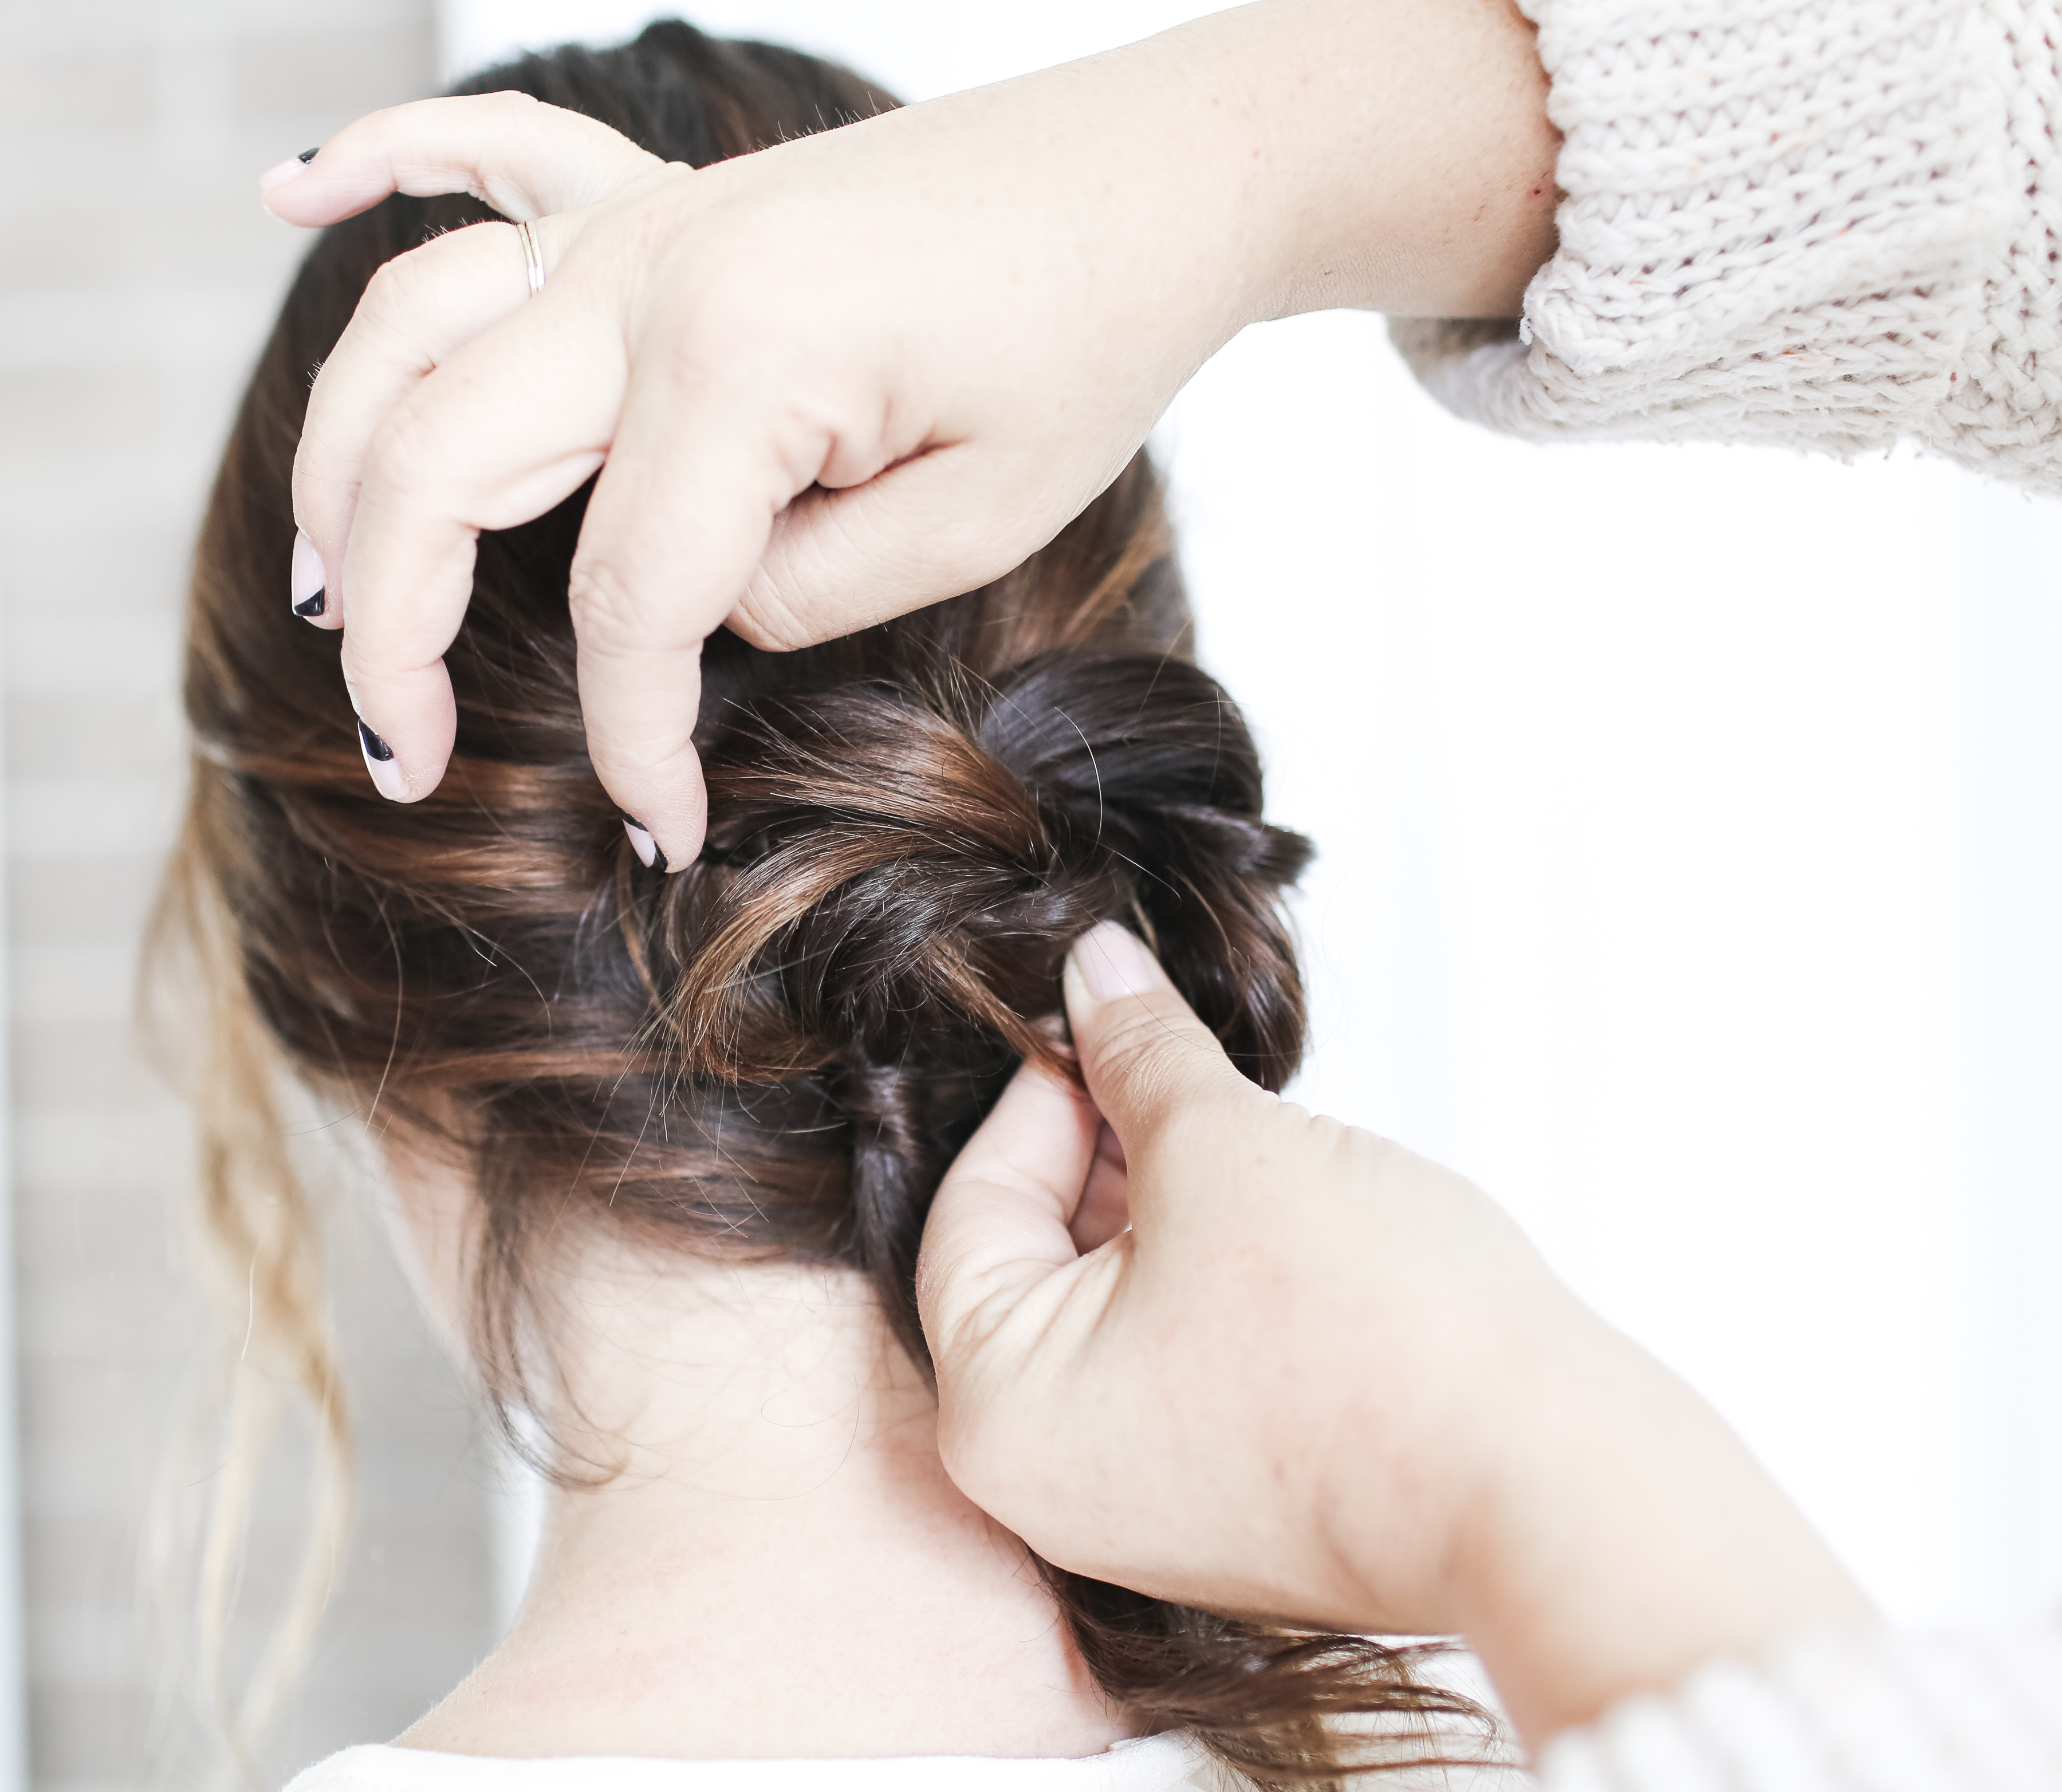
Gather the hair at crown of your head, leaving any pieces that you prefer out, and secure it a hair tie, that can later be broken. Use your fingers to tug on the hair at the crown to loosen the hair and add in texture. With the remaining hair, outside of the hair secured, separate it into two sections and cross them over each other, looping the hair to tie a knot, and tugging on each side to make it tight.
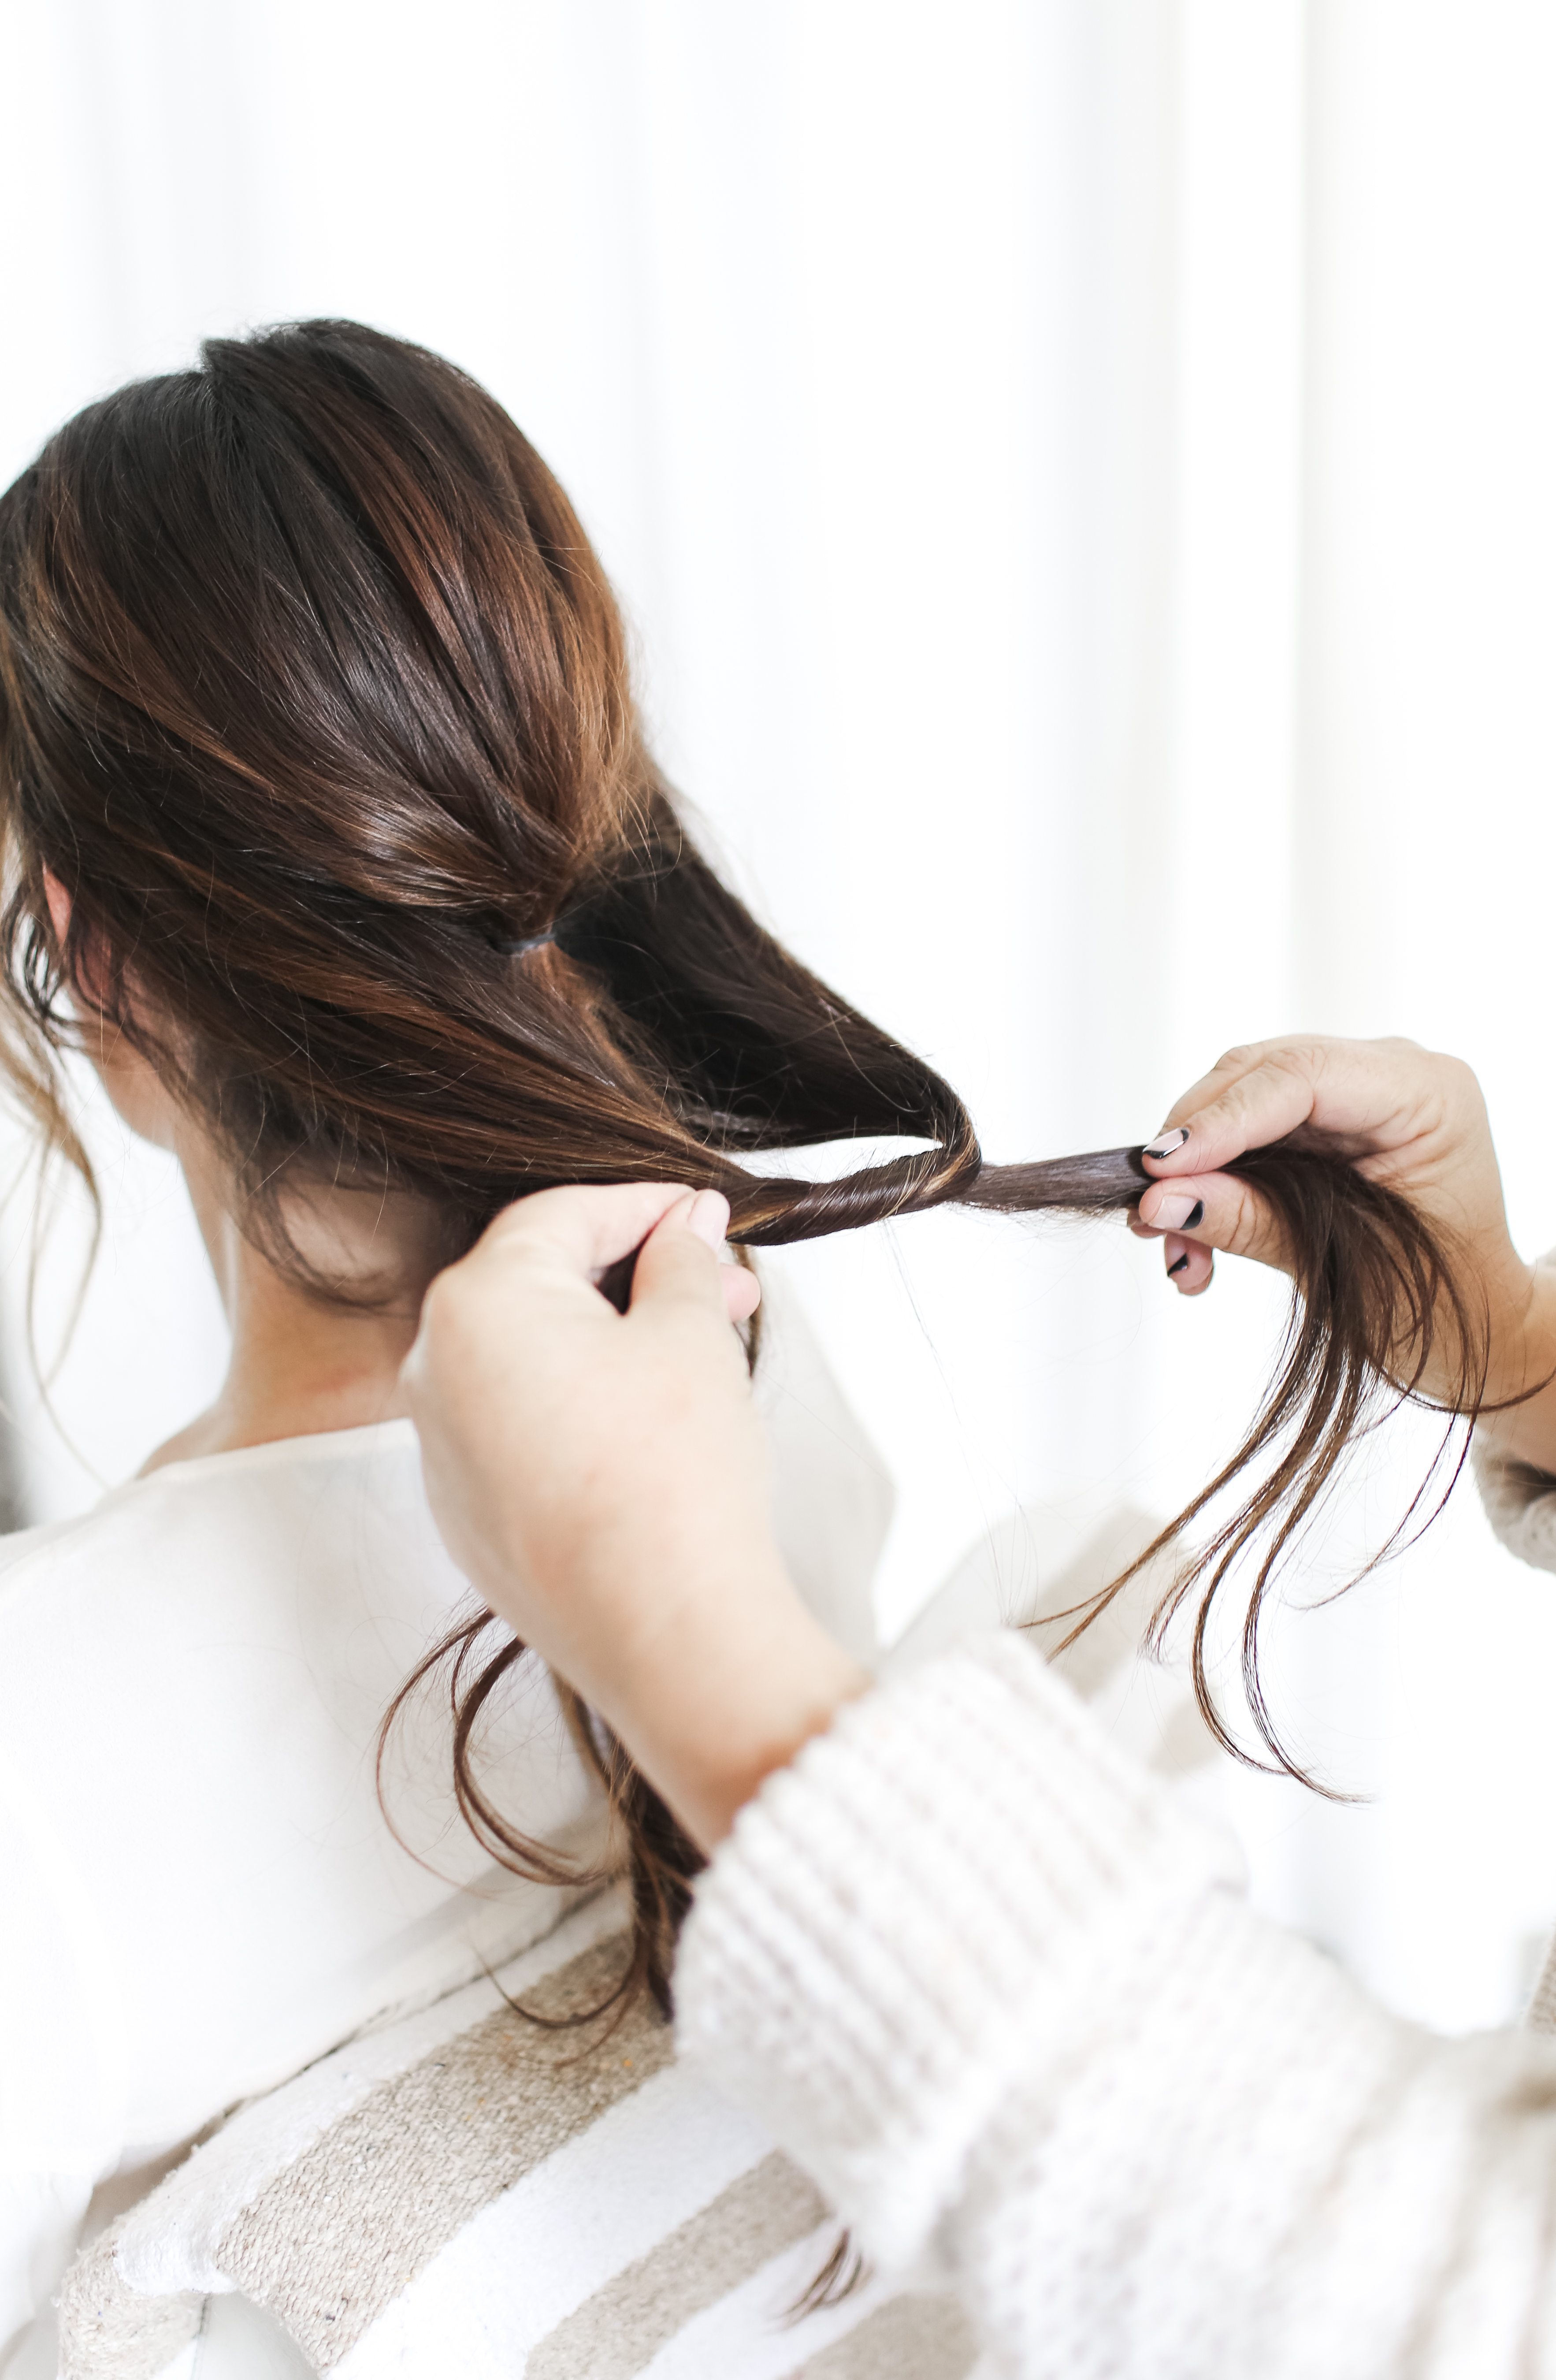
Add the ends of the knot to the other hair previously secured, creating two sections, and cross each section looping the hair to tie a knot.
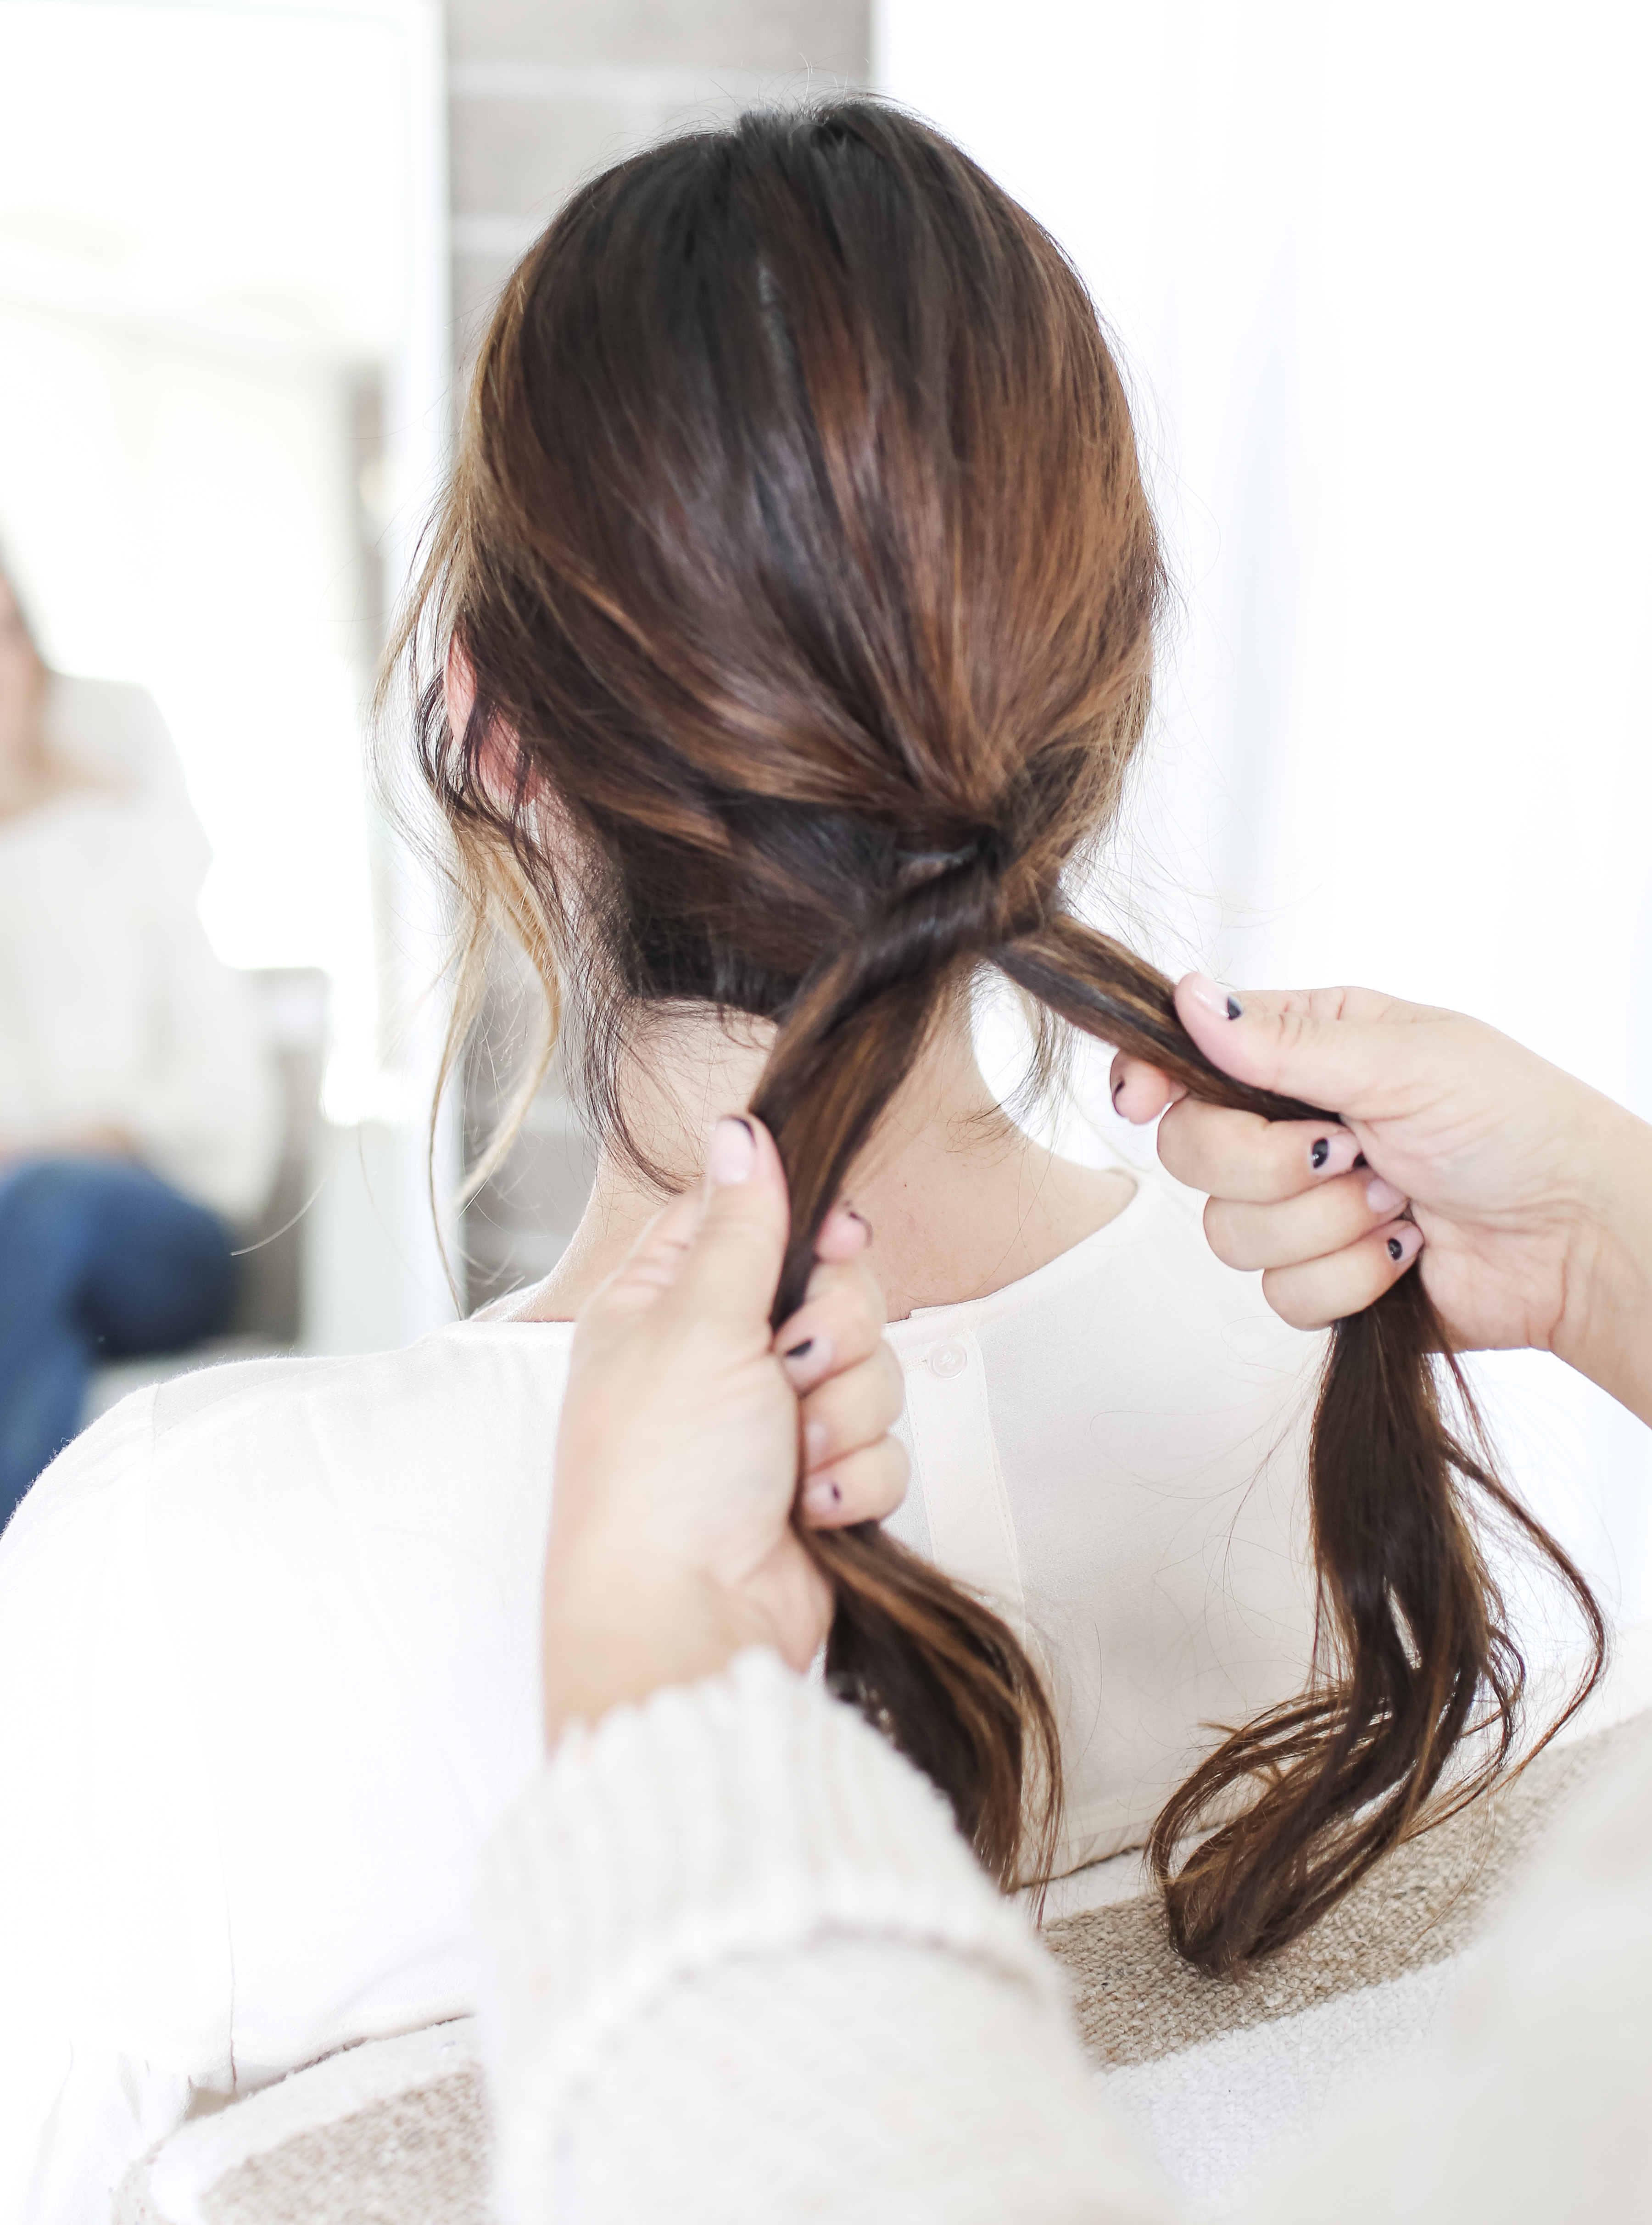
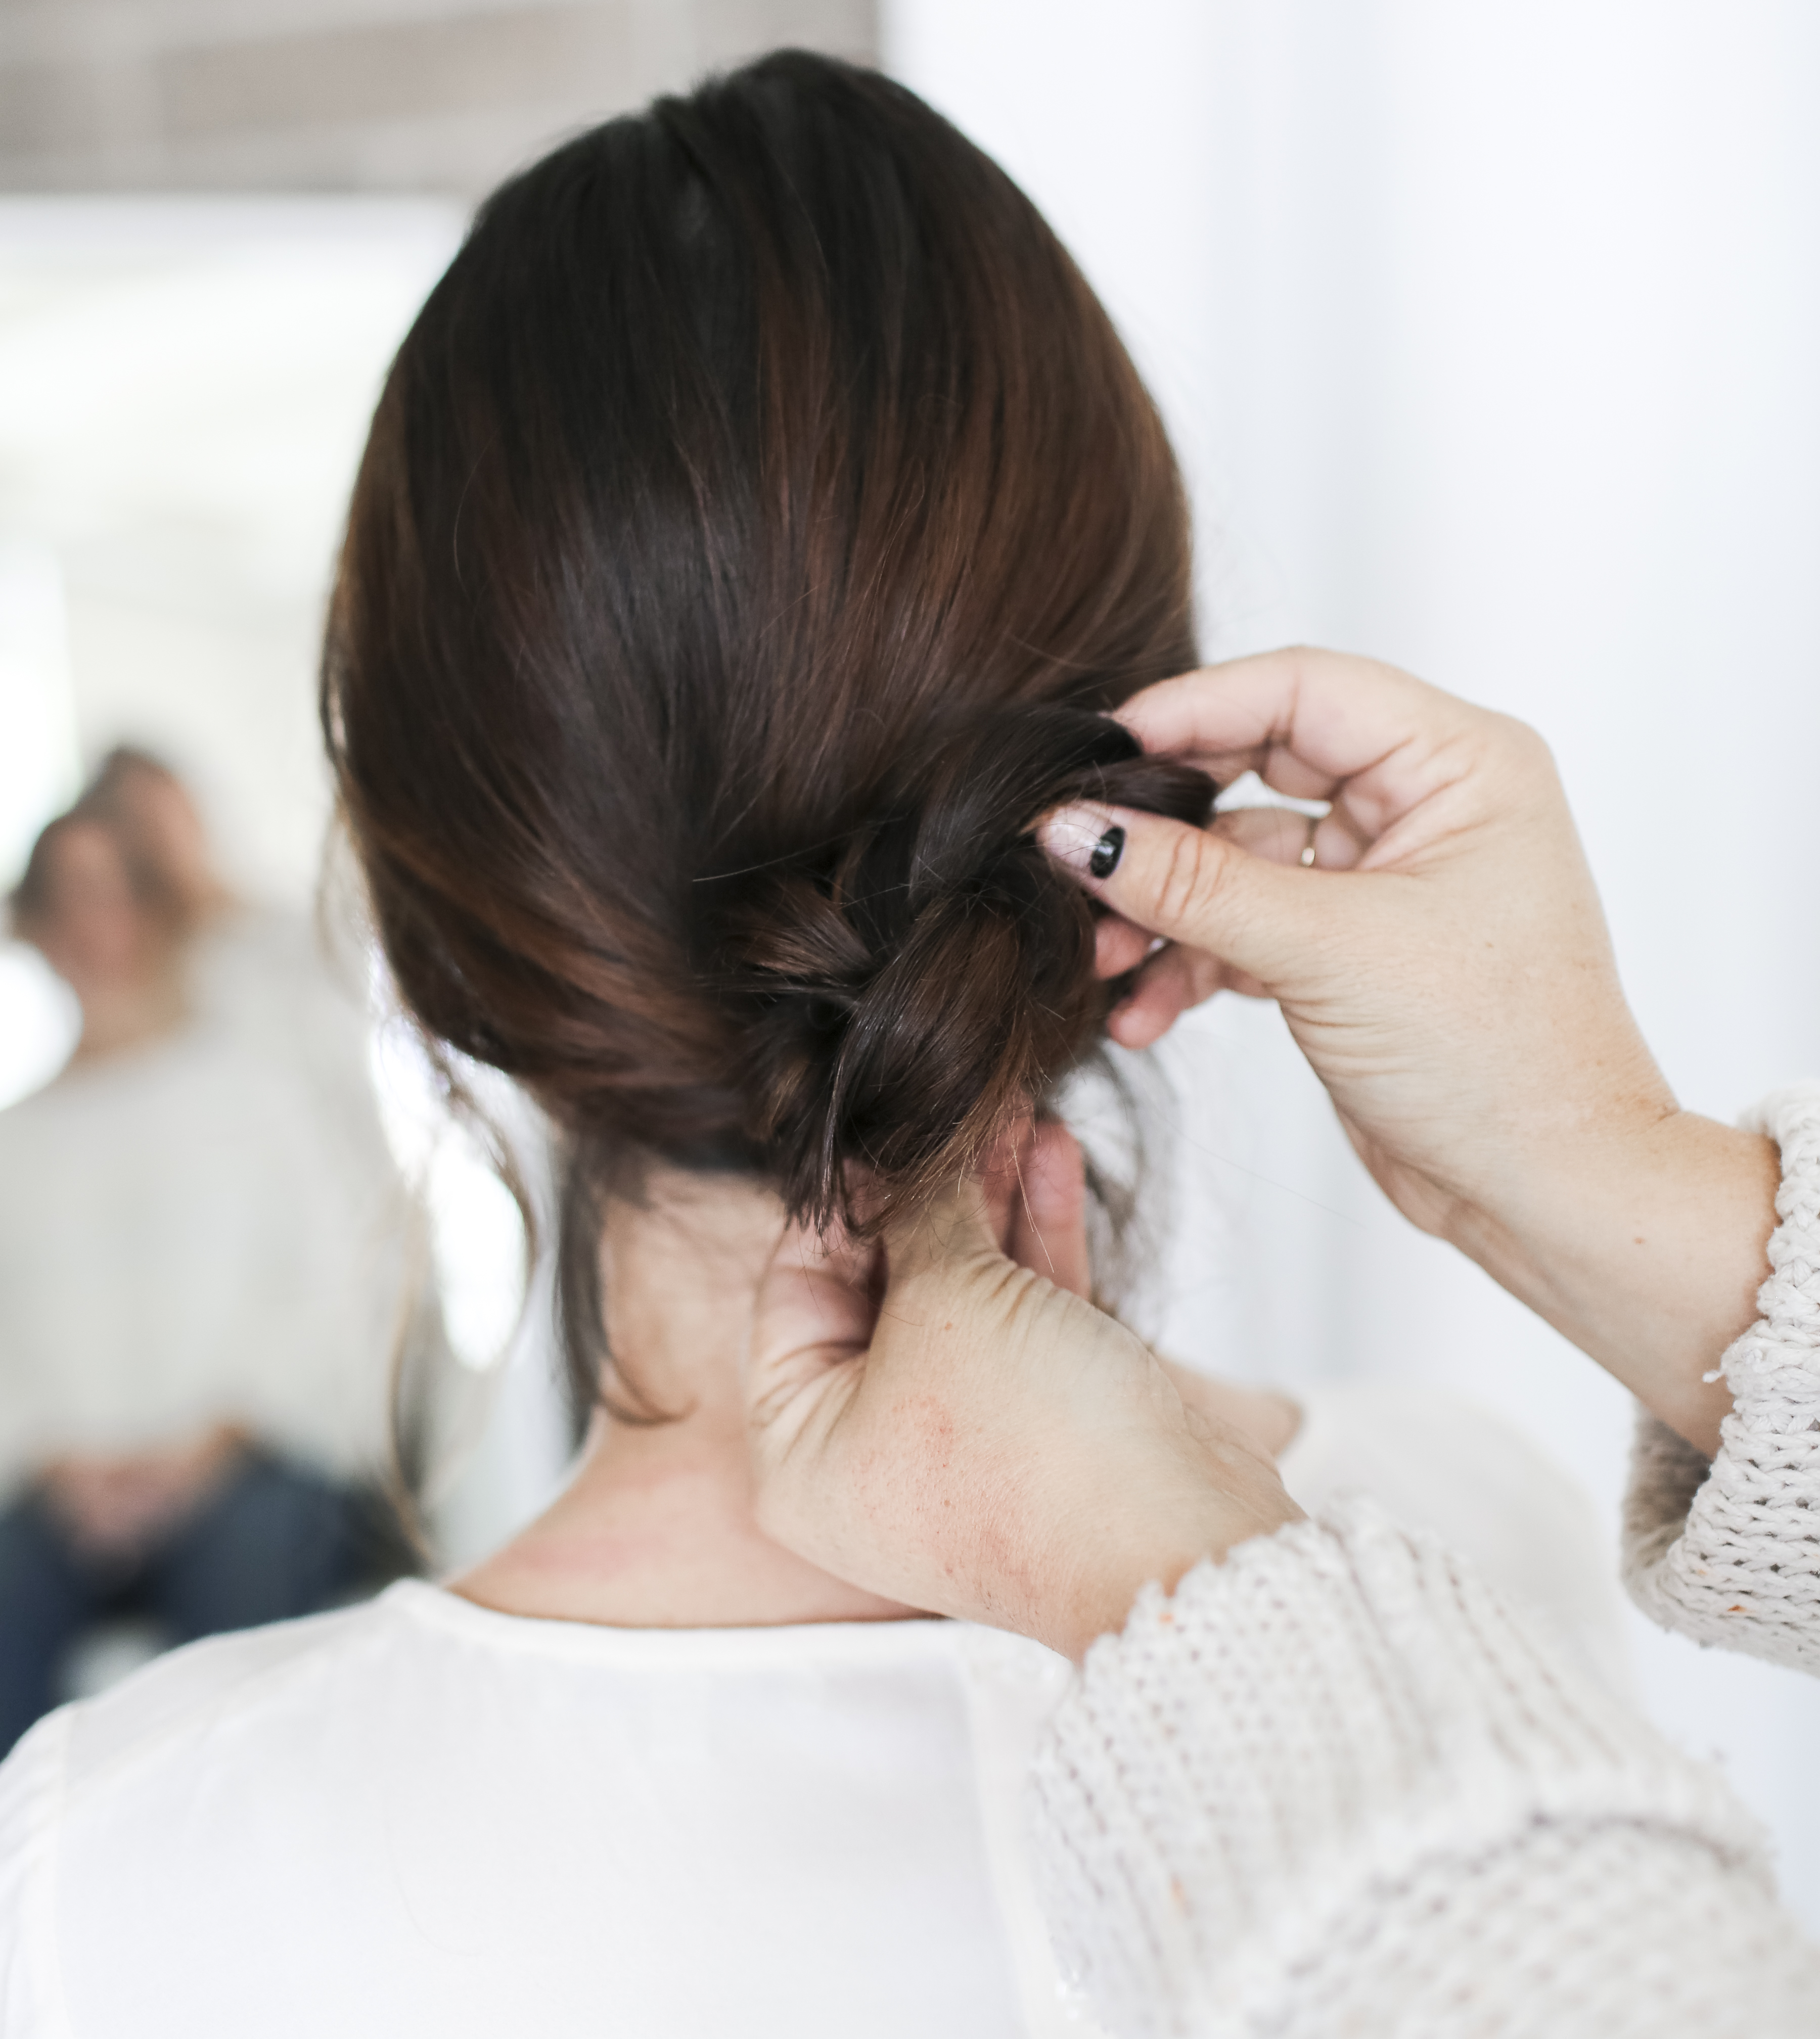
 Repeat as many times as you would like, and secure the ends with a hair tie. Take a small section of hair to wrap around the hair tie, looping the hair through the wrapped portion, and under the hair tie to secure the hair and cover the tie.
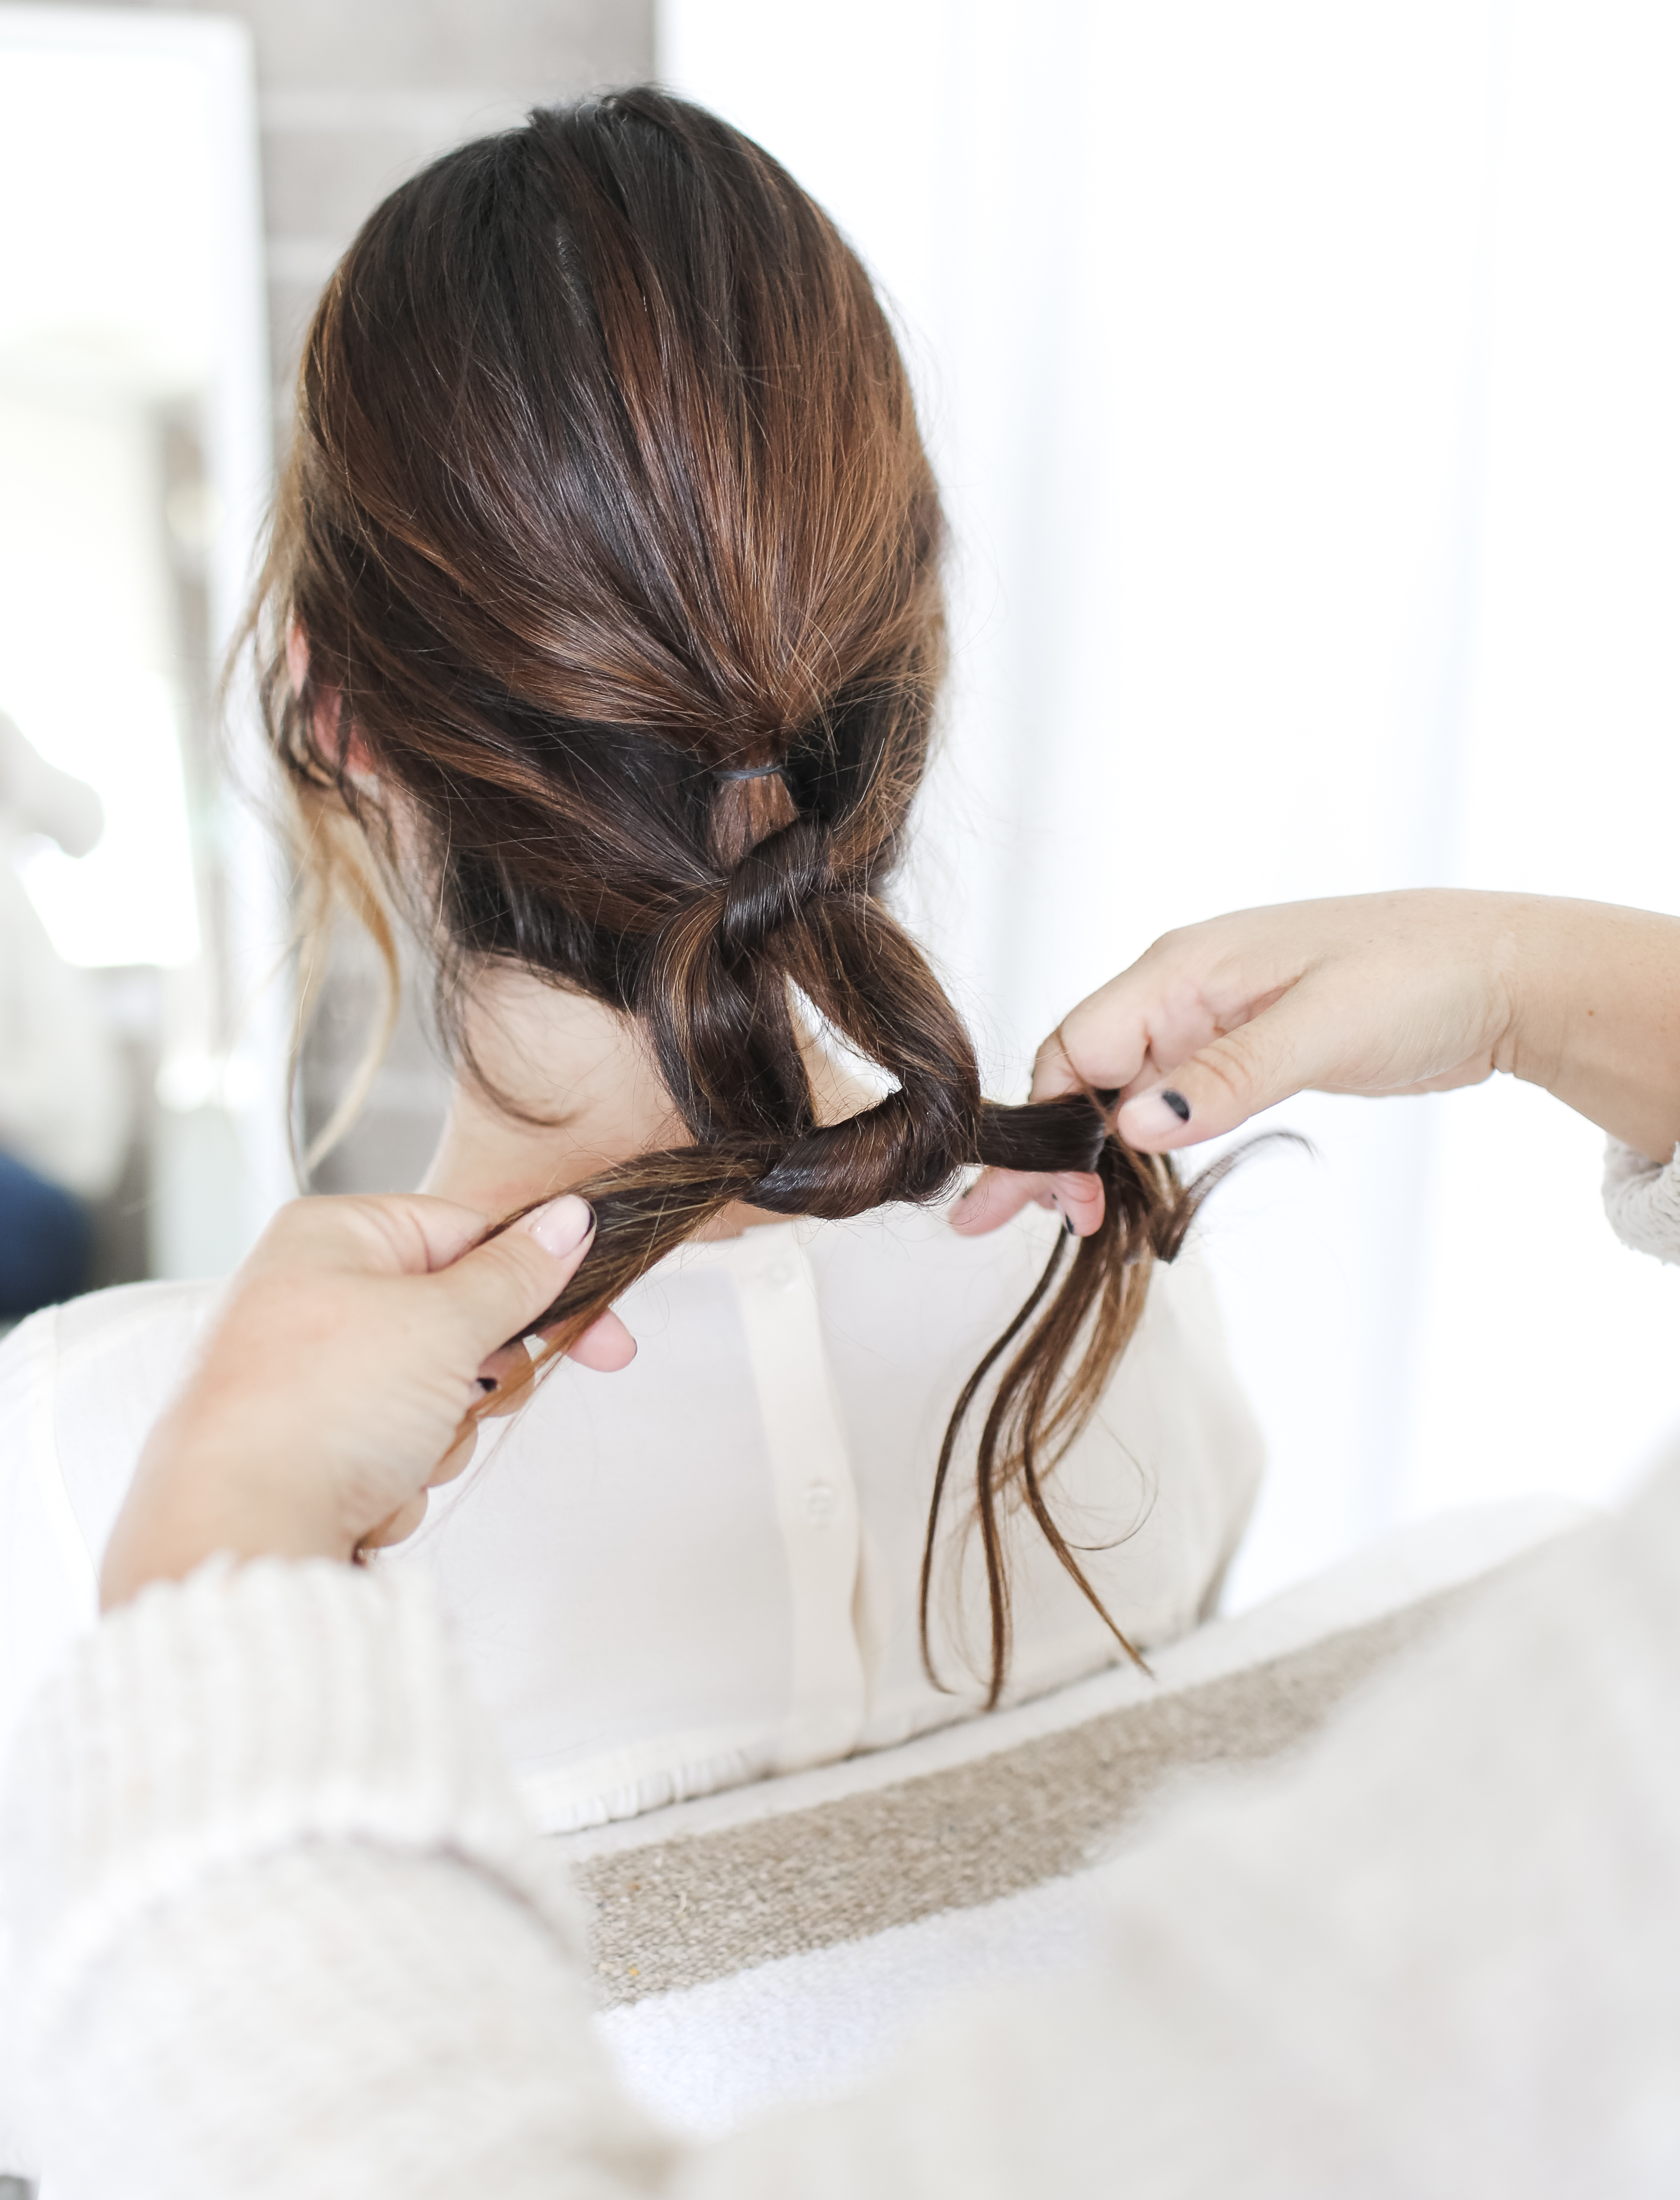
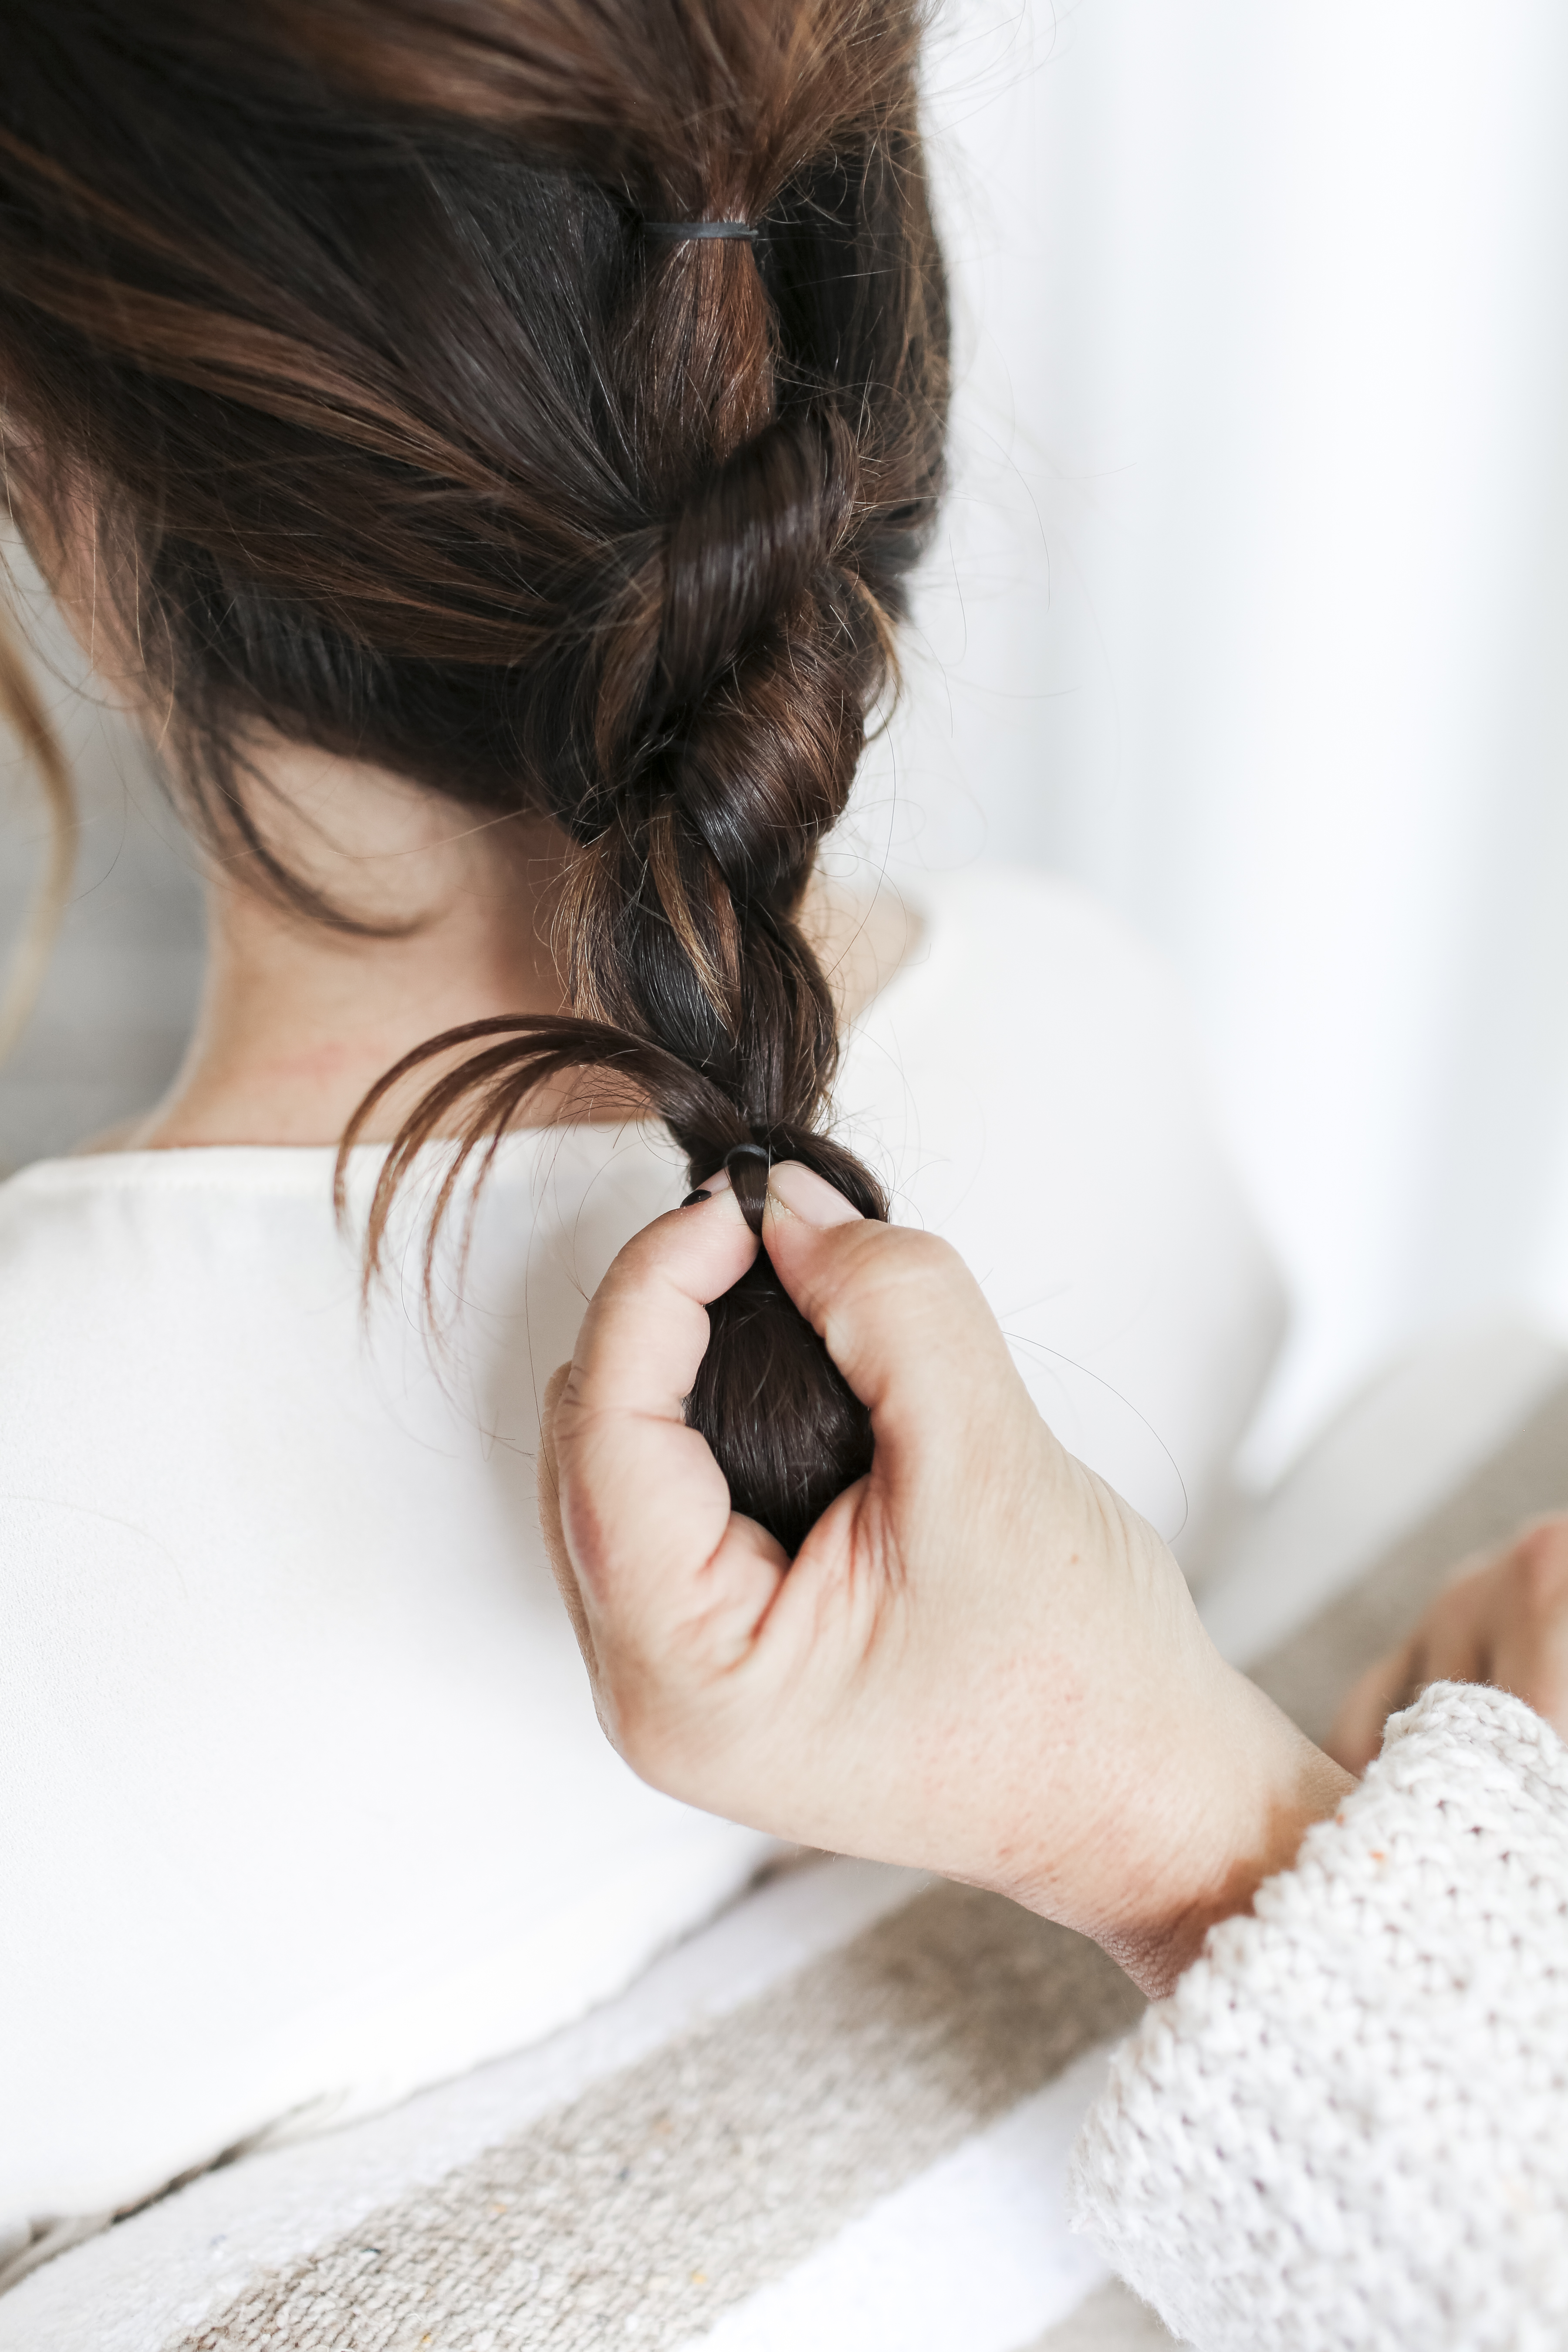
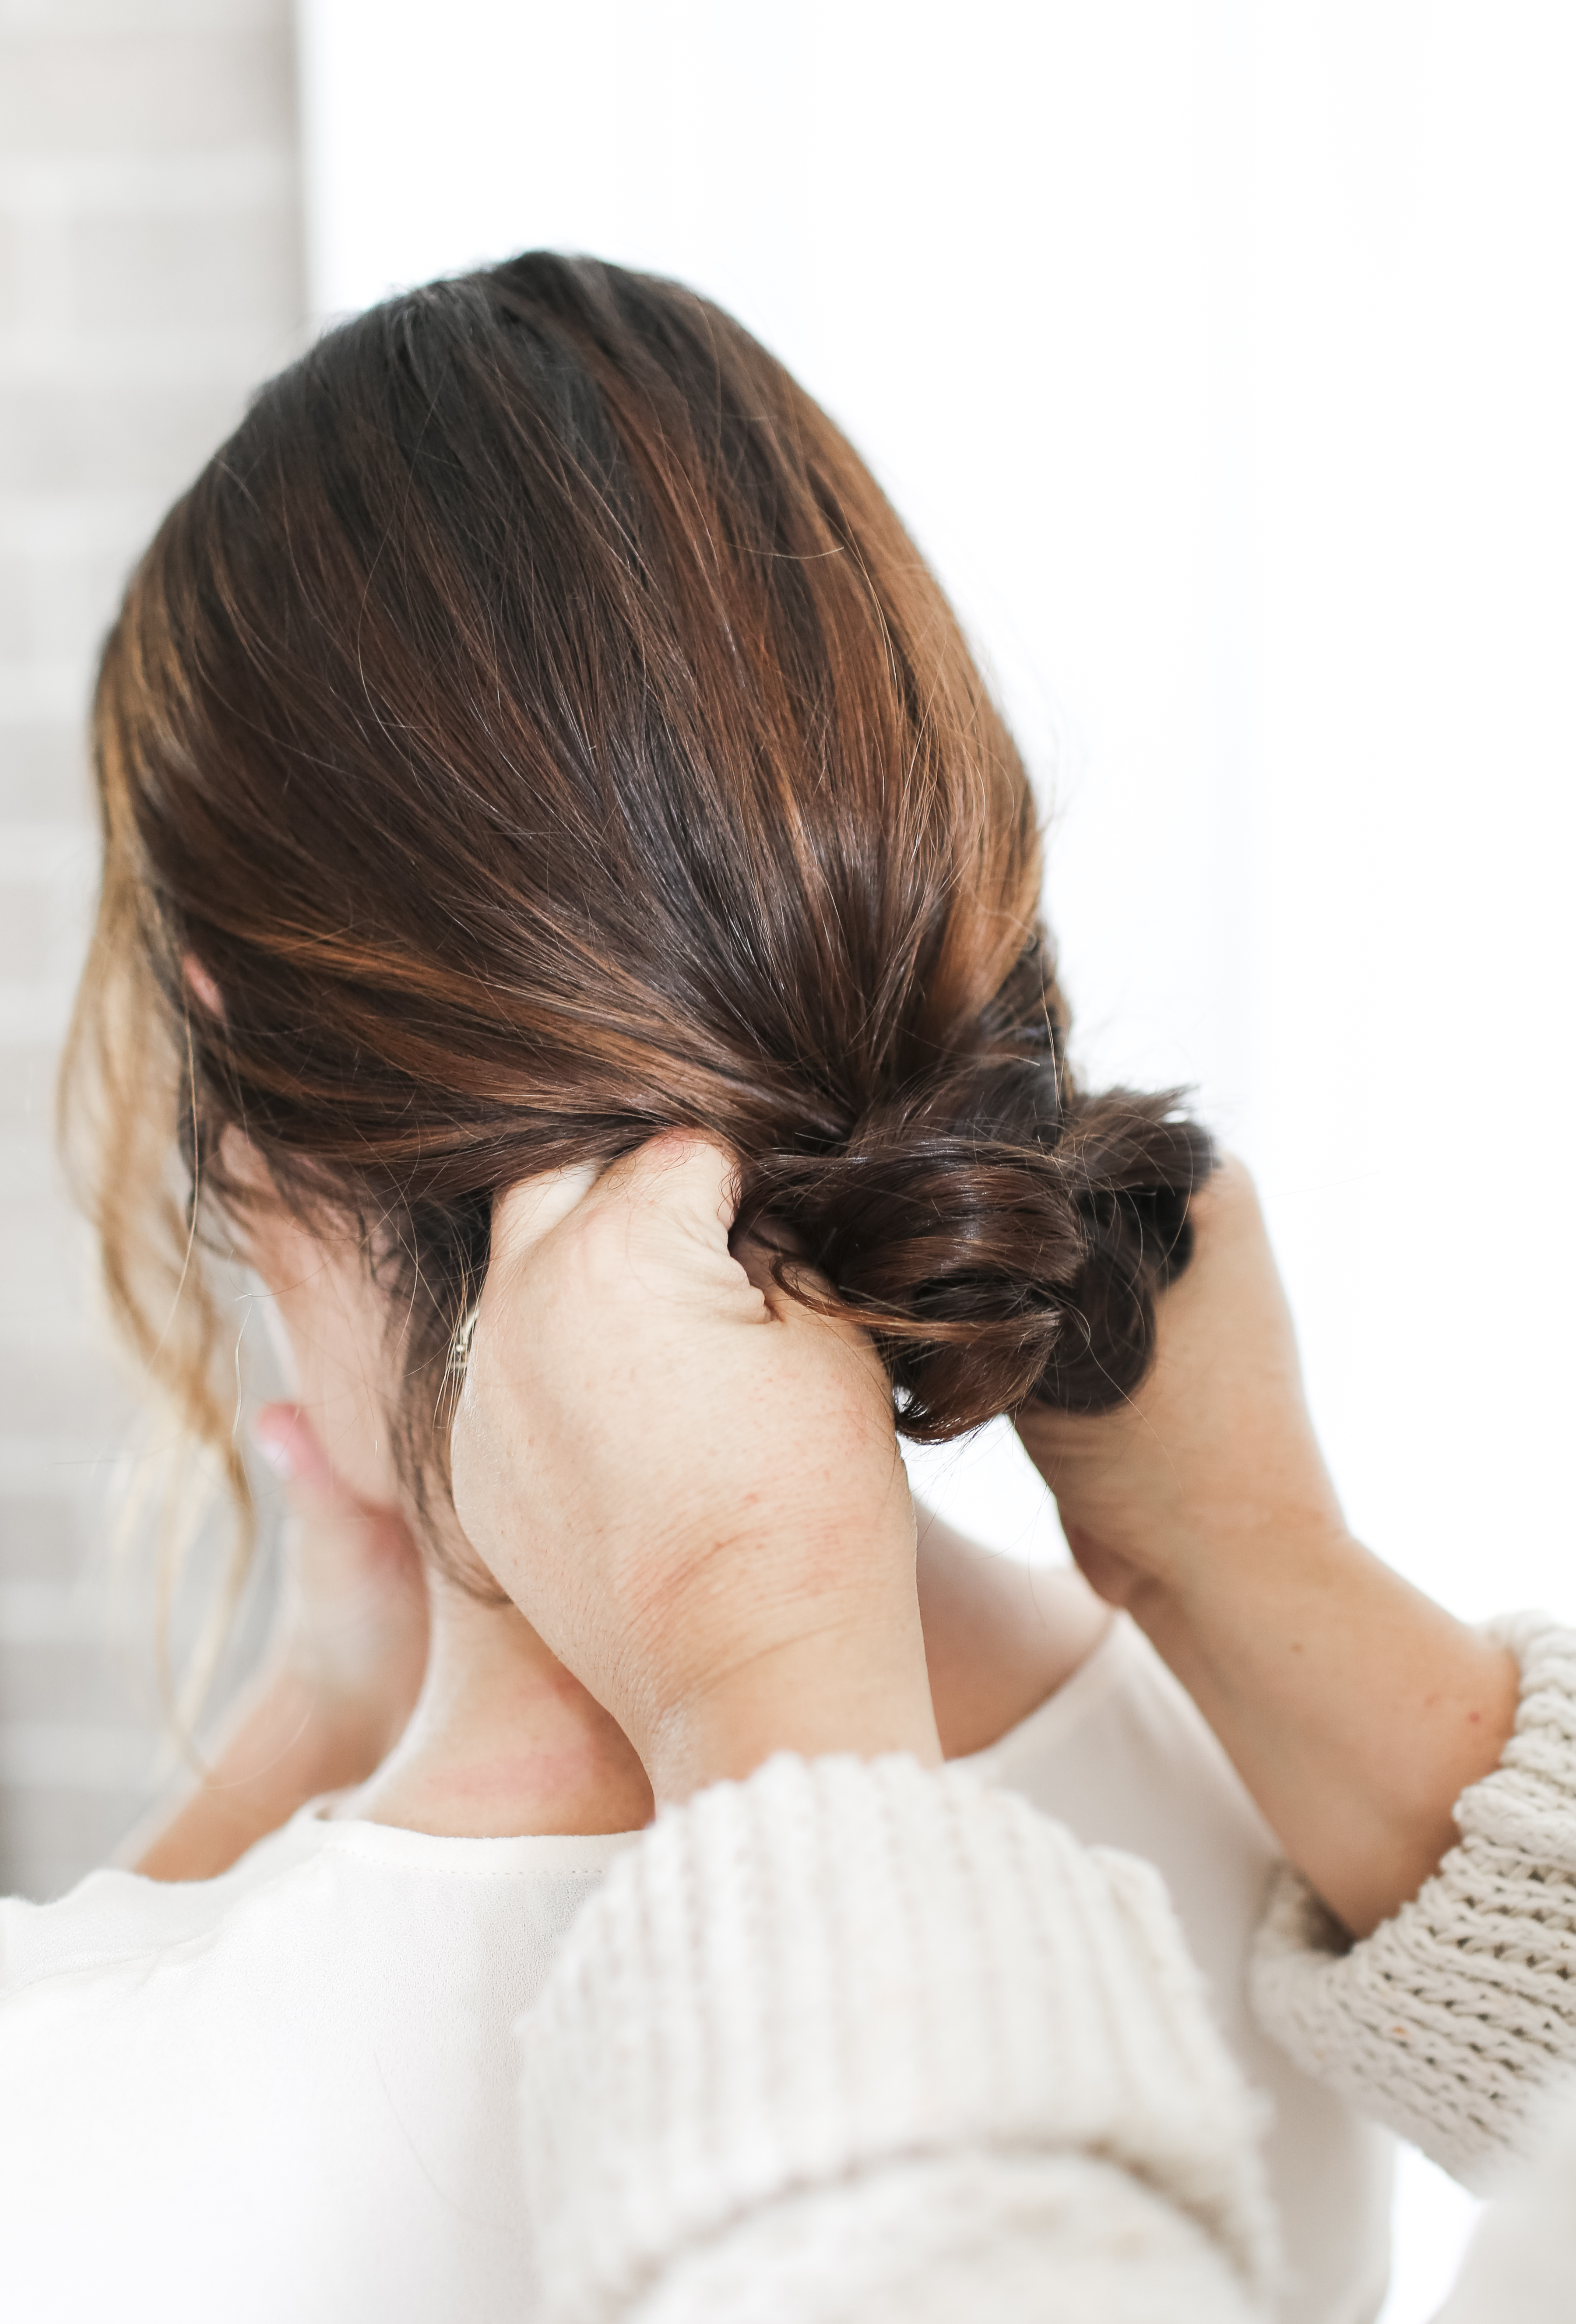
 Using your fingers, tug/pull on the hair to create larger knots. Break the band that you first secured the hair with. Spray with a finishing spray.
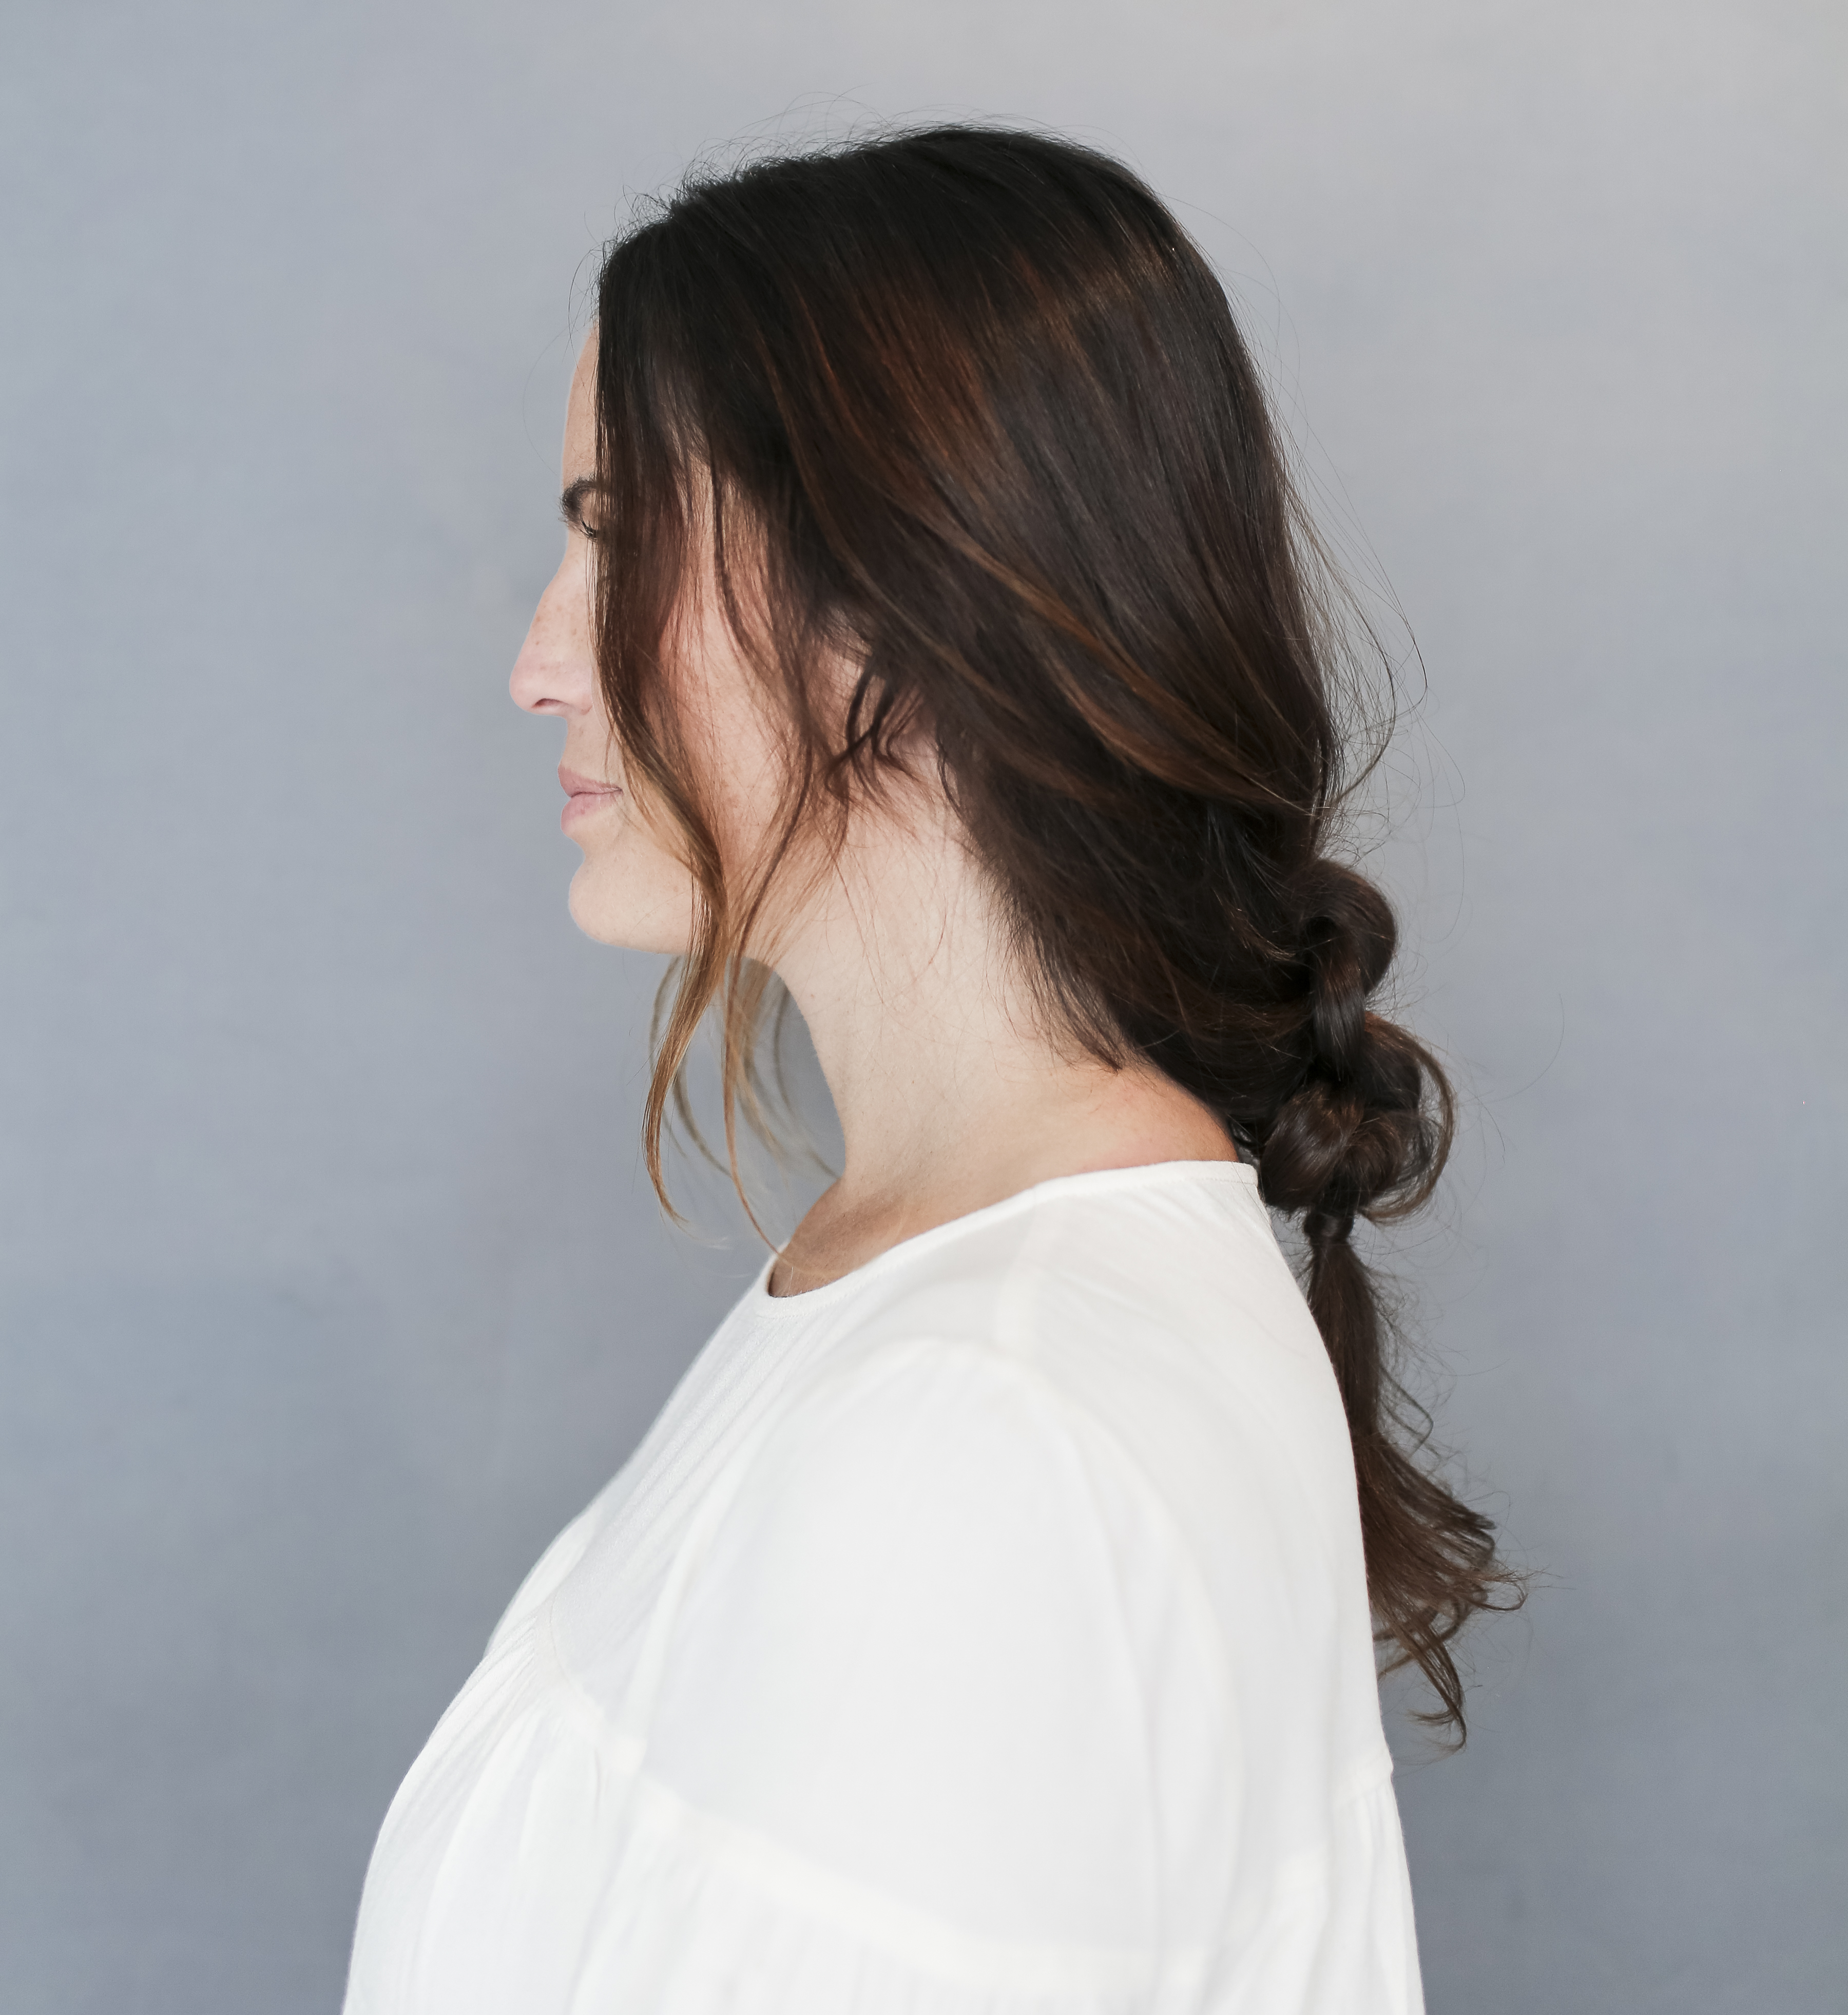
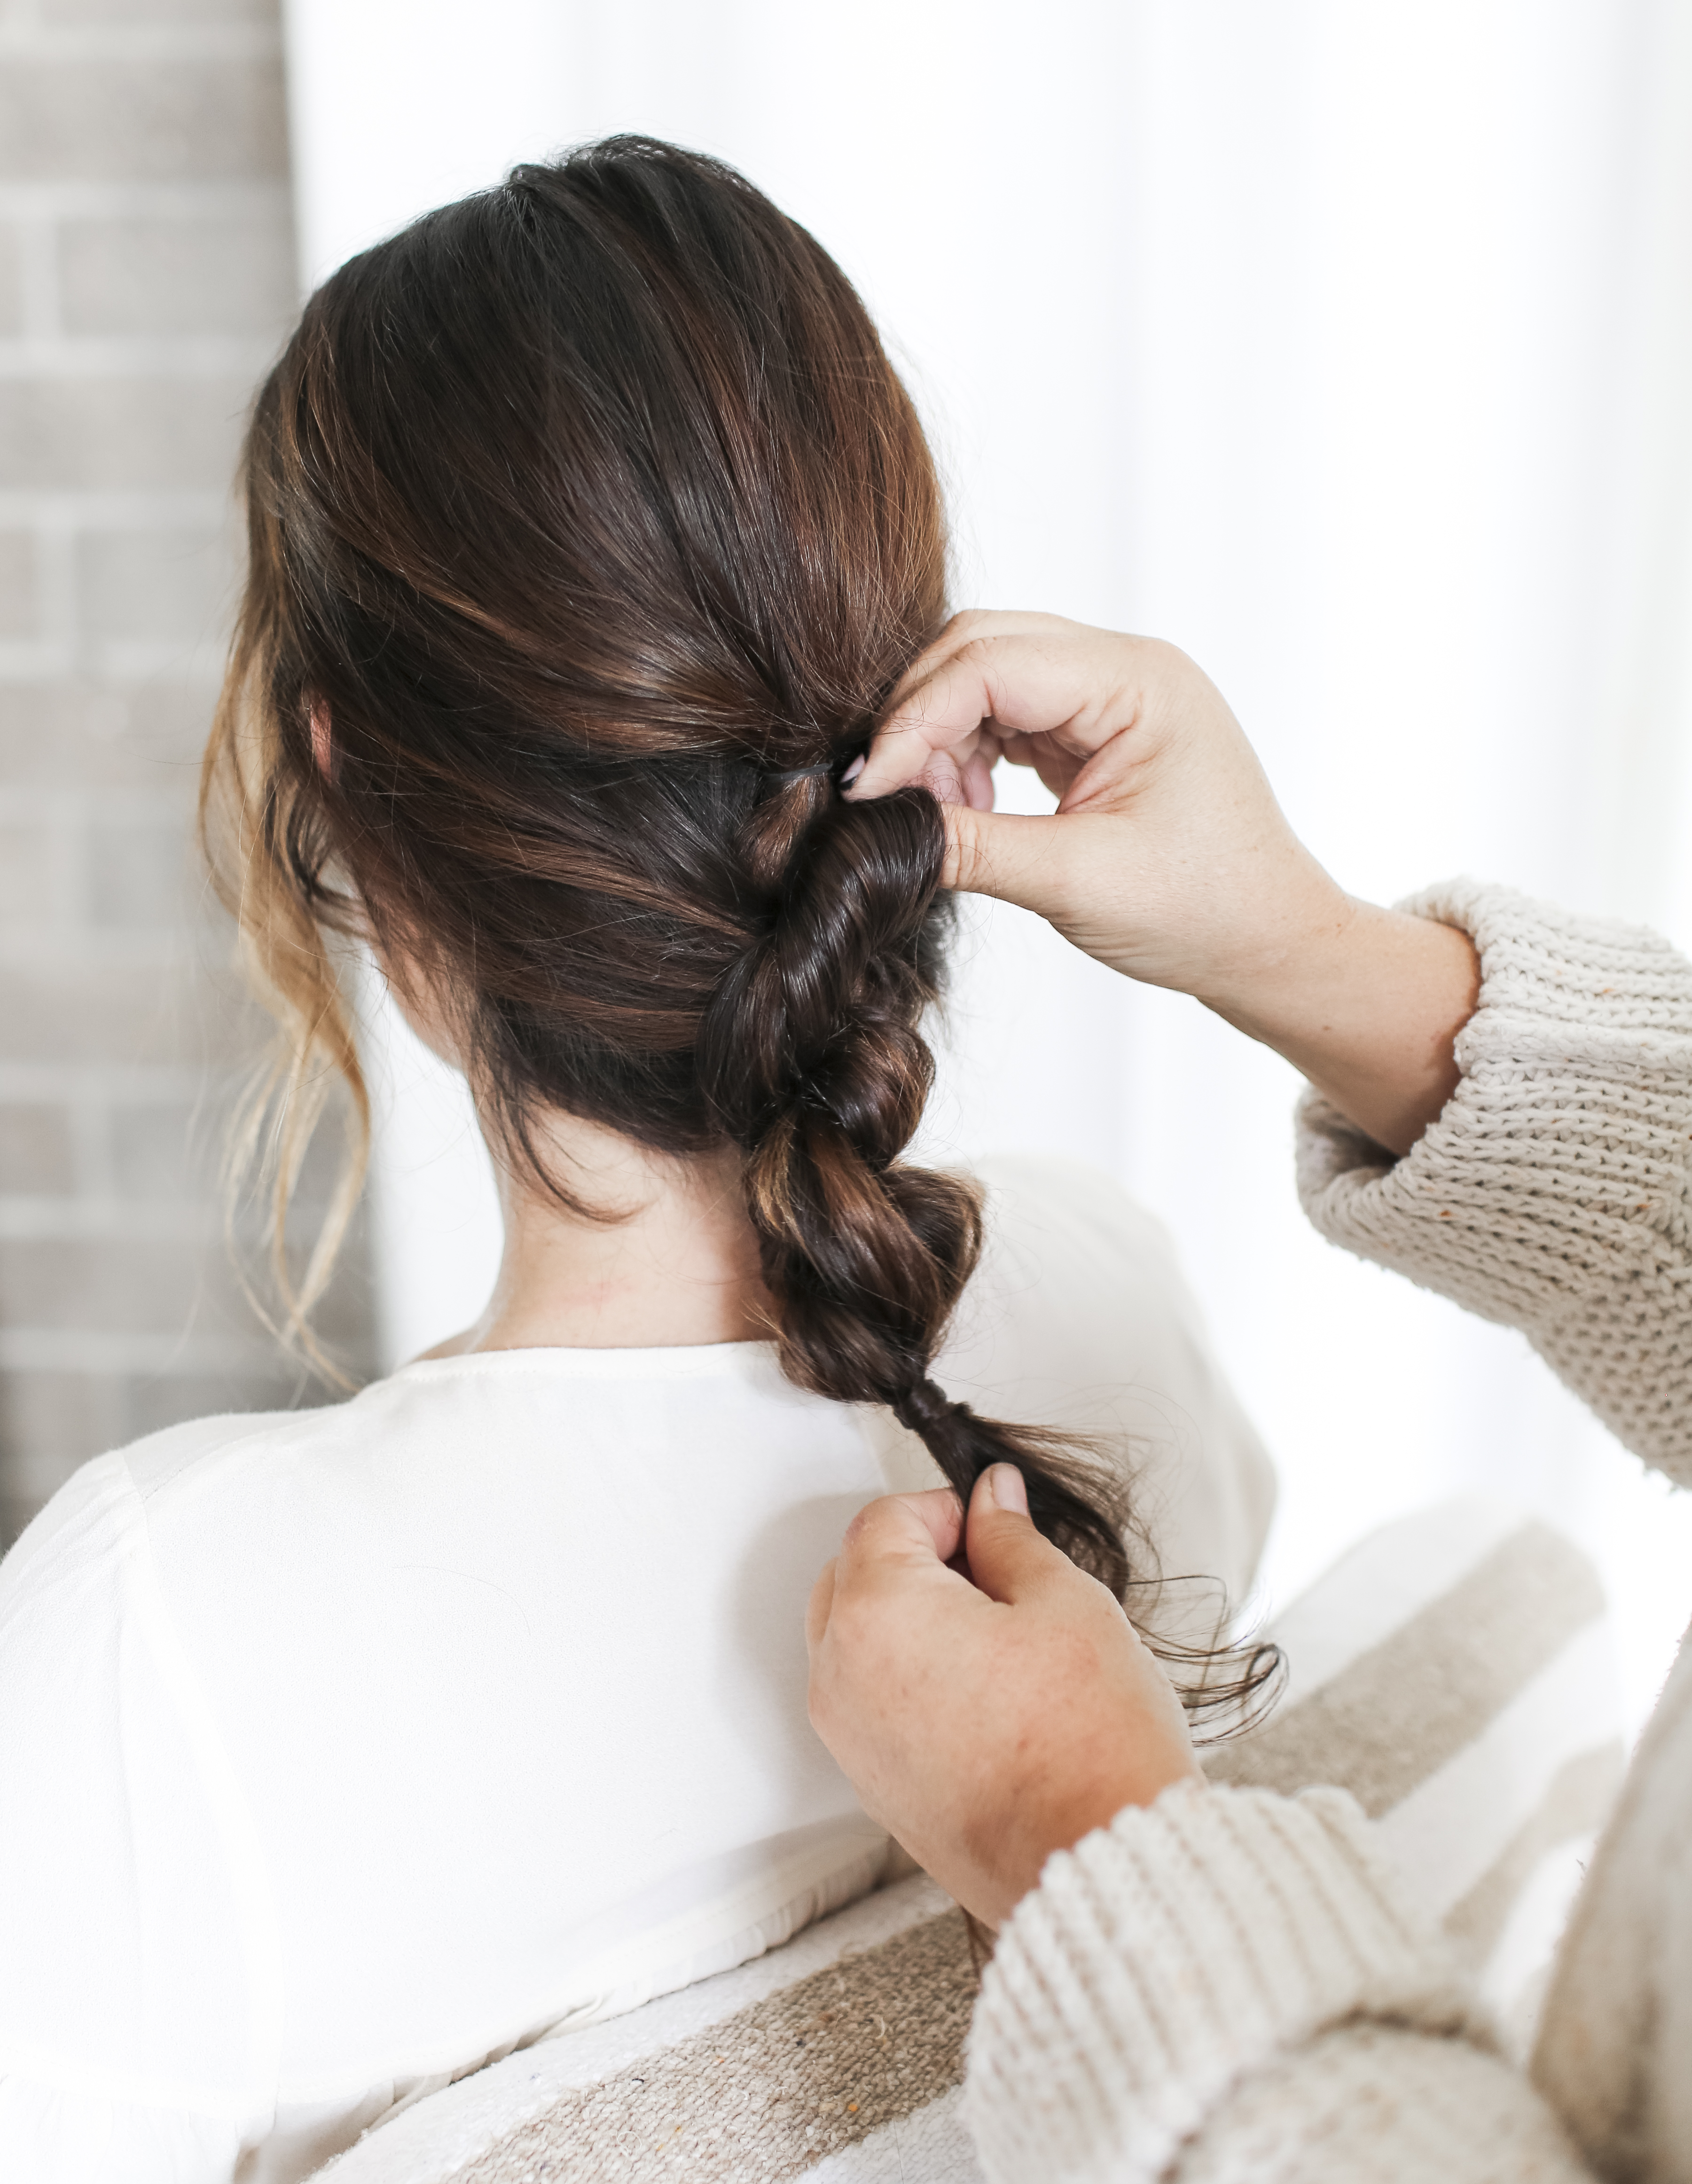
Taking the end of the pony tail, direct the hair up and slight roll the styled hair towards the back of the head. Secure the hair hair pins, slightly pulling the hair apart to create a fuller look.
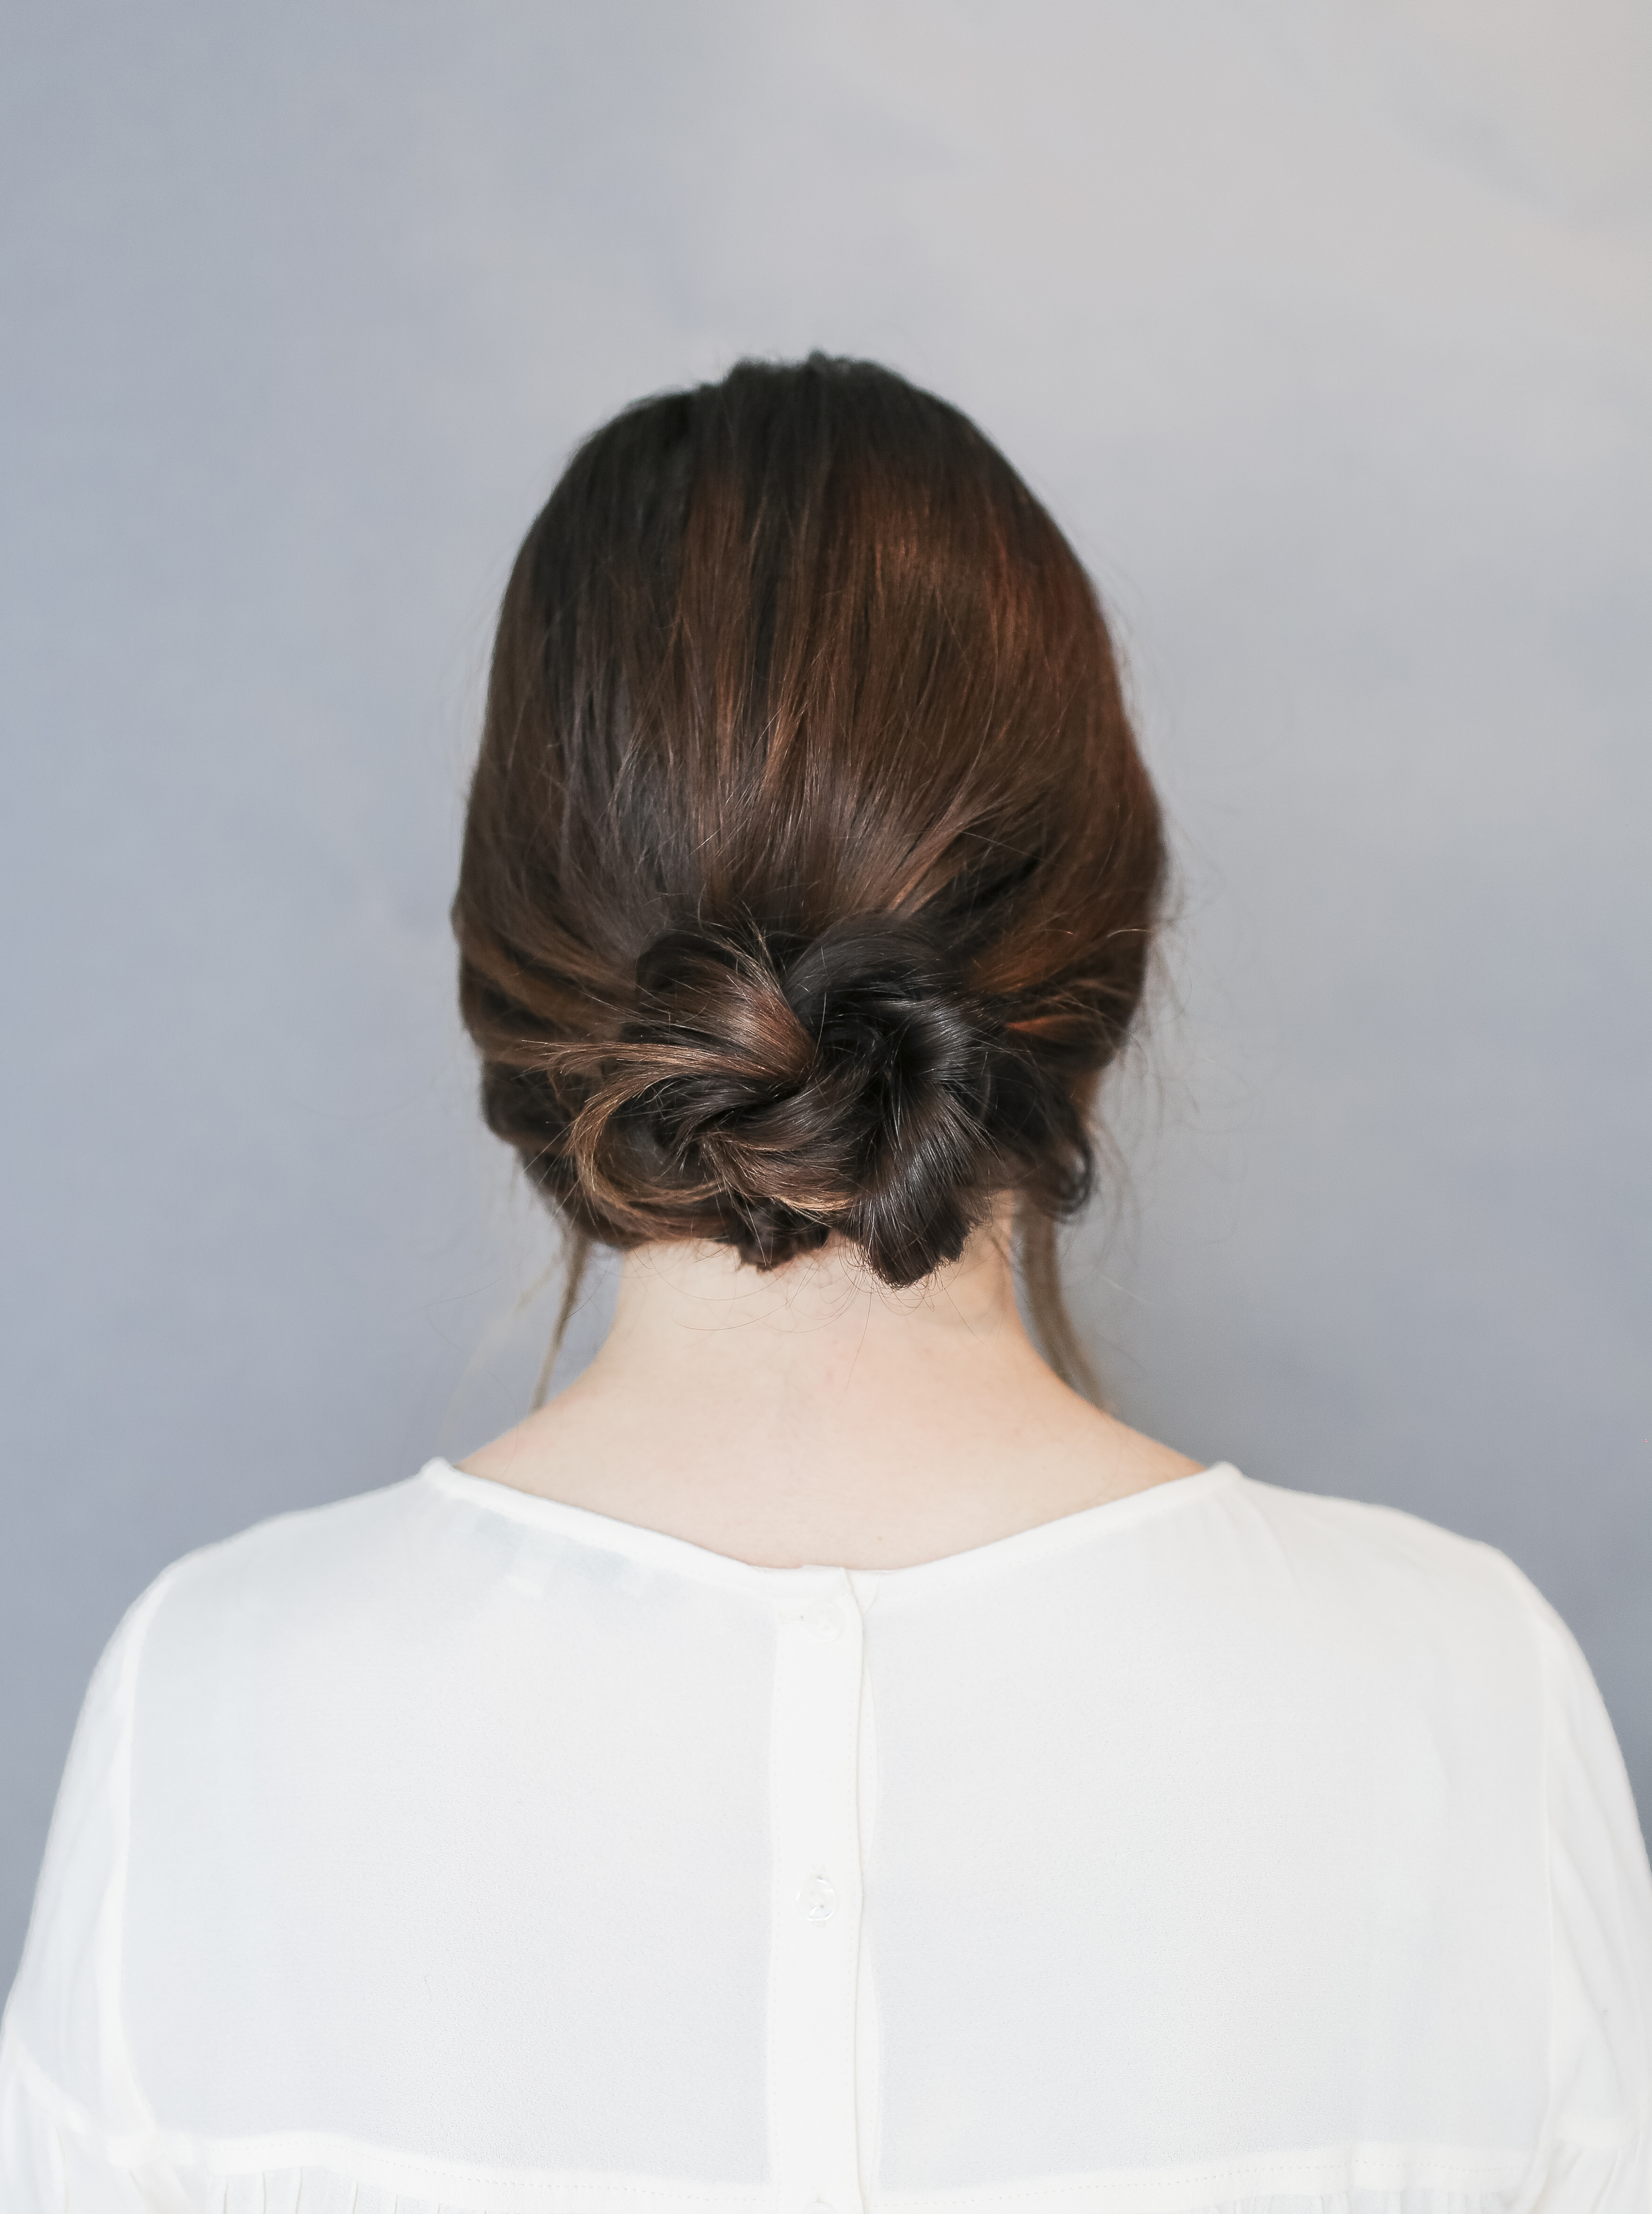
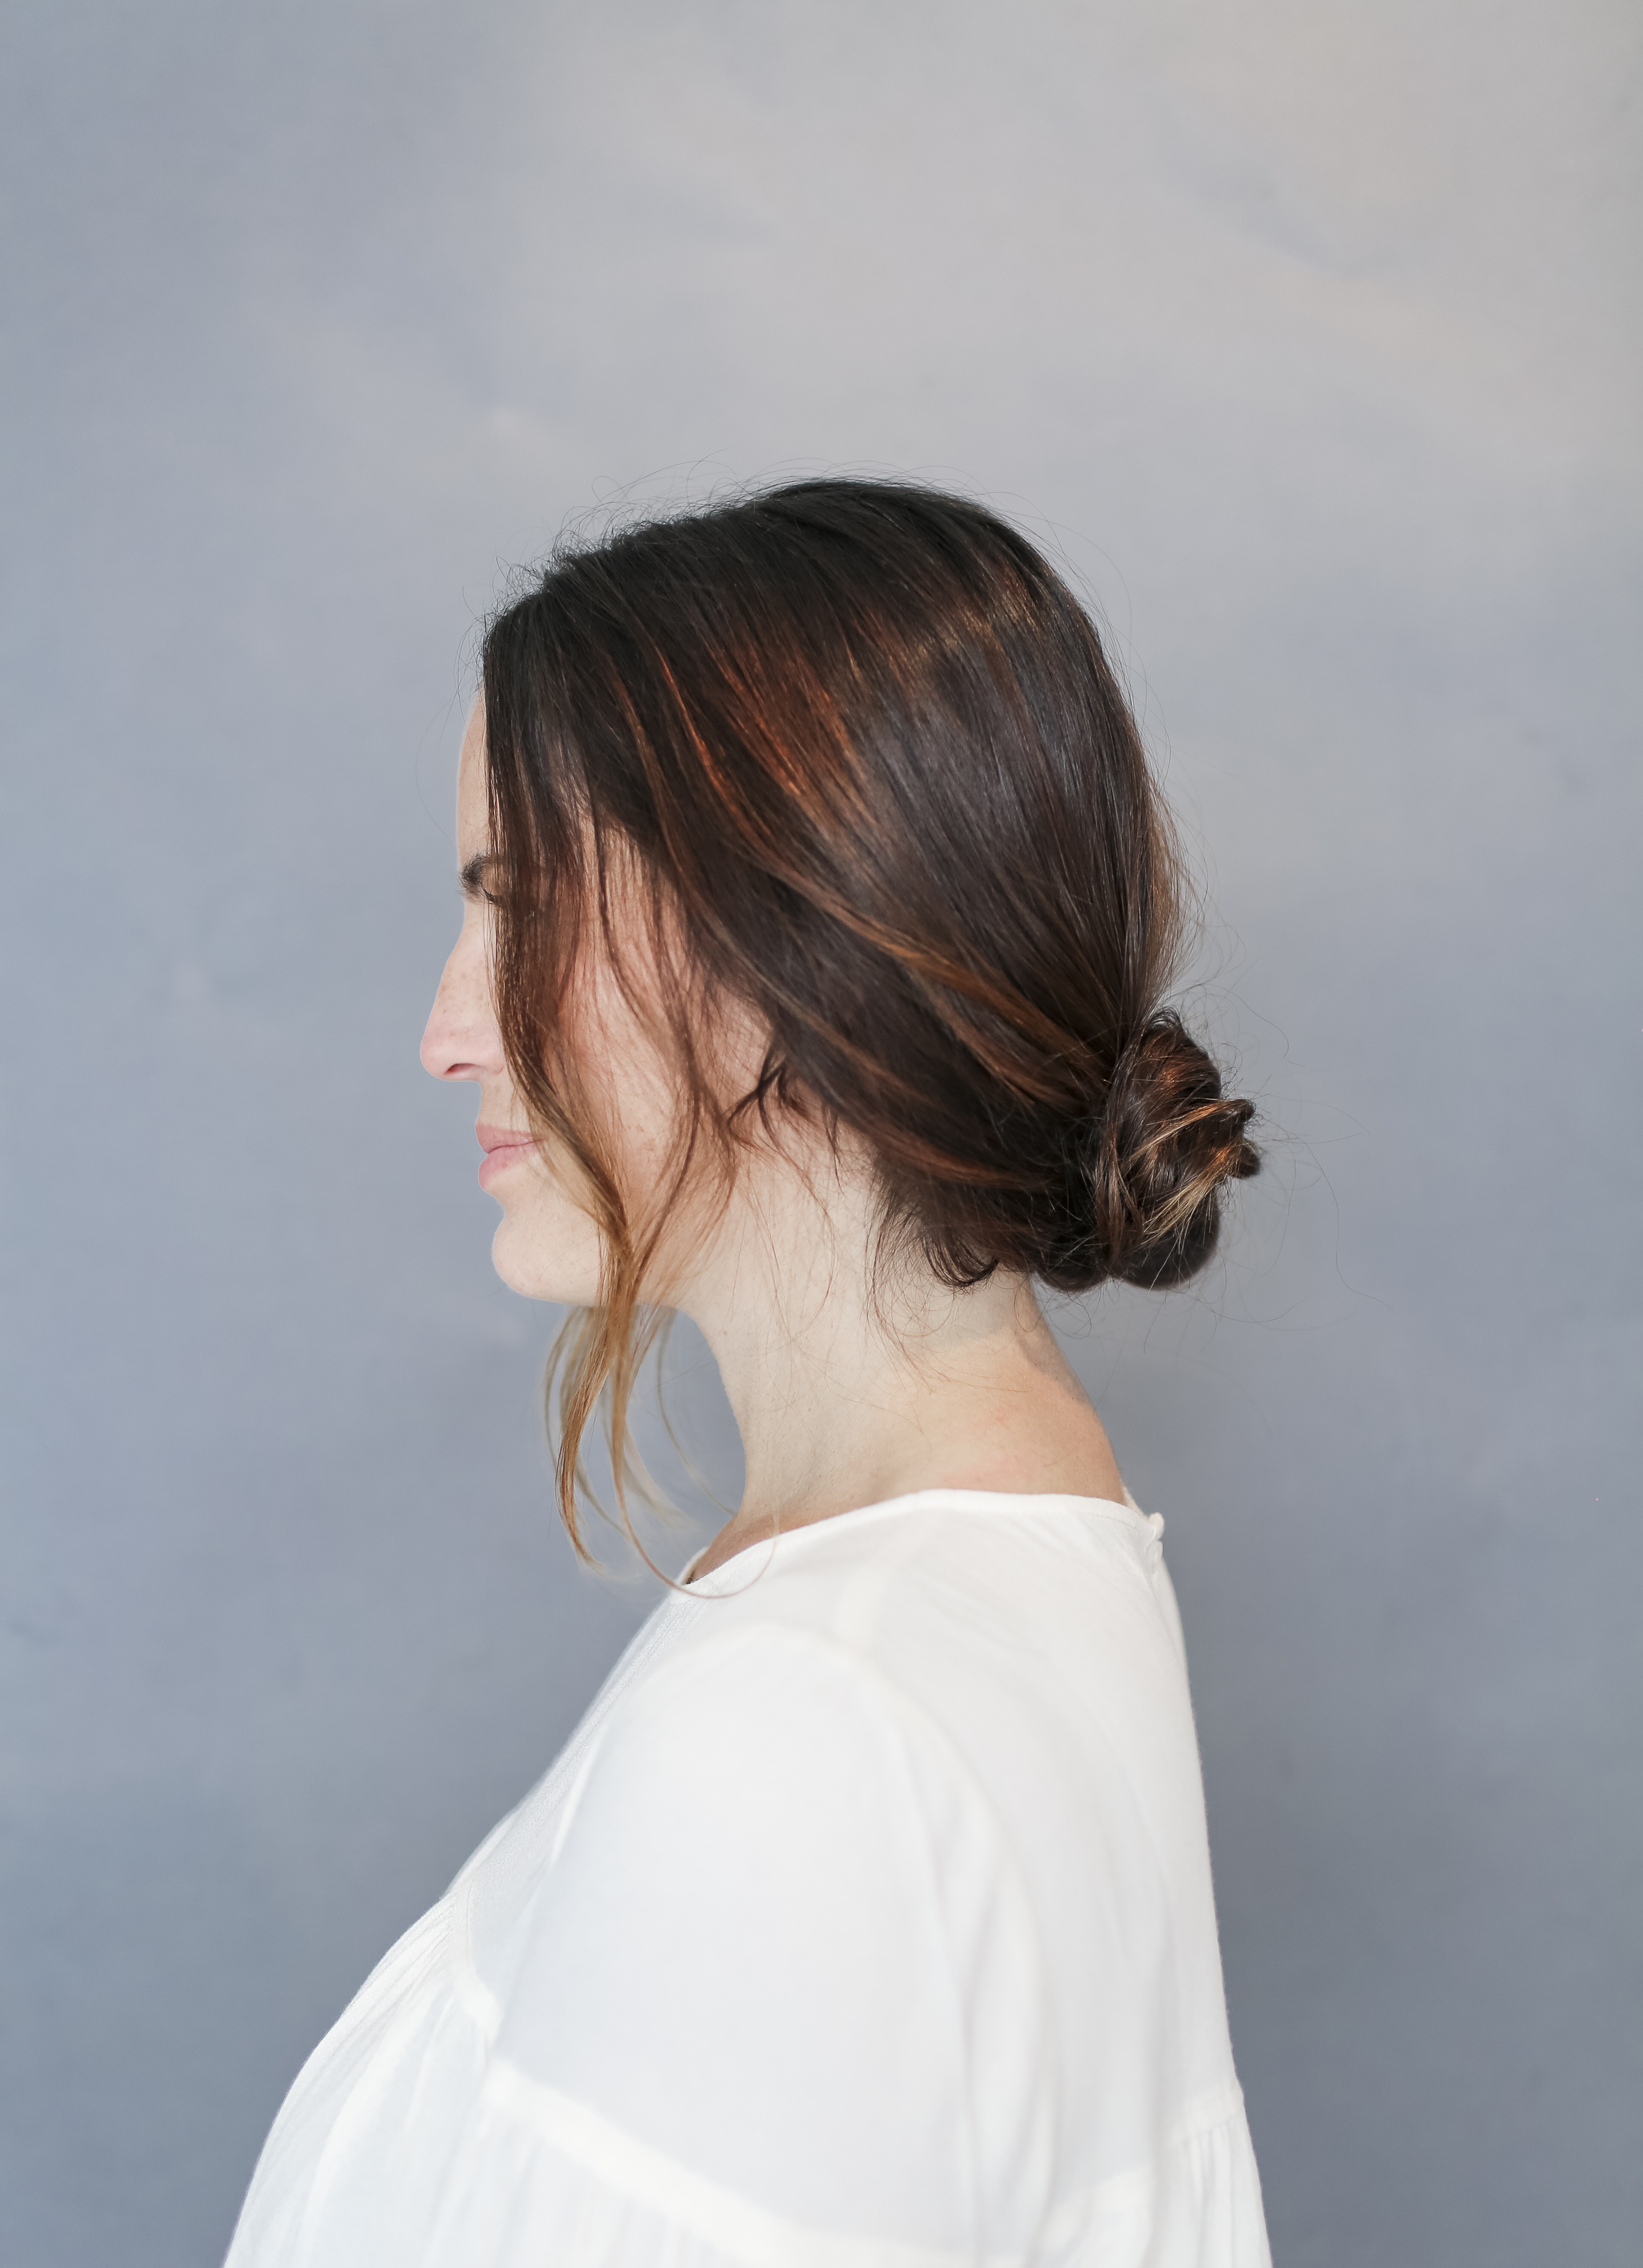
 Make sure to wrap the end of the pony tail up and under the hair and secure with a hair pin, to hide the ends. Spray with finishing spray.

 And there you have it! 4 easy braided looks for you to try at home! Let us know how it goes!! And thank you Erica for being the best teacher!
xx
Jacquelyn