BRAIDHAIRTUTORIAL

Boho Braids- Hair Tutorial

By June 3, 2015 No Comments

We are always looking for fun new ways to style our usual air-dried, no- fuss, beachy locks. A straightener, whats that? :) Let’s admit it…. being a full time working mama, your hair just is the last thing, if at all to get beautified. But when we do have that one minute, if your lucky two minutes, the braid is our go to style. The cool thing about braids is that it goes with any style you are going for that day. So jump out of bed, and try out these three fun boho braids!

We met up with our favorite lady Erica, owner of 1011 Makeup, to show us some easy boho braids that anyone can do.

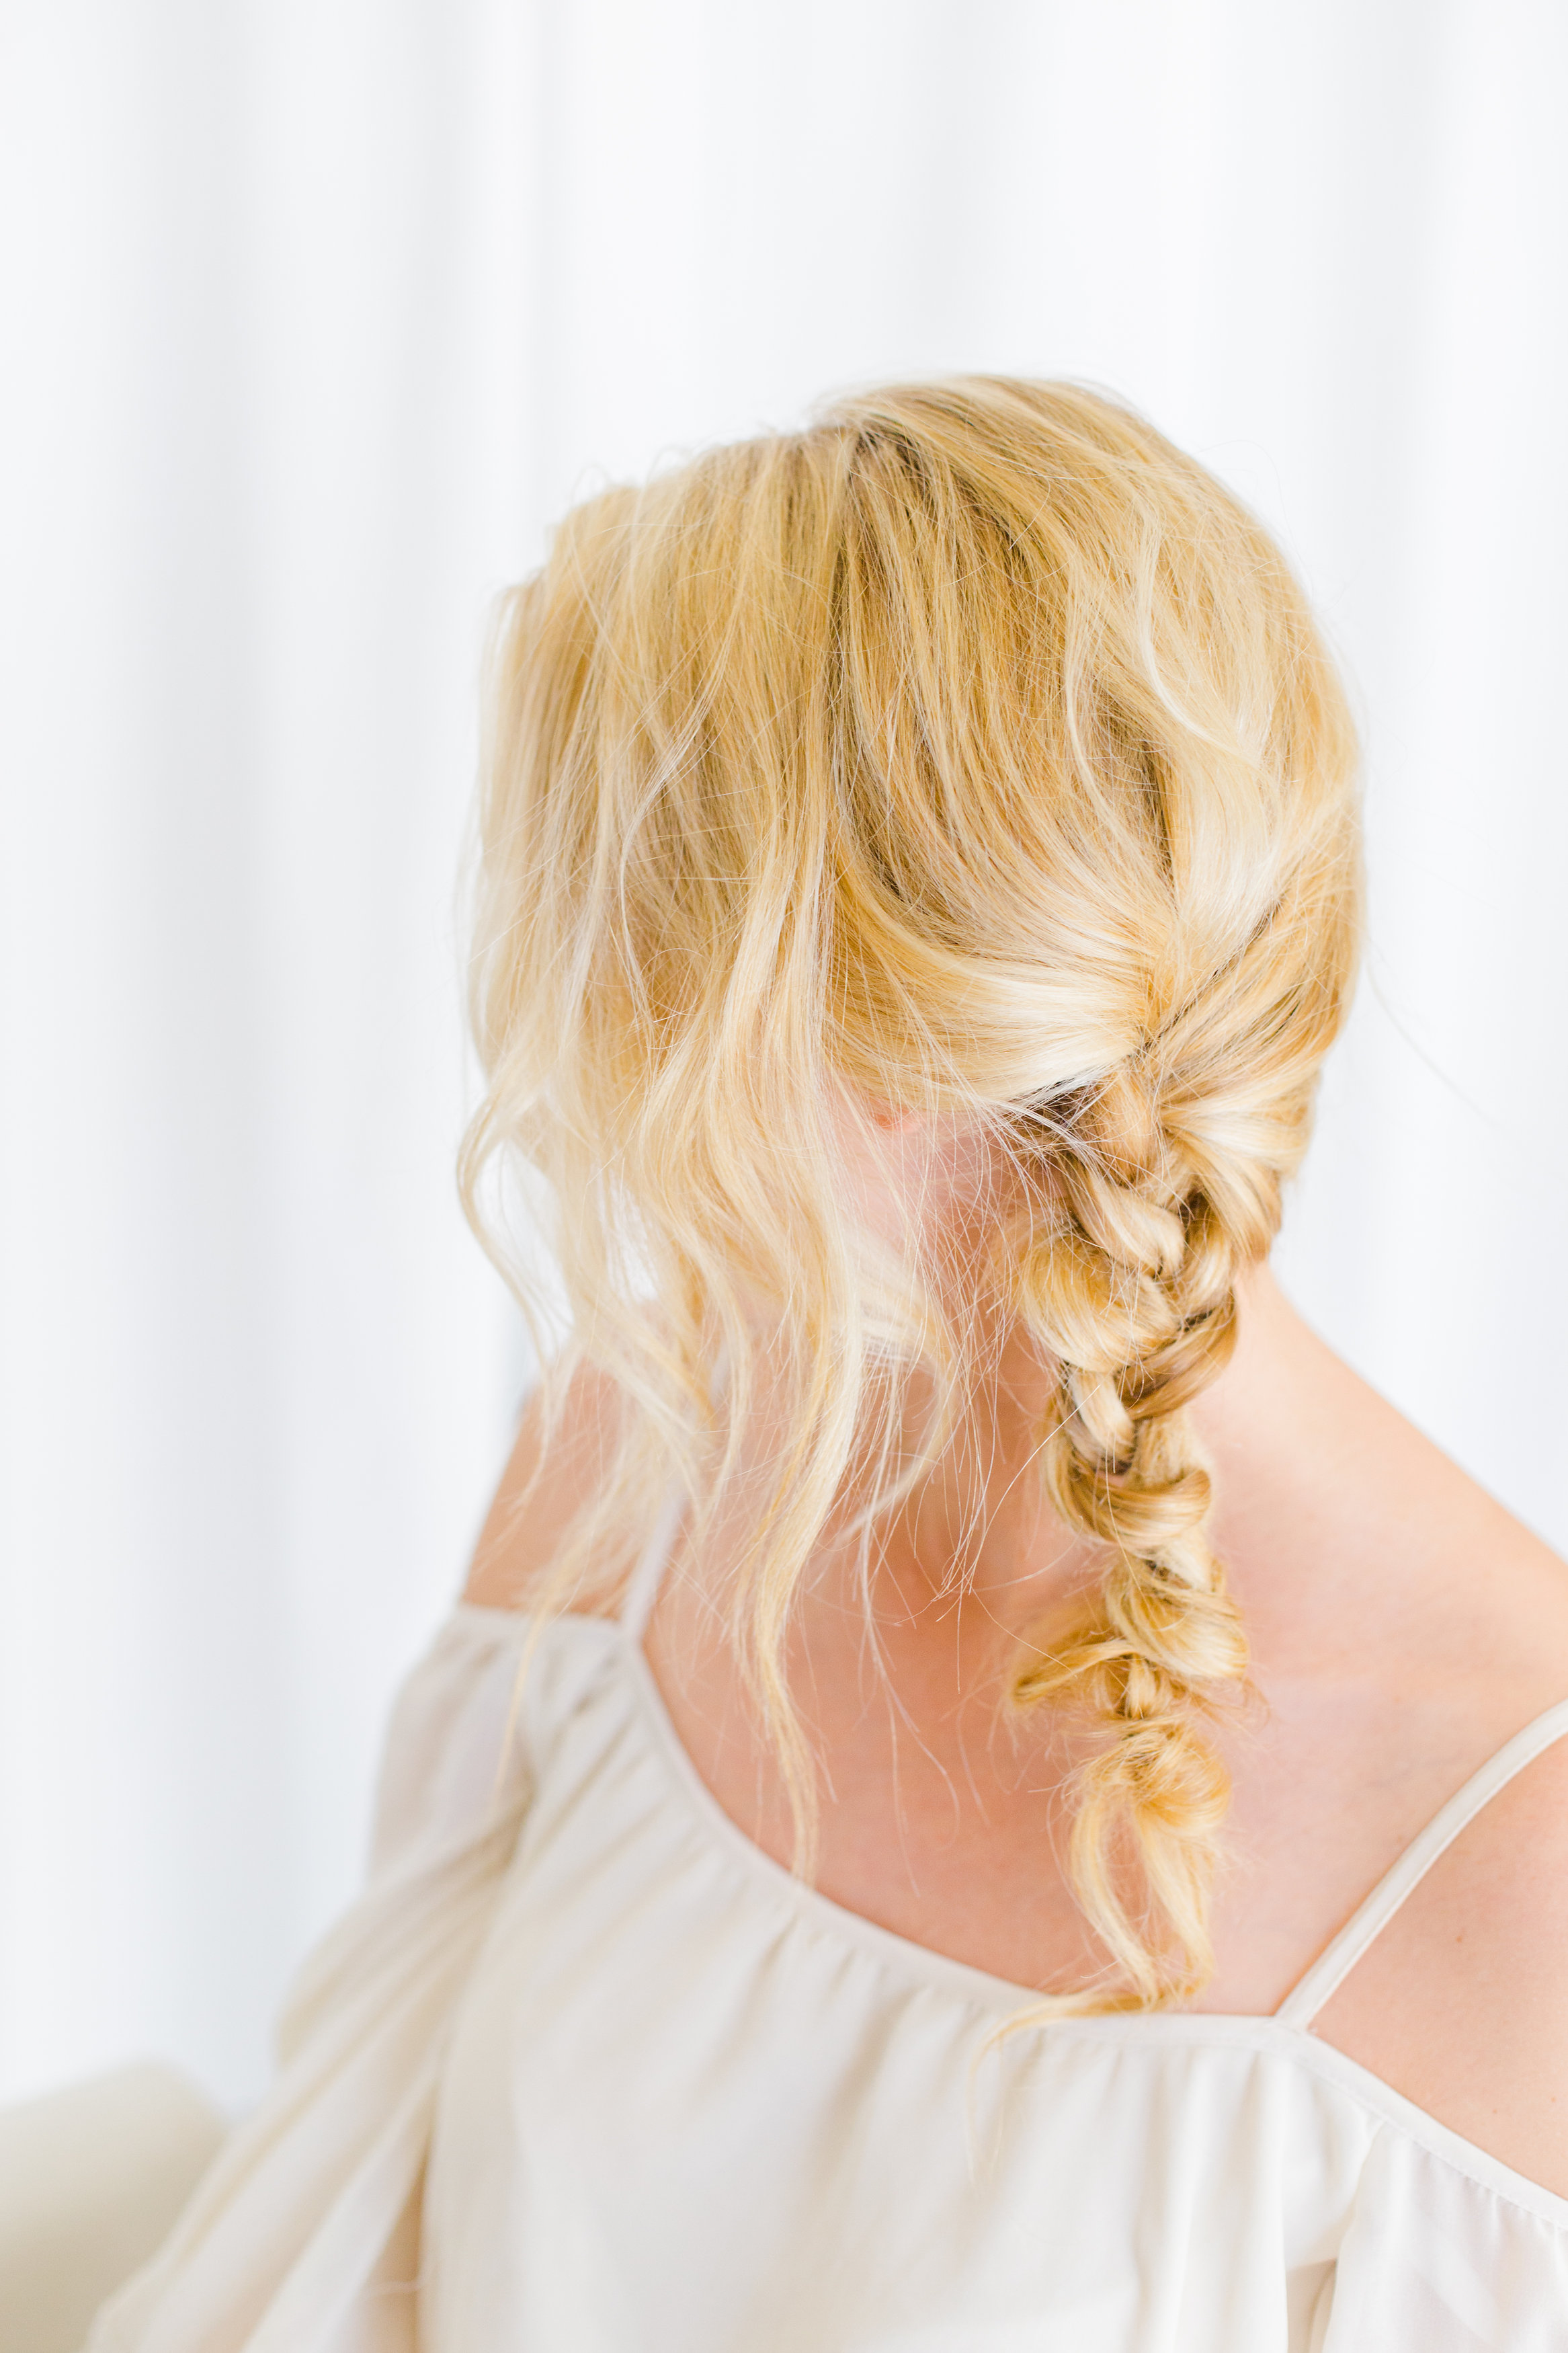
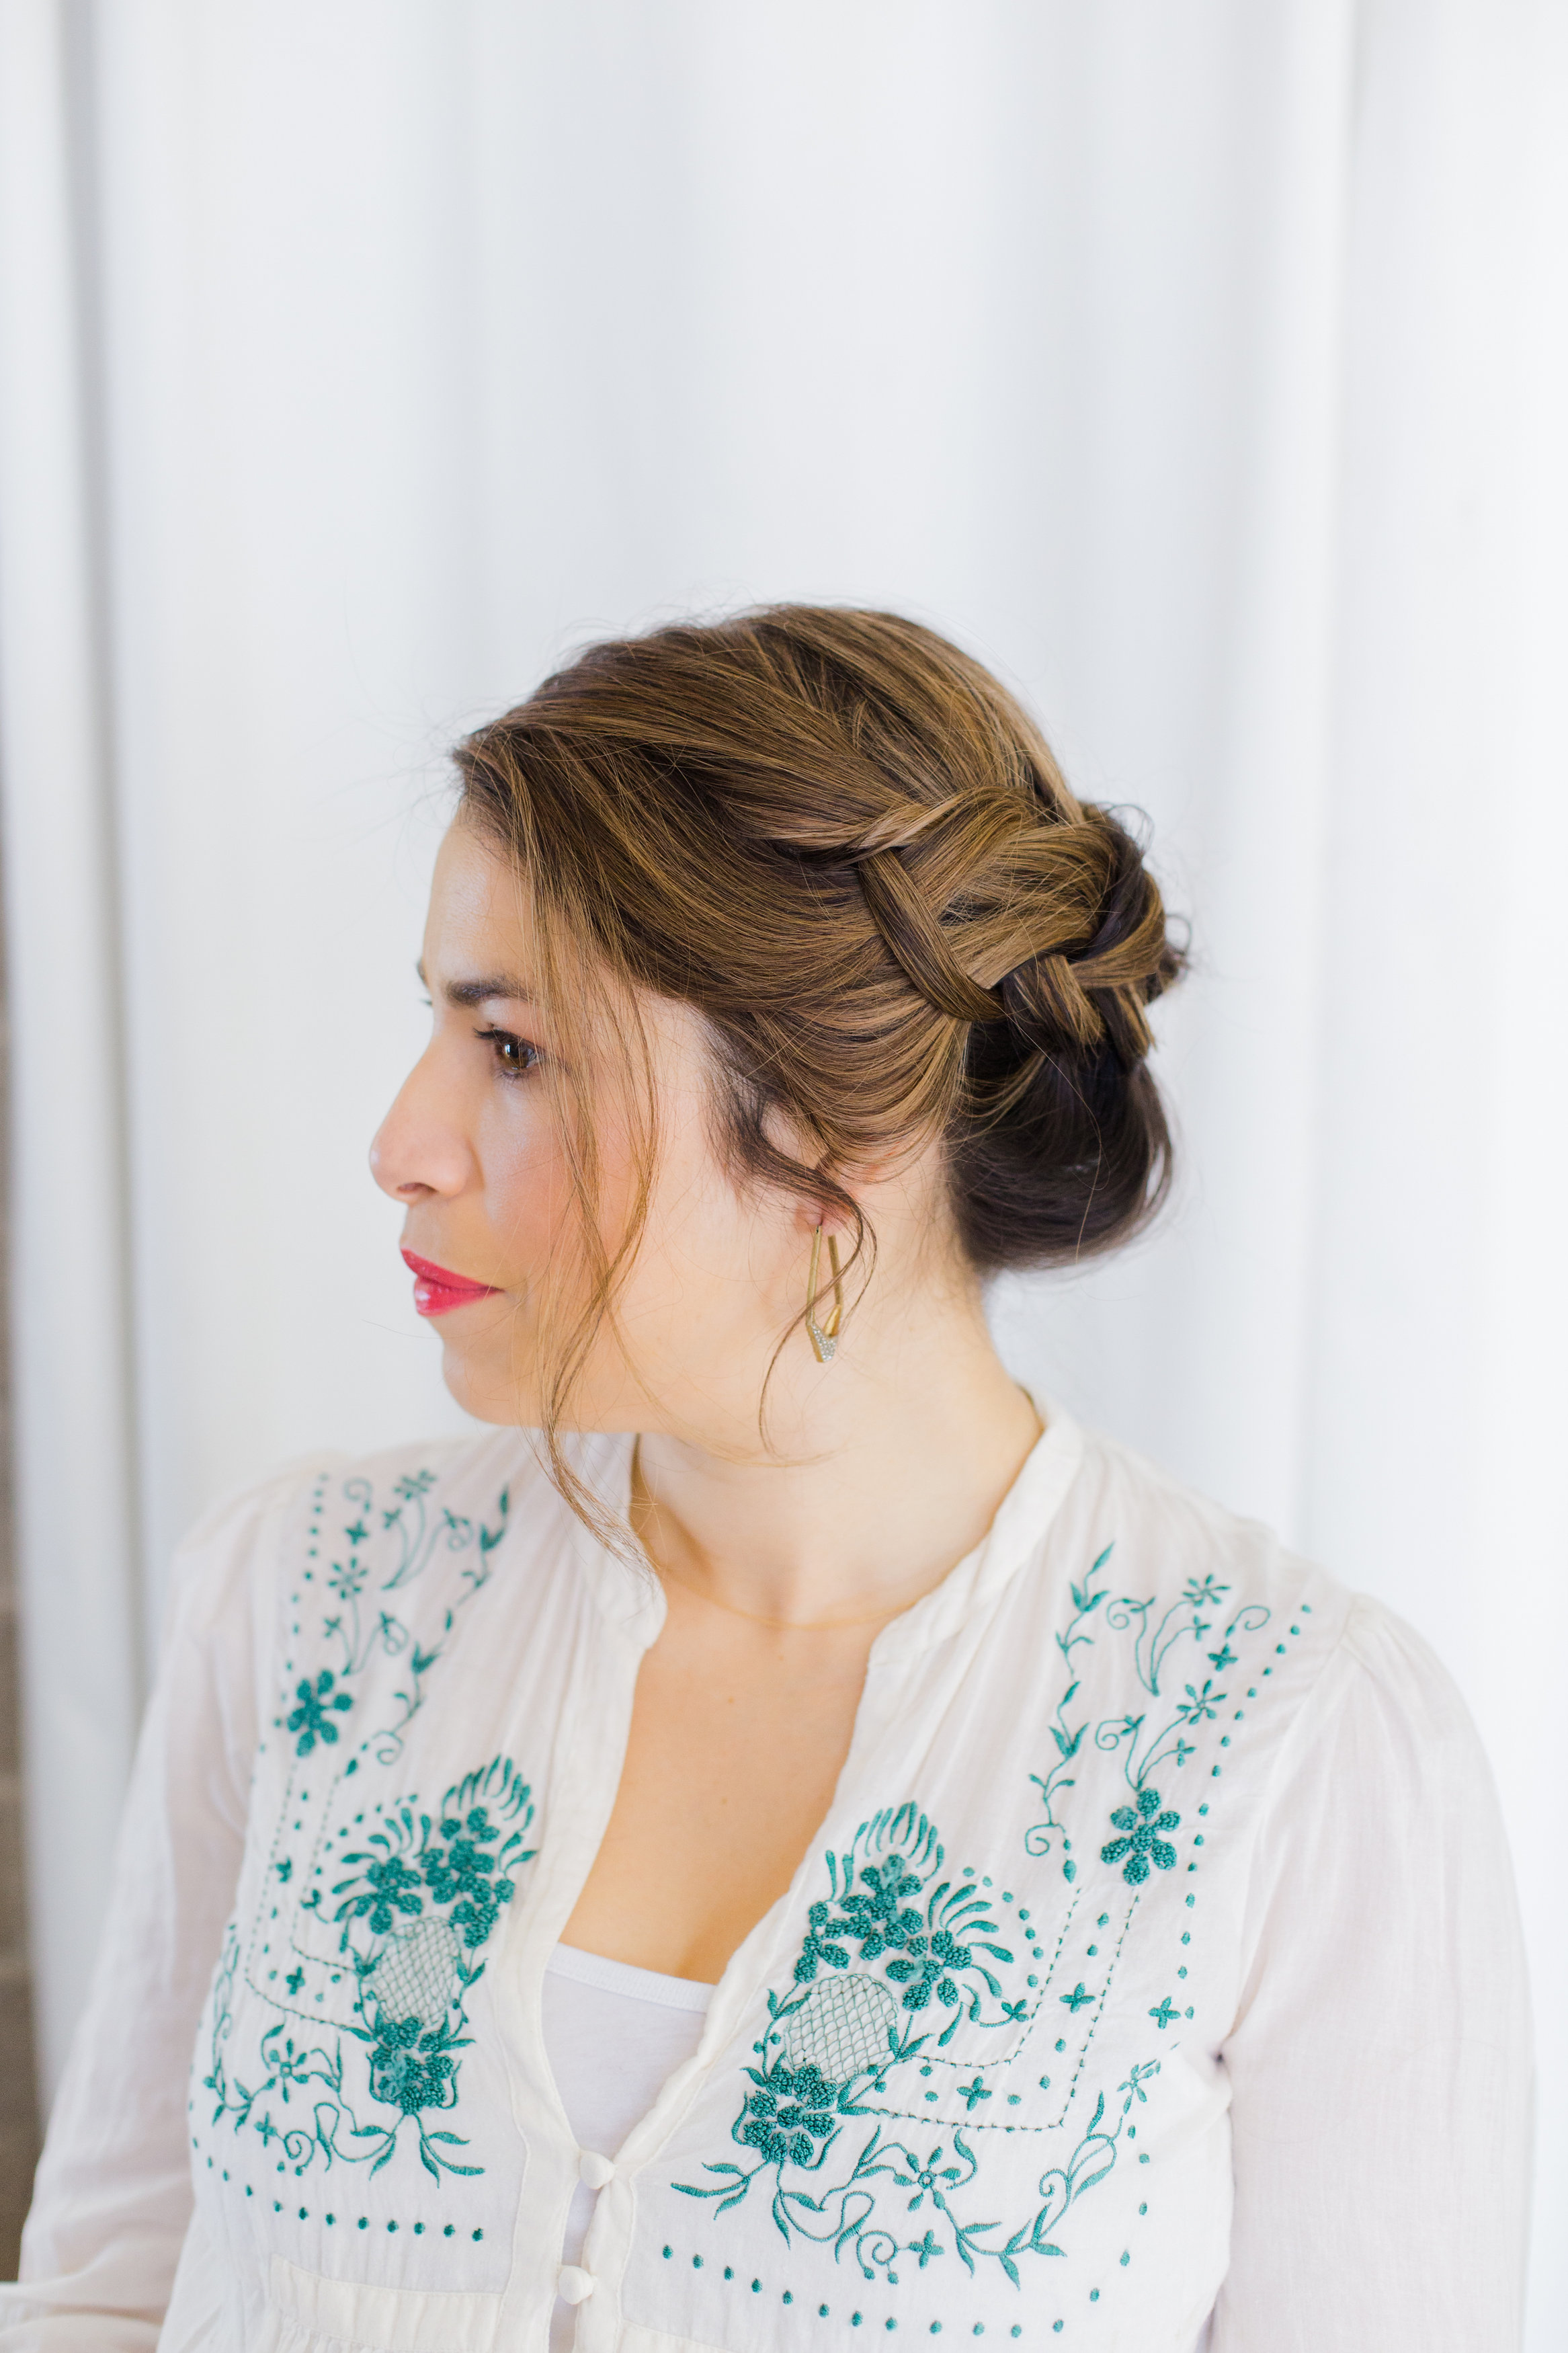
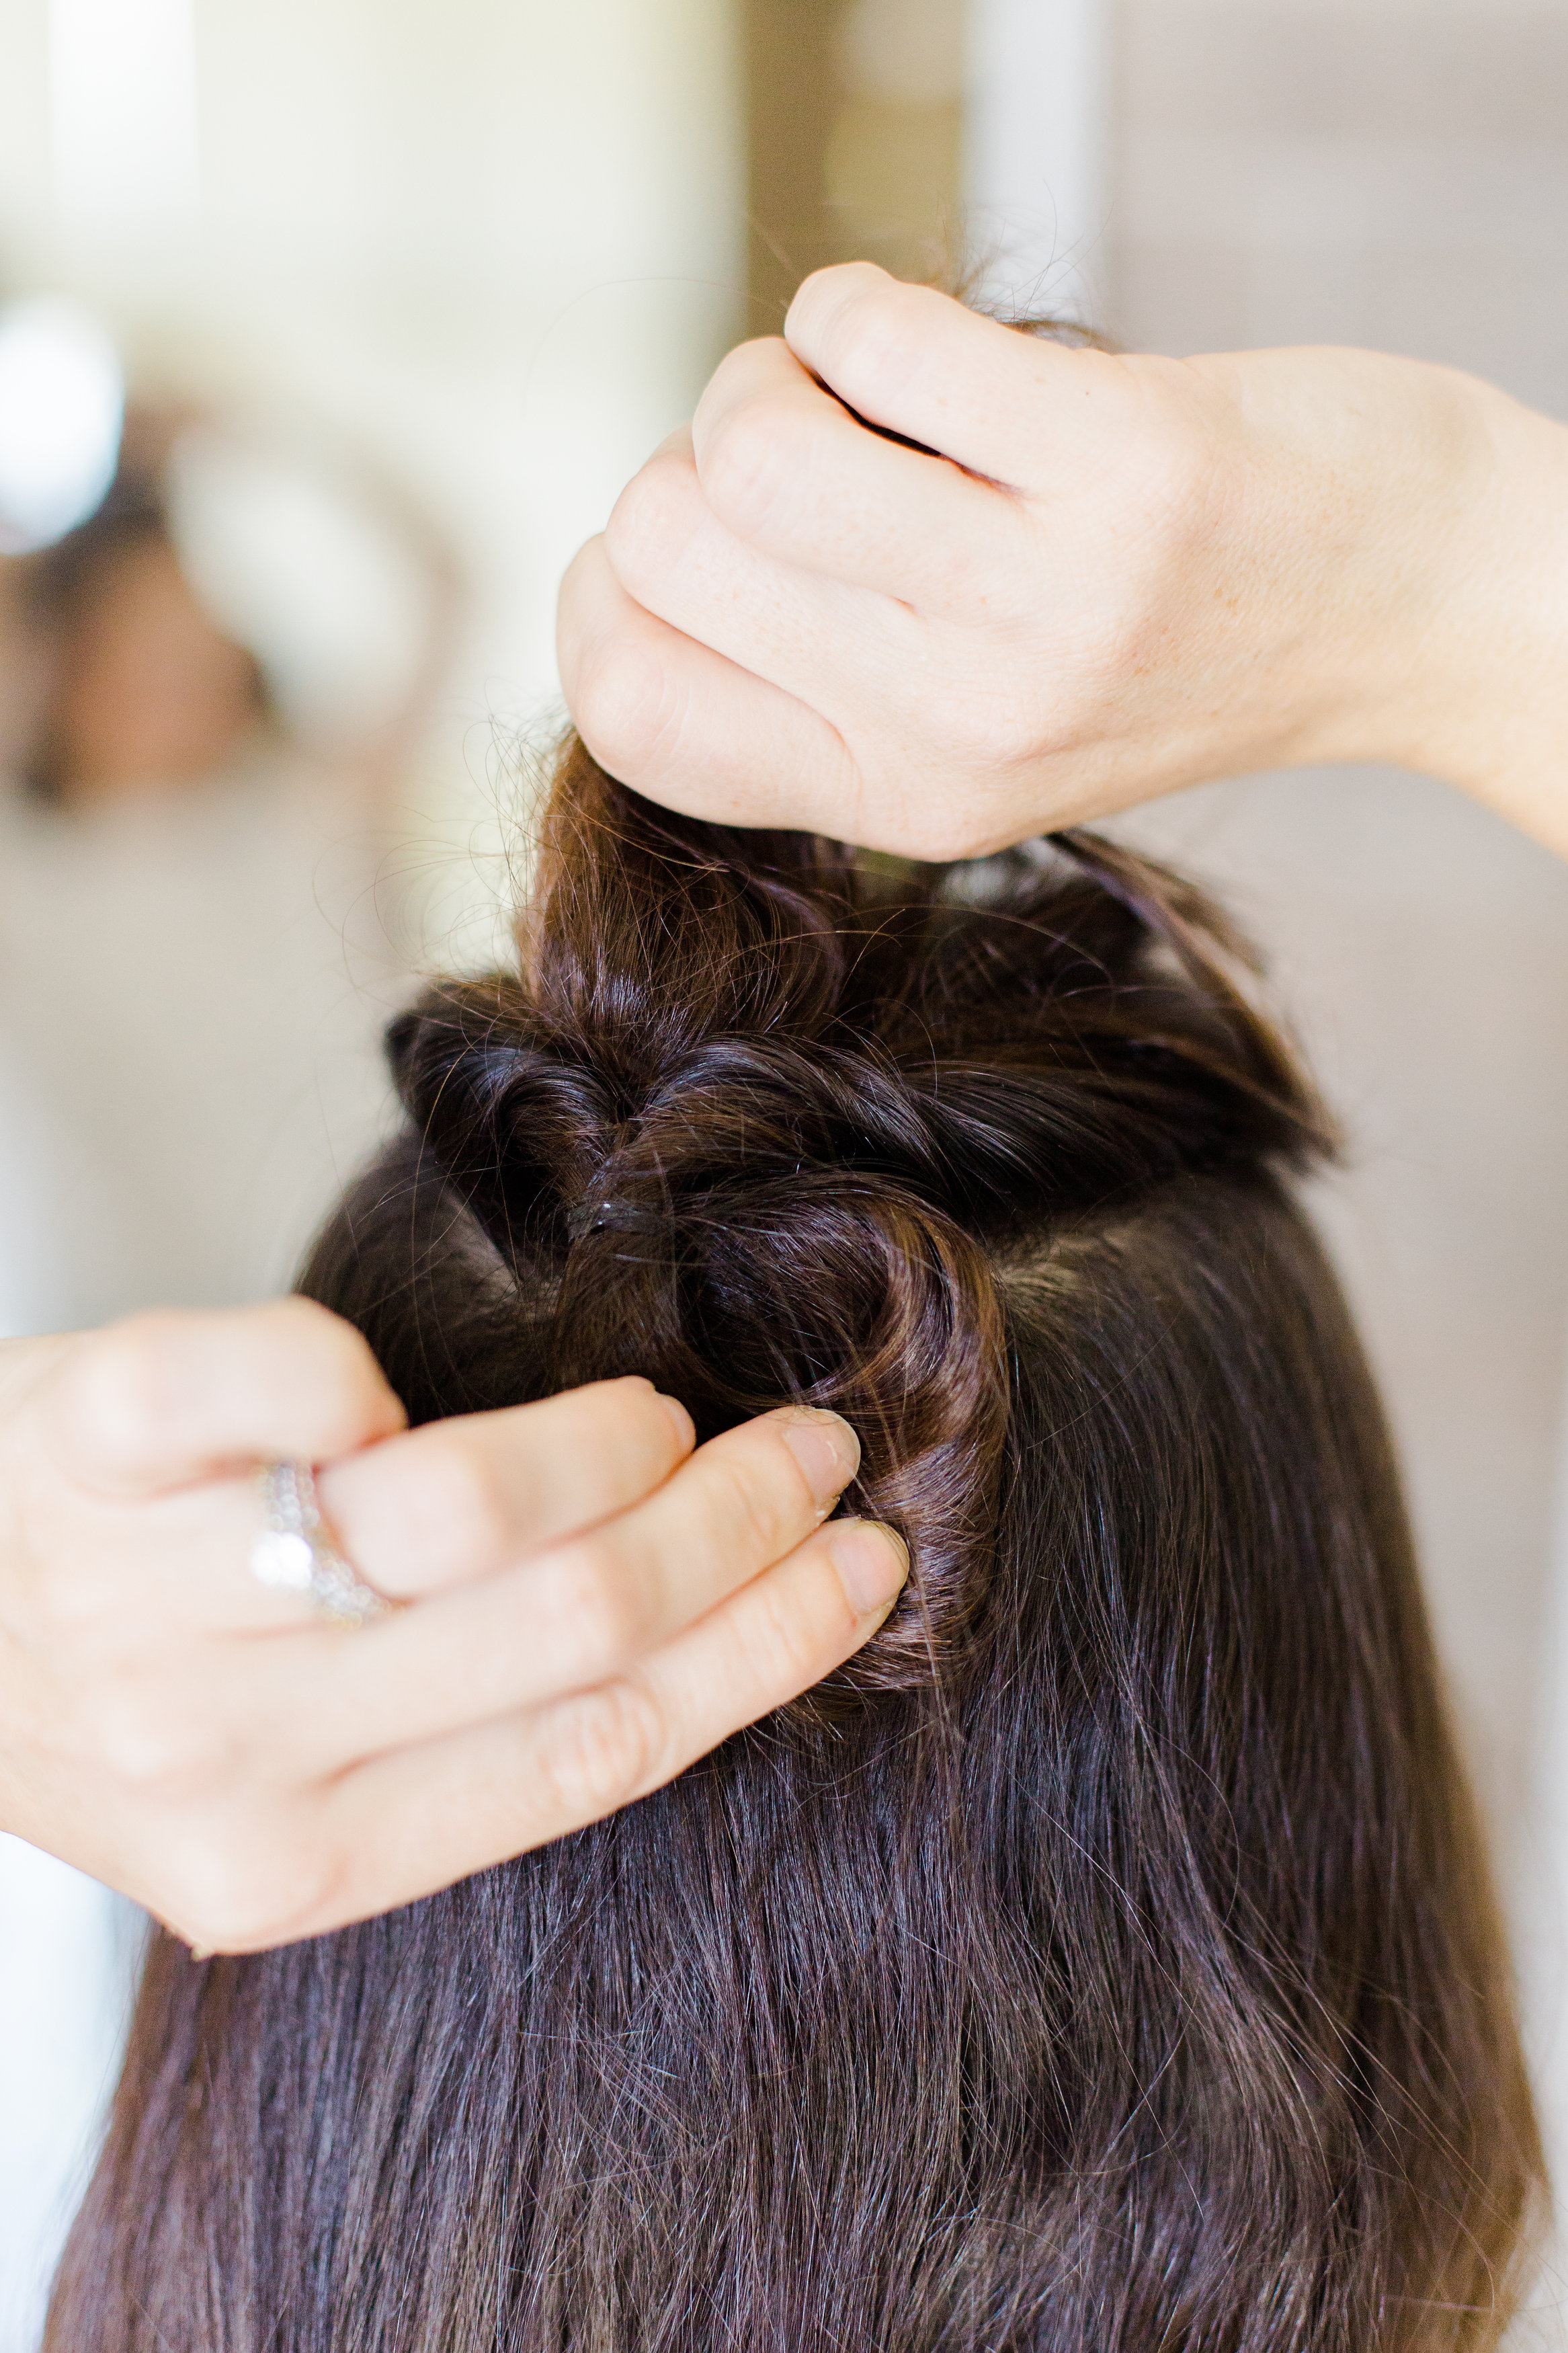
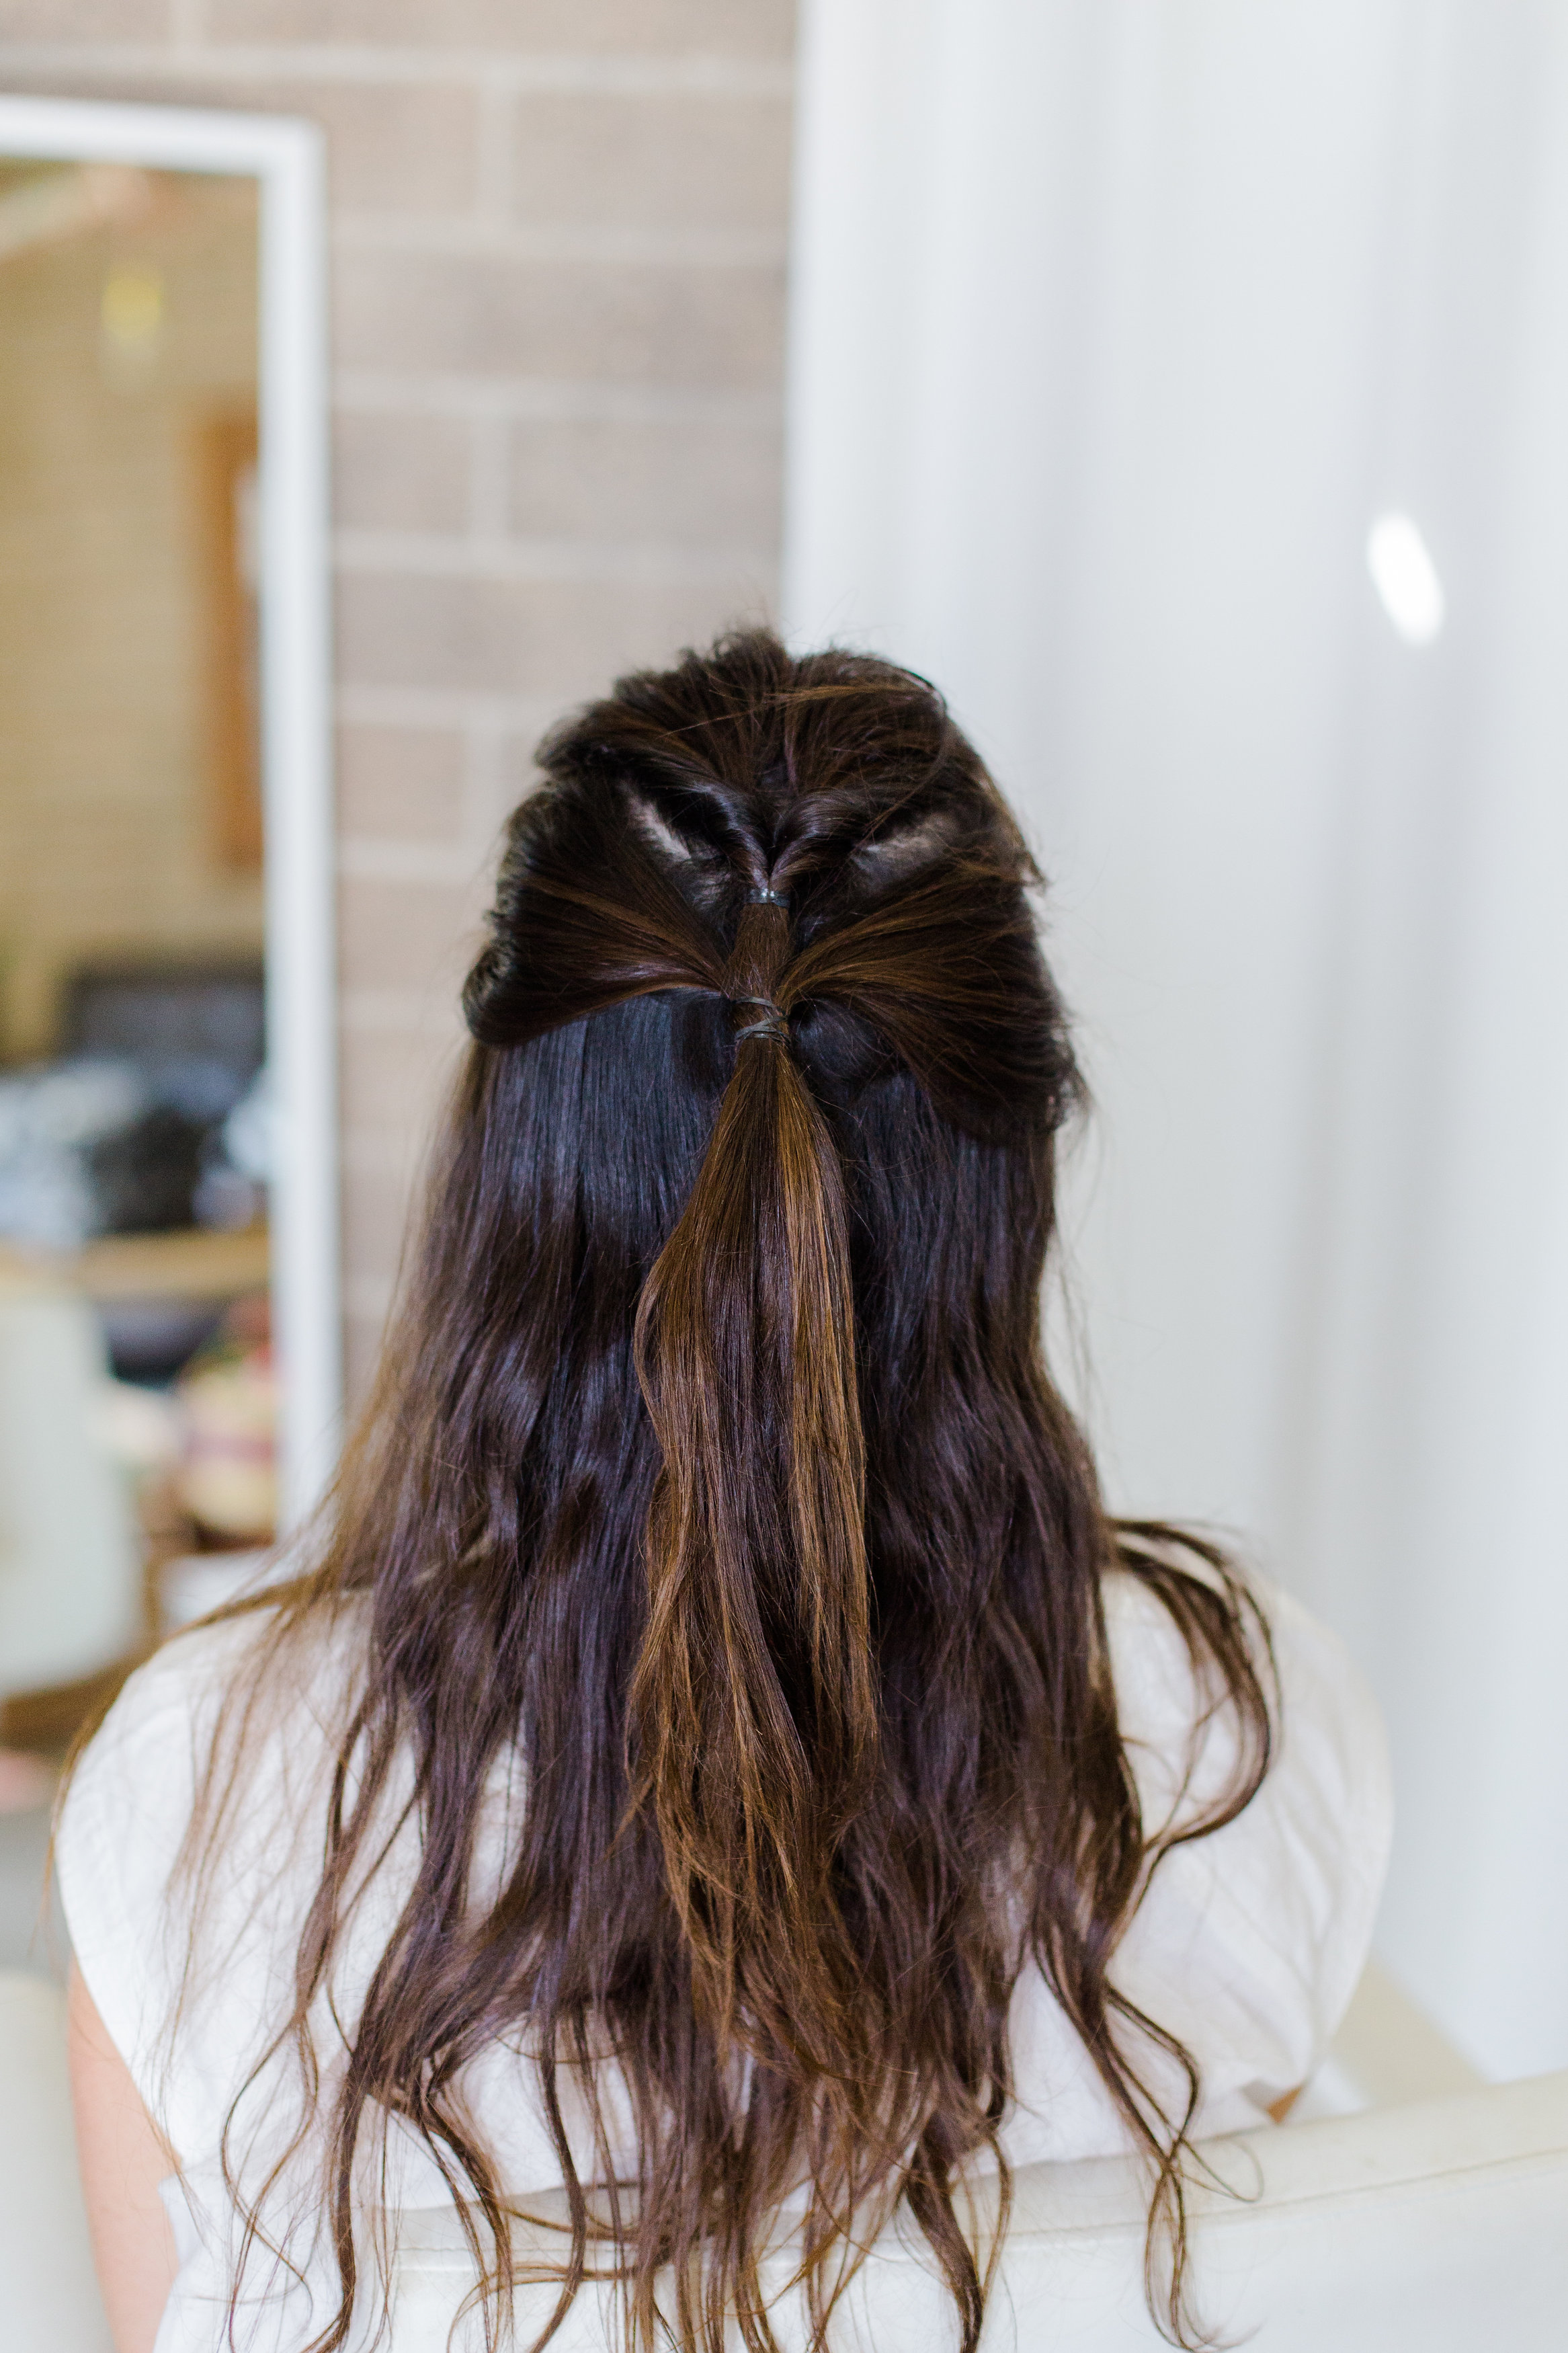
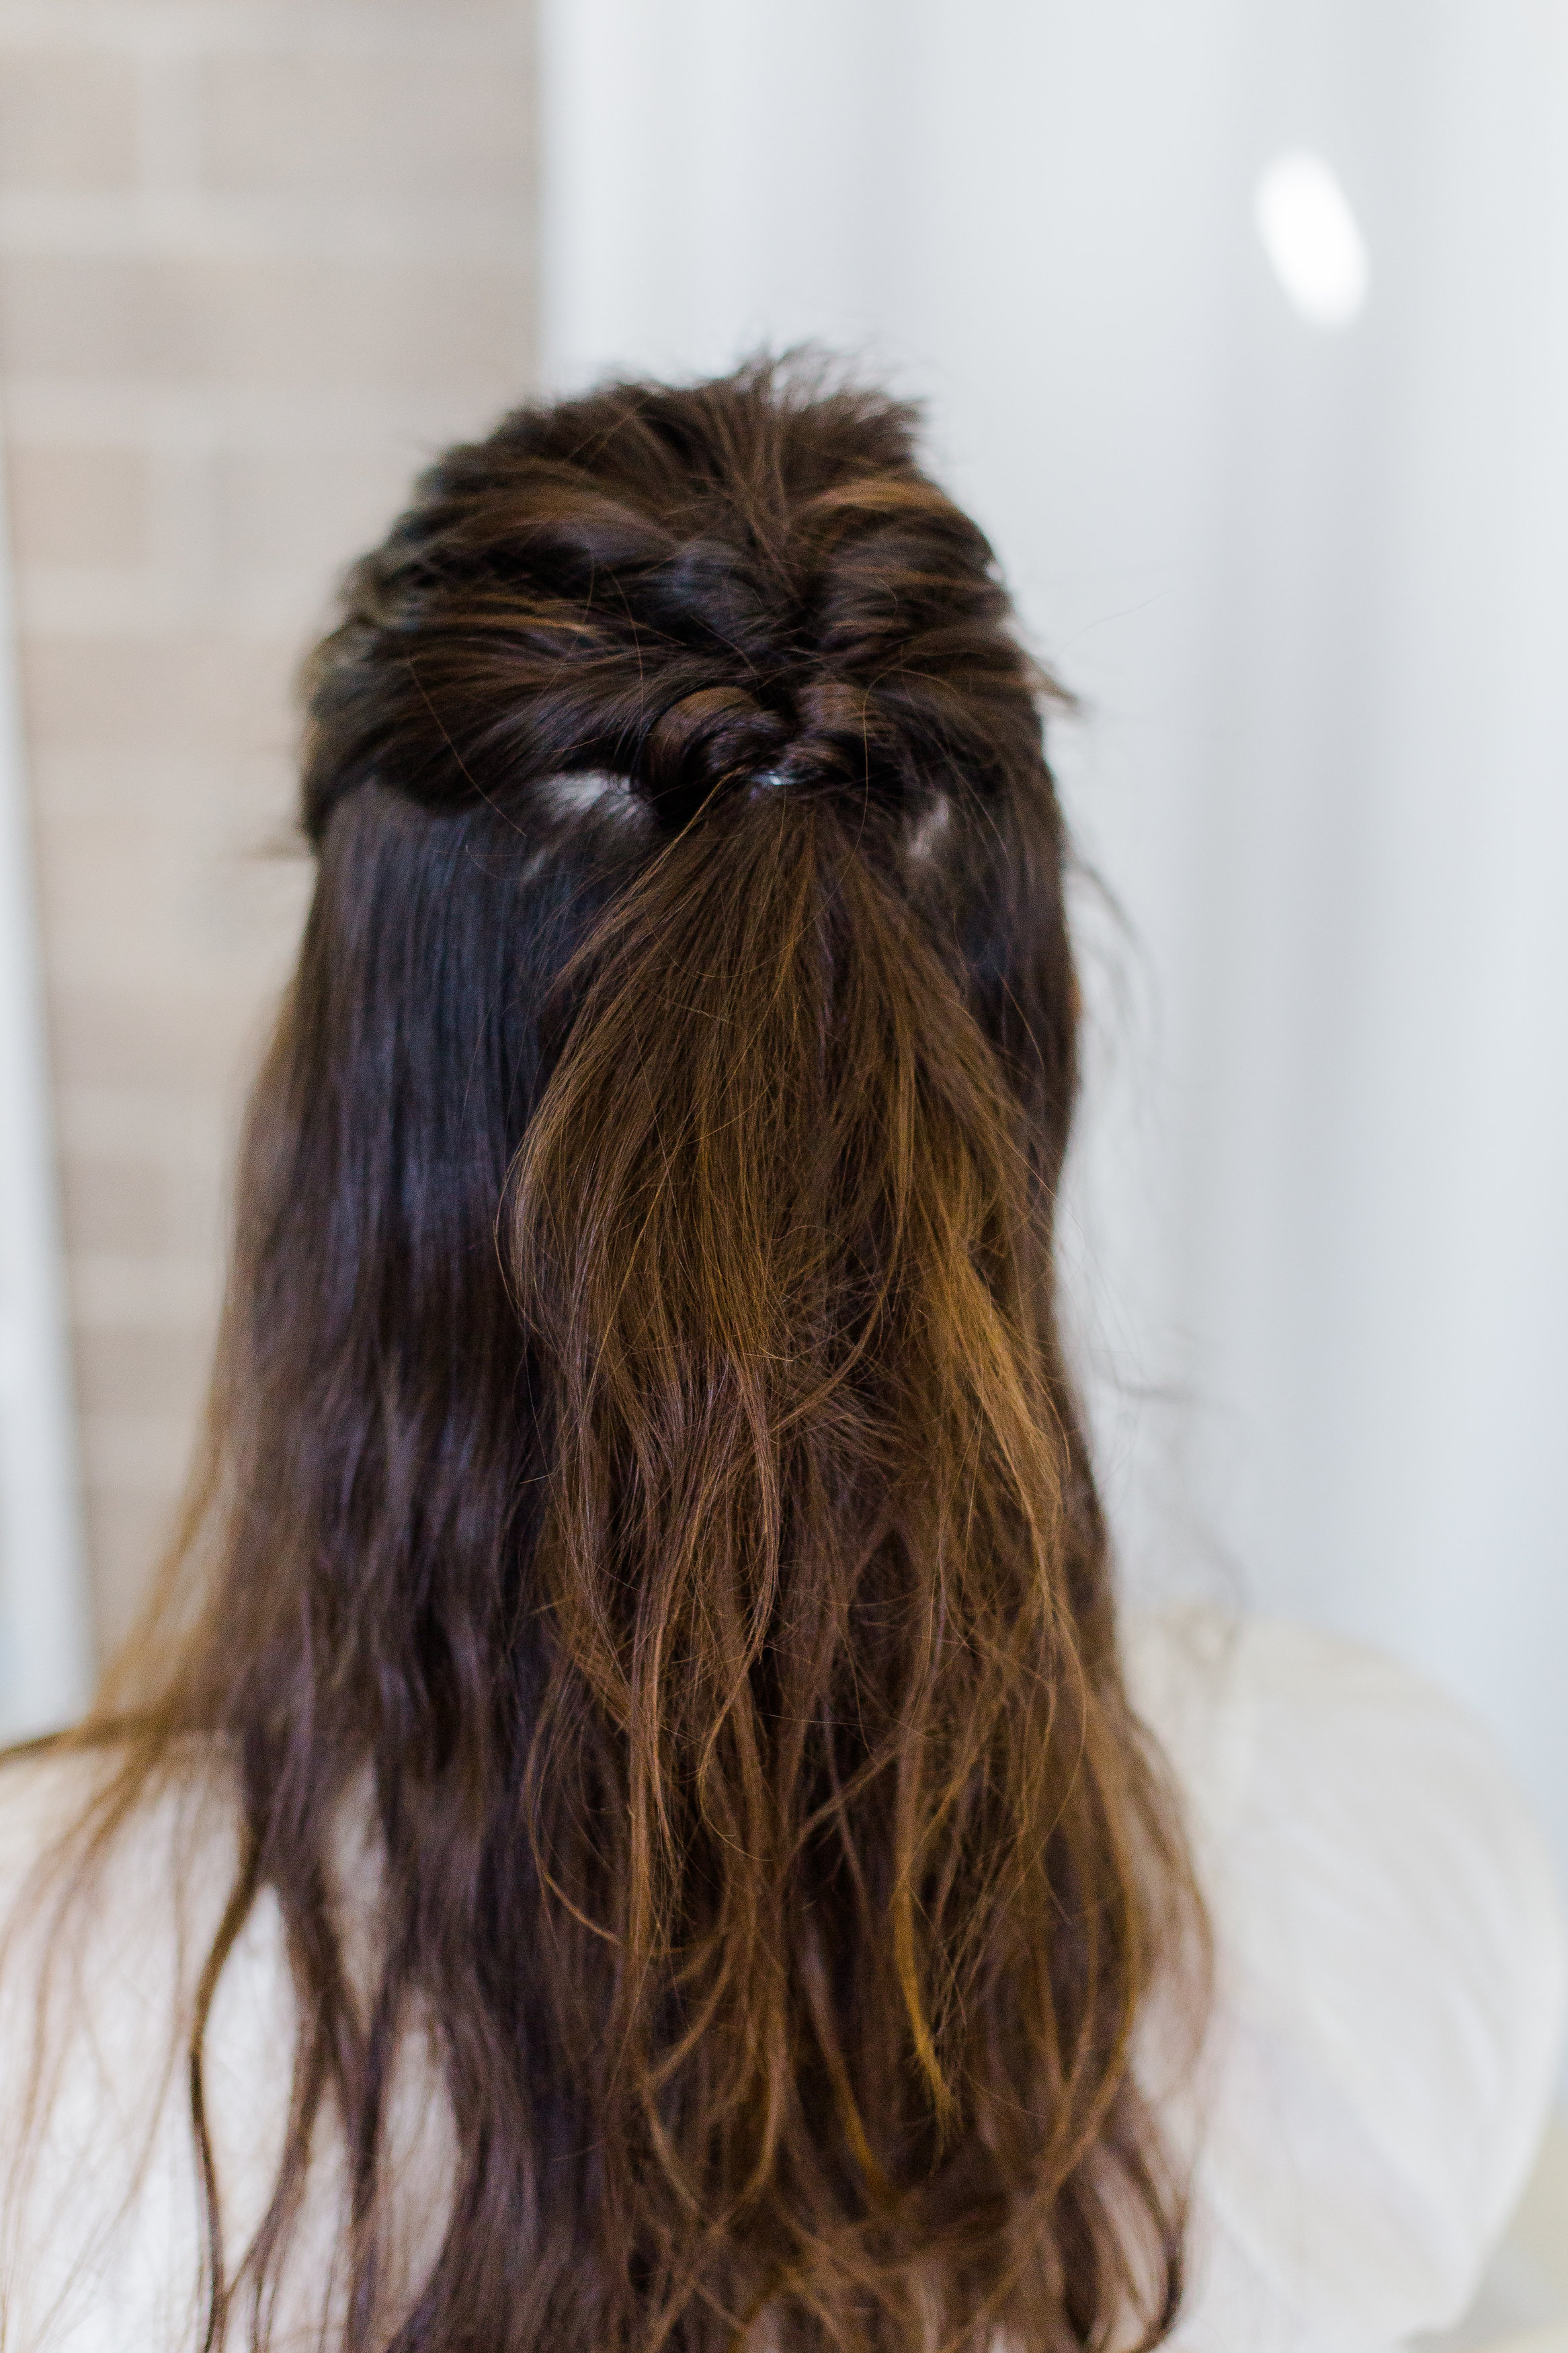
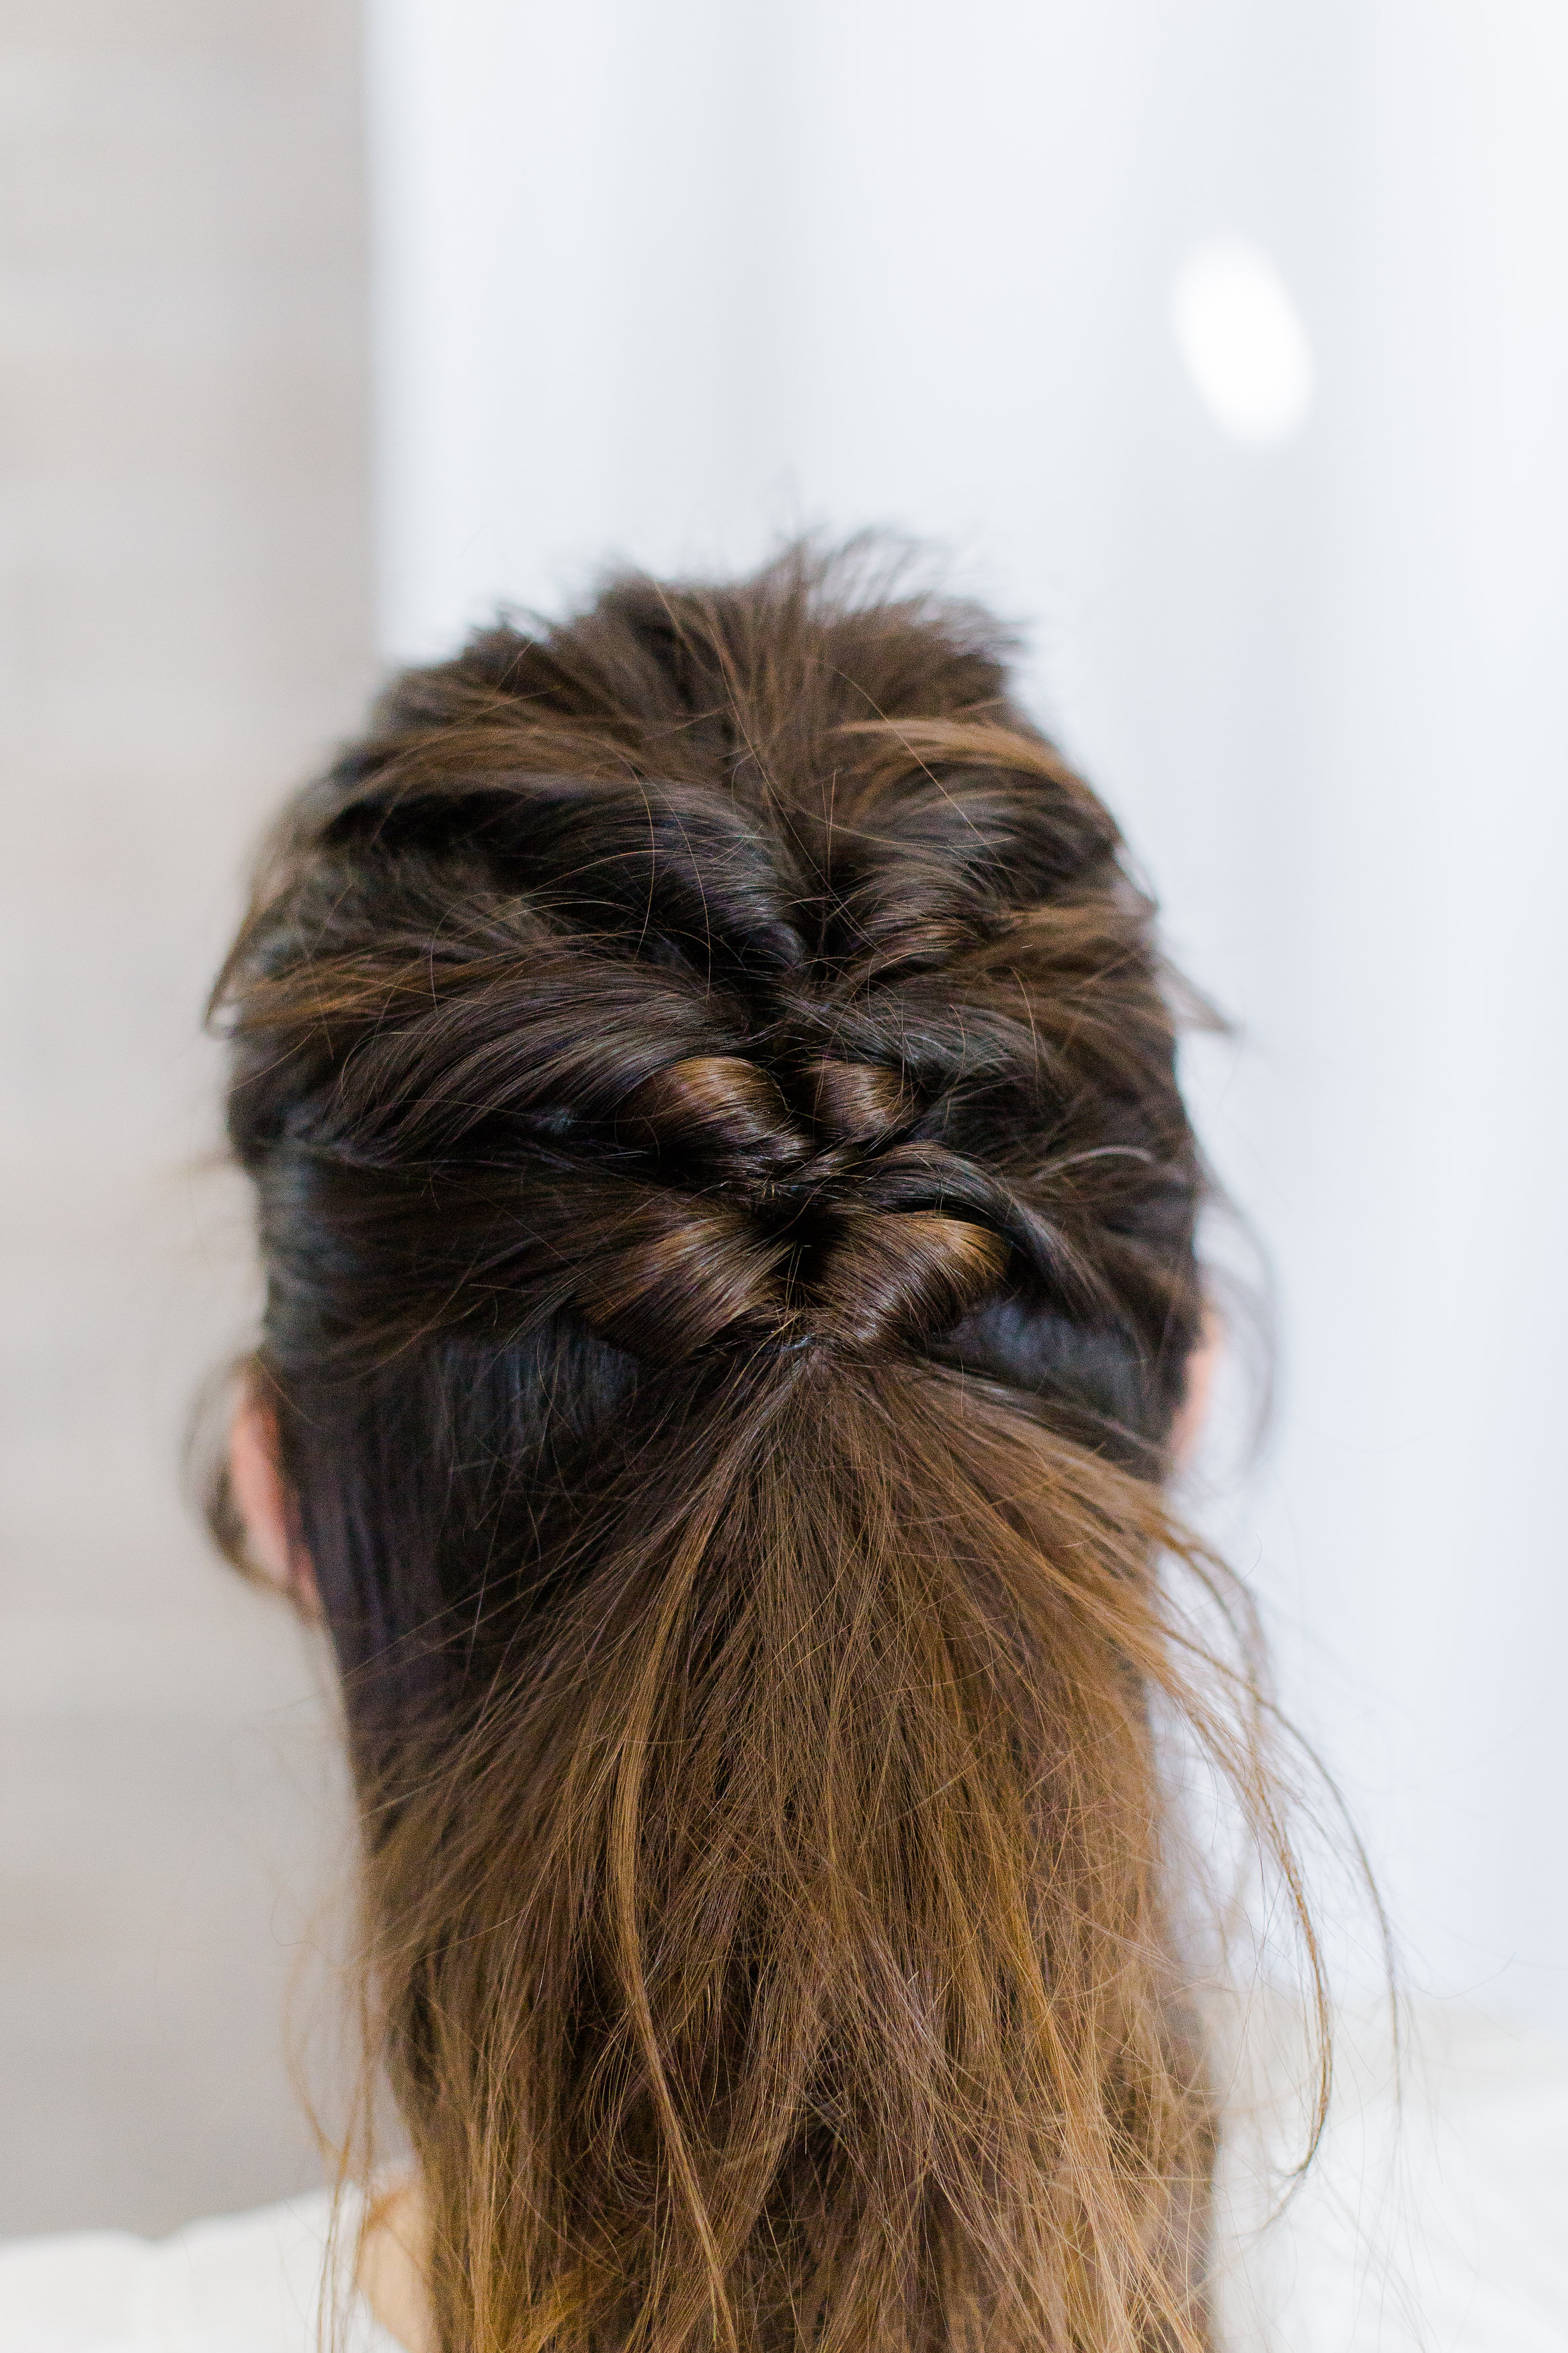
The 1st braid is the Topsy Tailed Braid, which we love for any occasion. This sassy firecracker wears this braid perfectly.

thisgirlnicole_beijosevents-206

 Jacquelyn started off by gathering hair where she would like your style to begin, then takes a horizontal section of hair and secures with a hair tie (making a small pony tail). Gently pull the secured tie away from your head, leaving a little room to part the hair between the rubber band and the scalp.
thisgirlnicole_beijosevents-176
Once the hair is parted, flip the hair in the pony tail up and over the hair tie, through and down the parted hair, and pull the hair tight to secure creating a “topsy tail”.
thisgirlnicole_beijosevents-177
thisgirlnicole_beijosevents-181
Gather your next horizontal section (making these as large or small as you desire… larger sections will result with less topsy tails than smaller sections) include the ponytail hair from the previous topsy tailed section and repeat the previous steps. The tighter and smaller you make each section will result in your style looking more or less like a “braid”.
thisgirlnicole_beijosevents-183 thisgirlnicole_beijosevents-185
Once you have your style to the desired look, secure with a hair tie and wrap the end of the hair tie with hair to cover with hair, securing with a hair pin. We love that Erica showed us to tease the ends of the braid for that boho touch. Spray with a finishing spray.
thisgirlnicole_beijosevents-205

 Thanks Jacq!

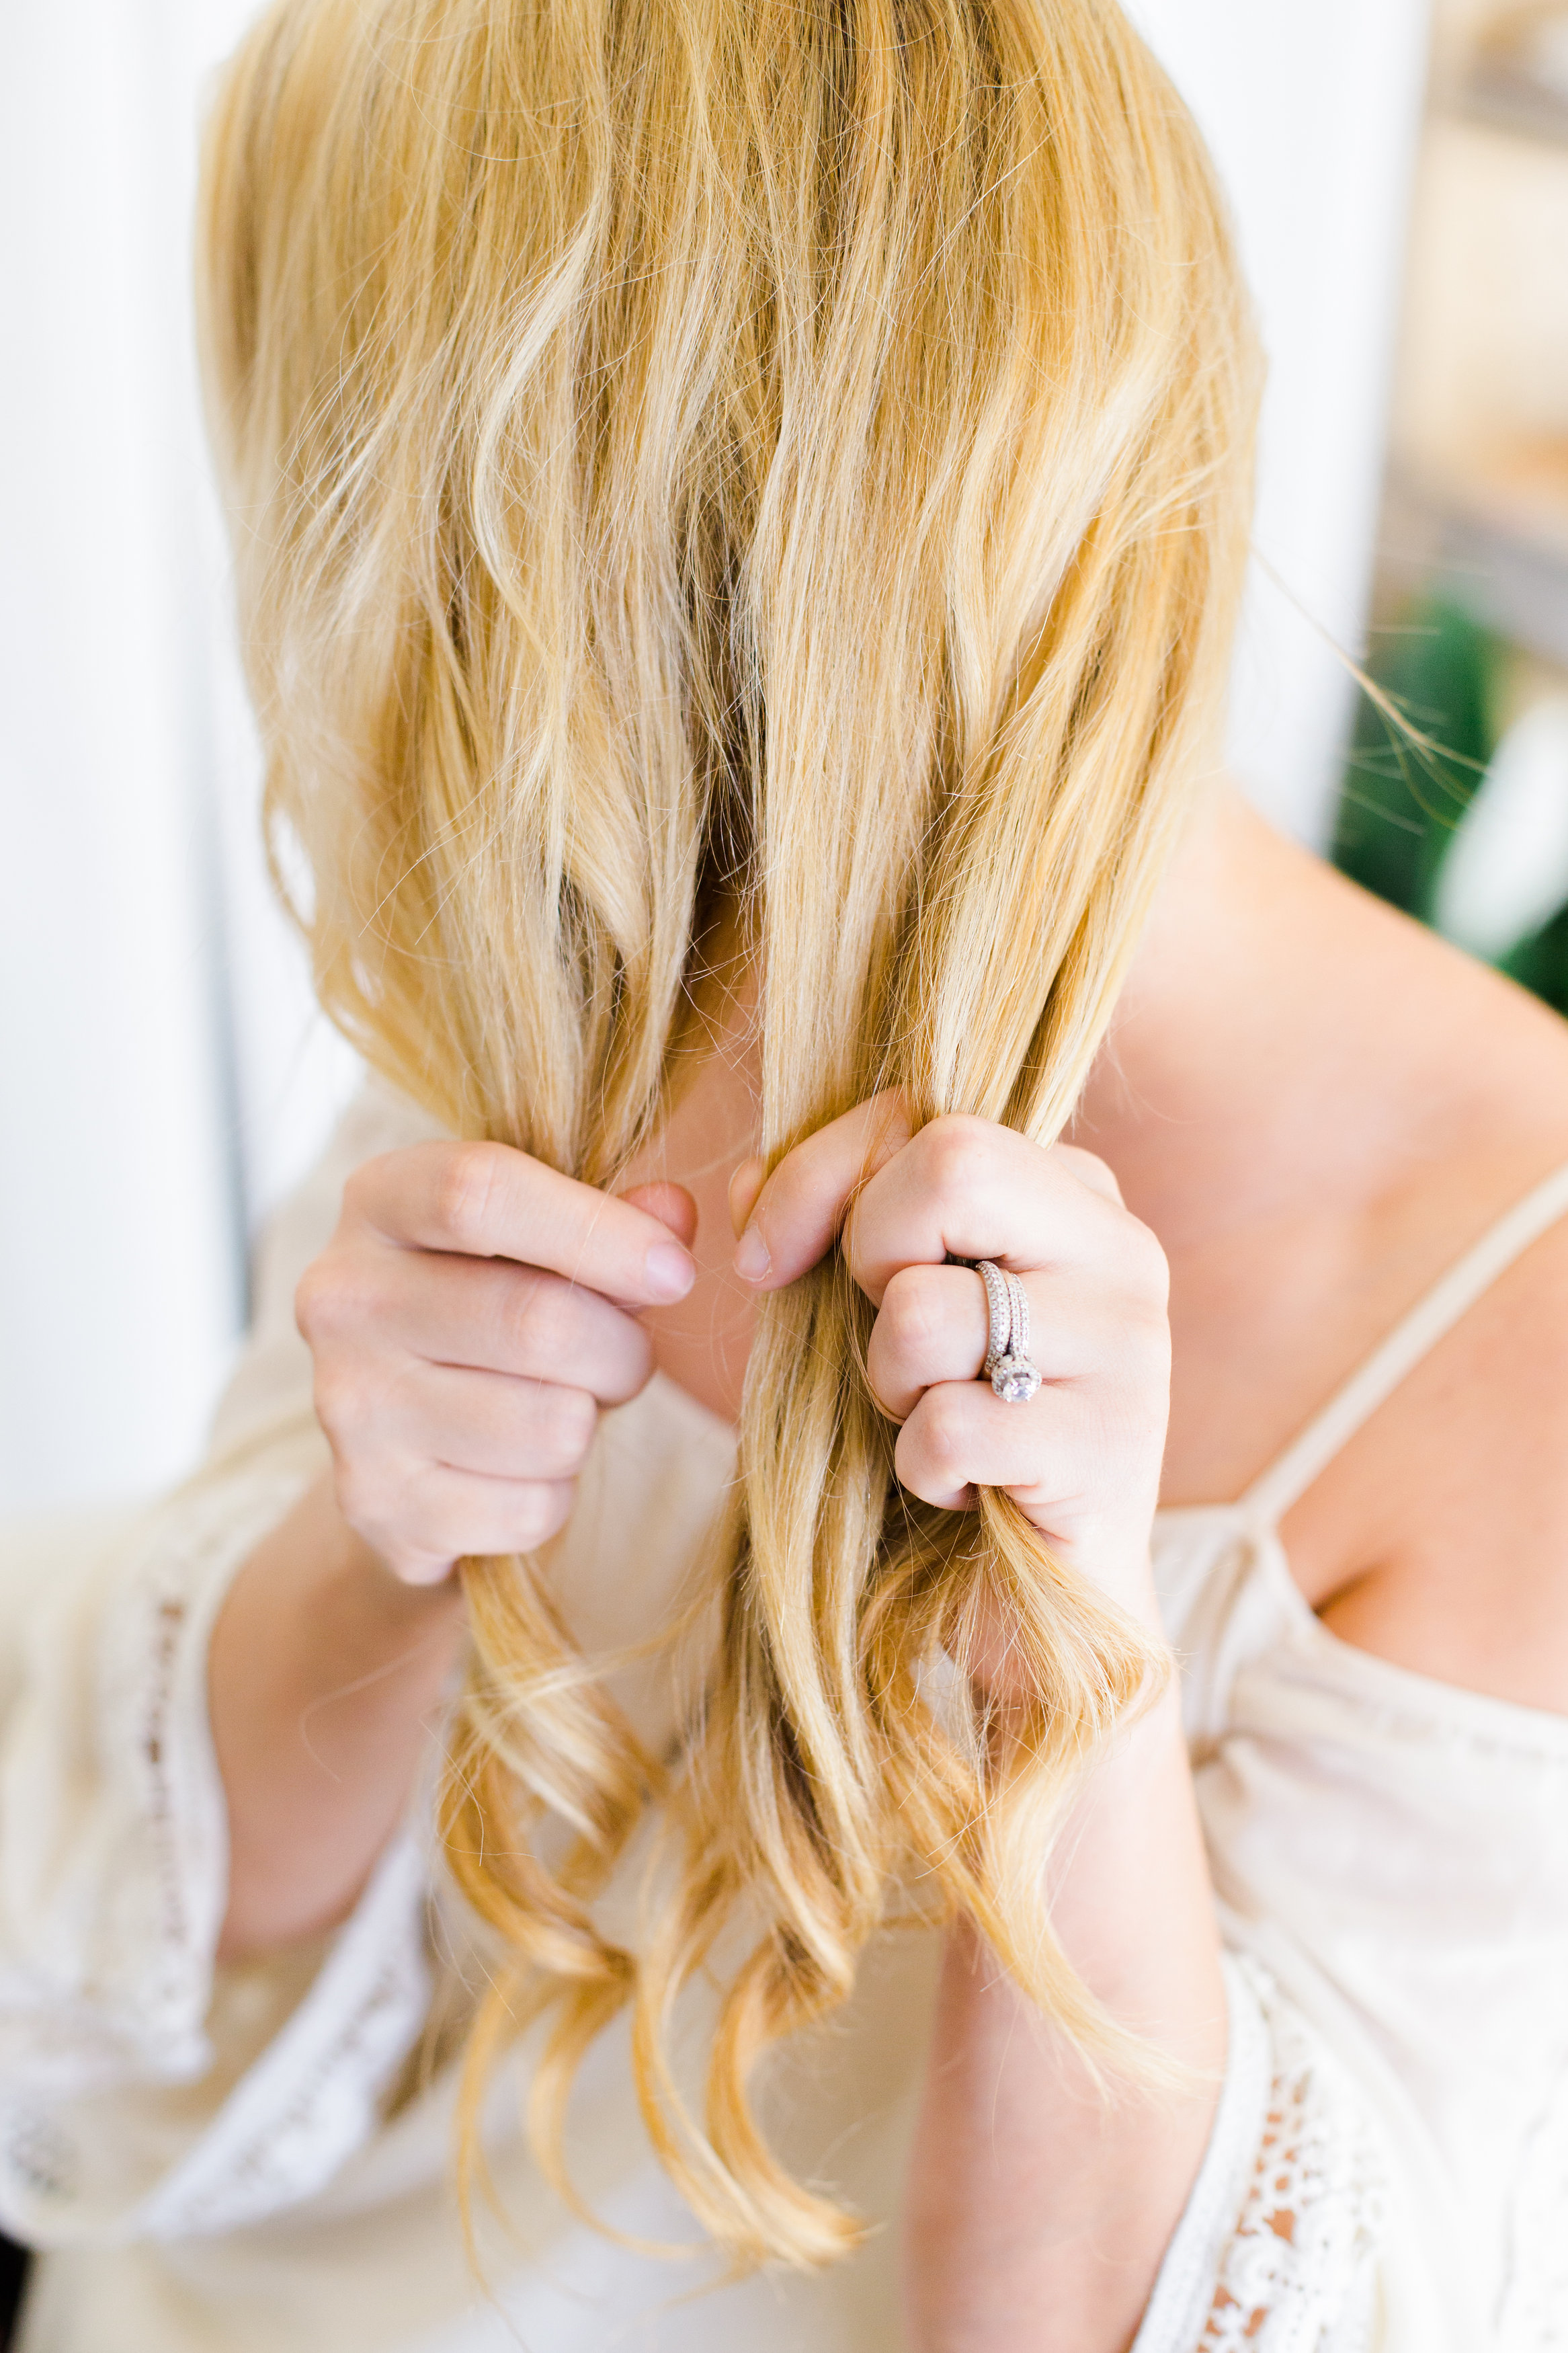
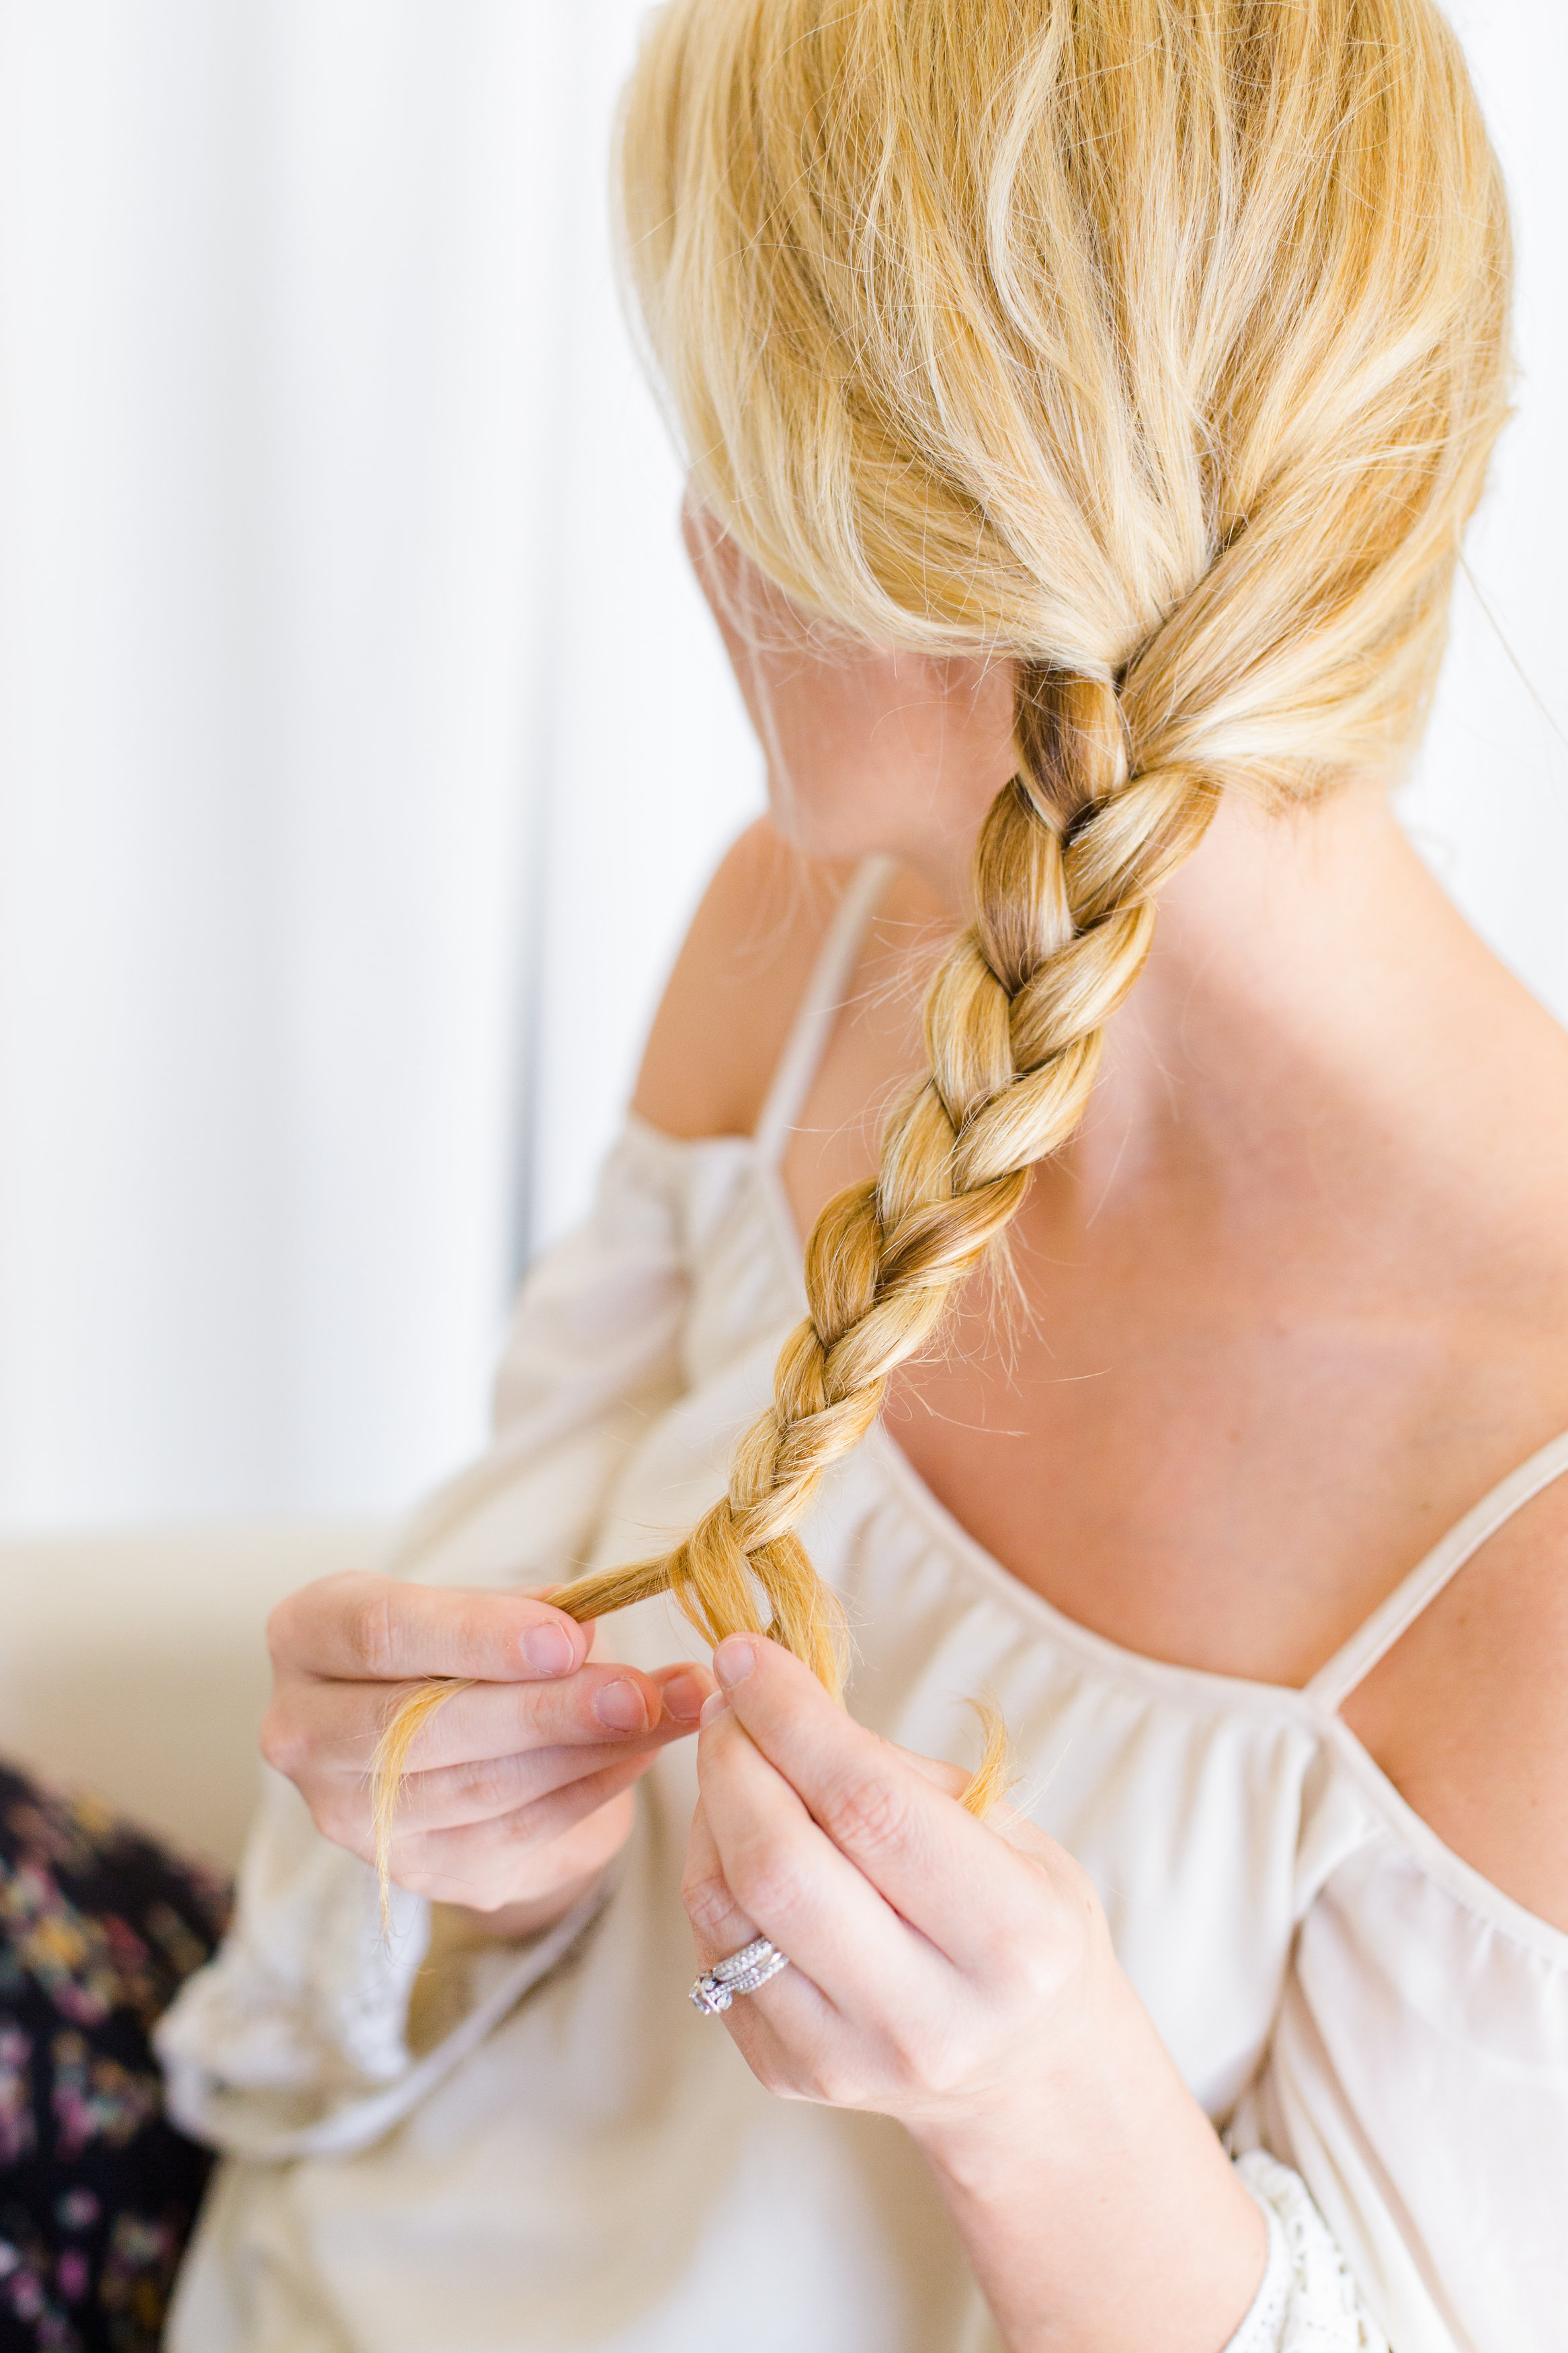
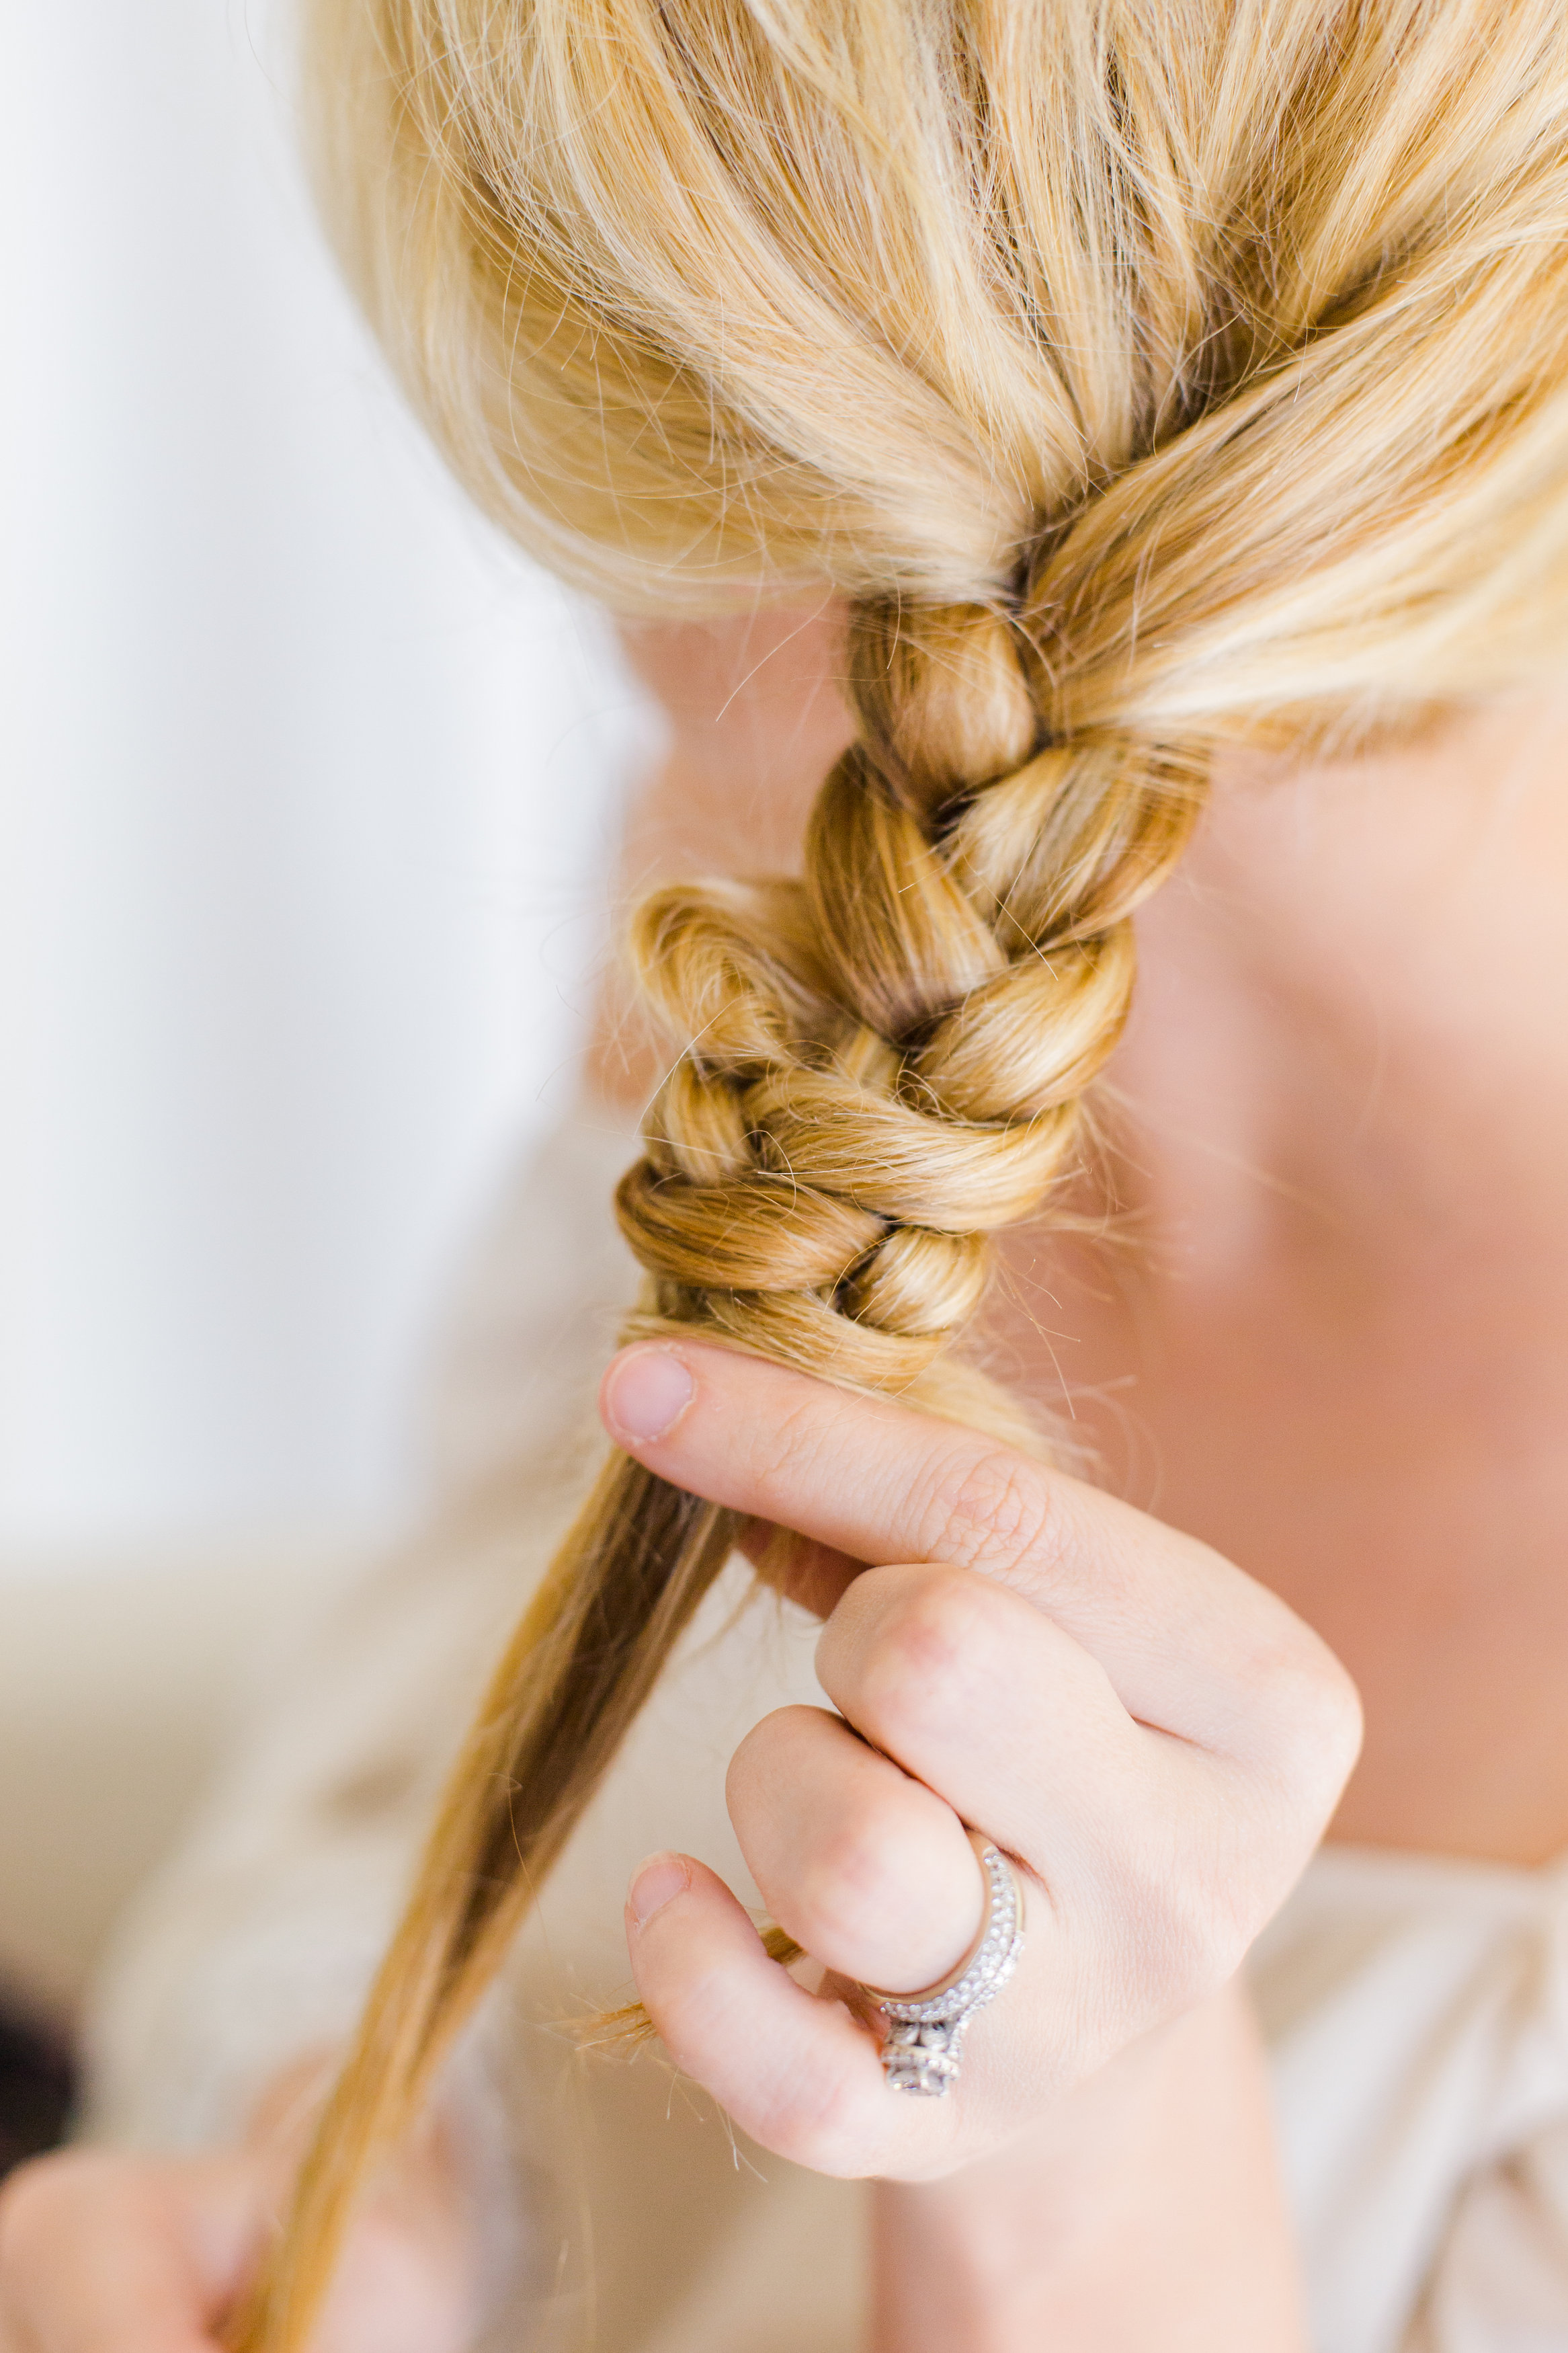
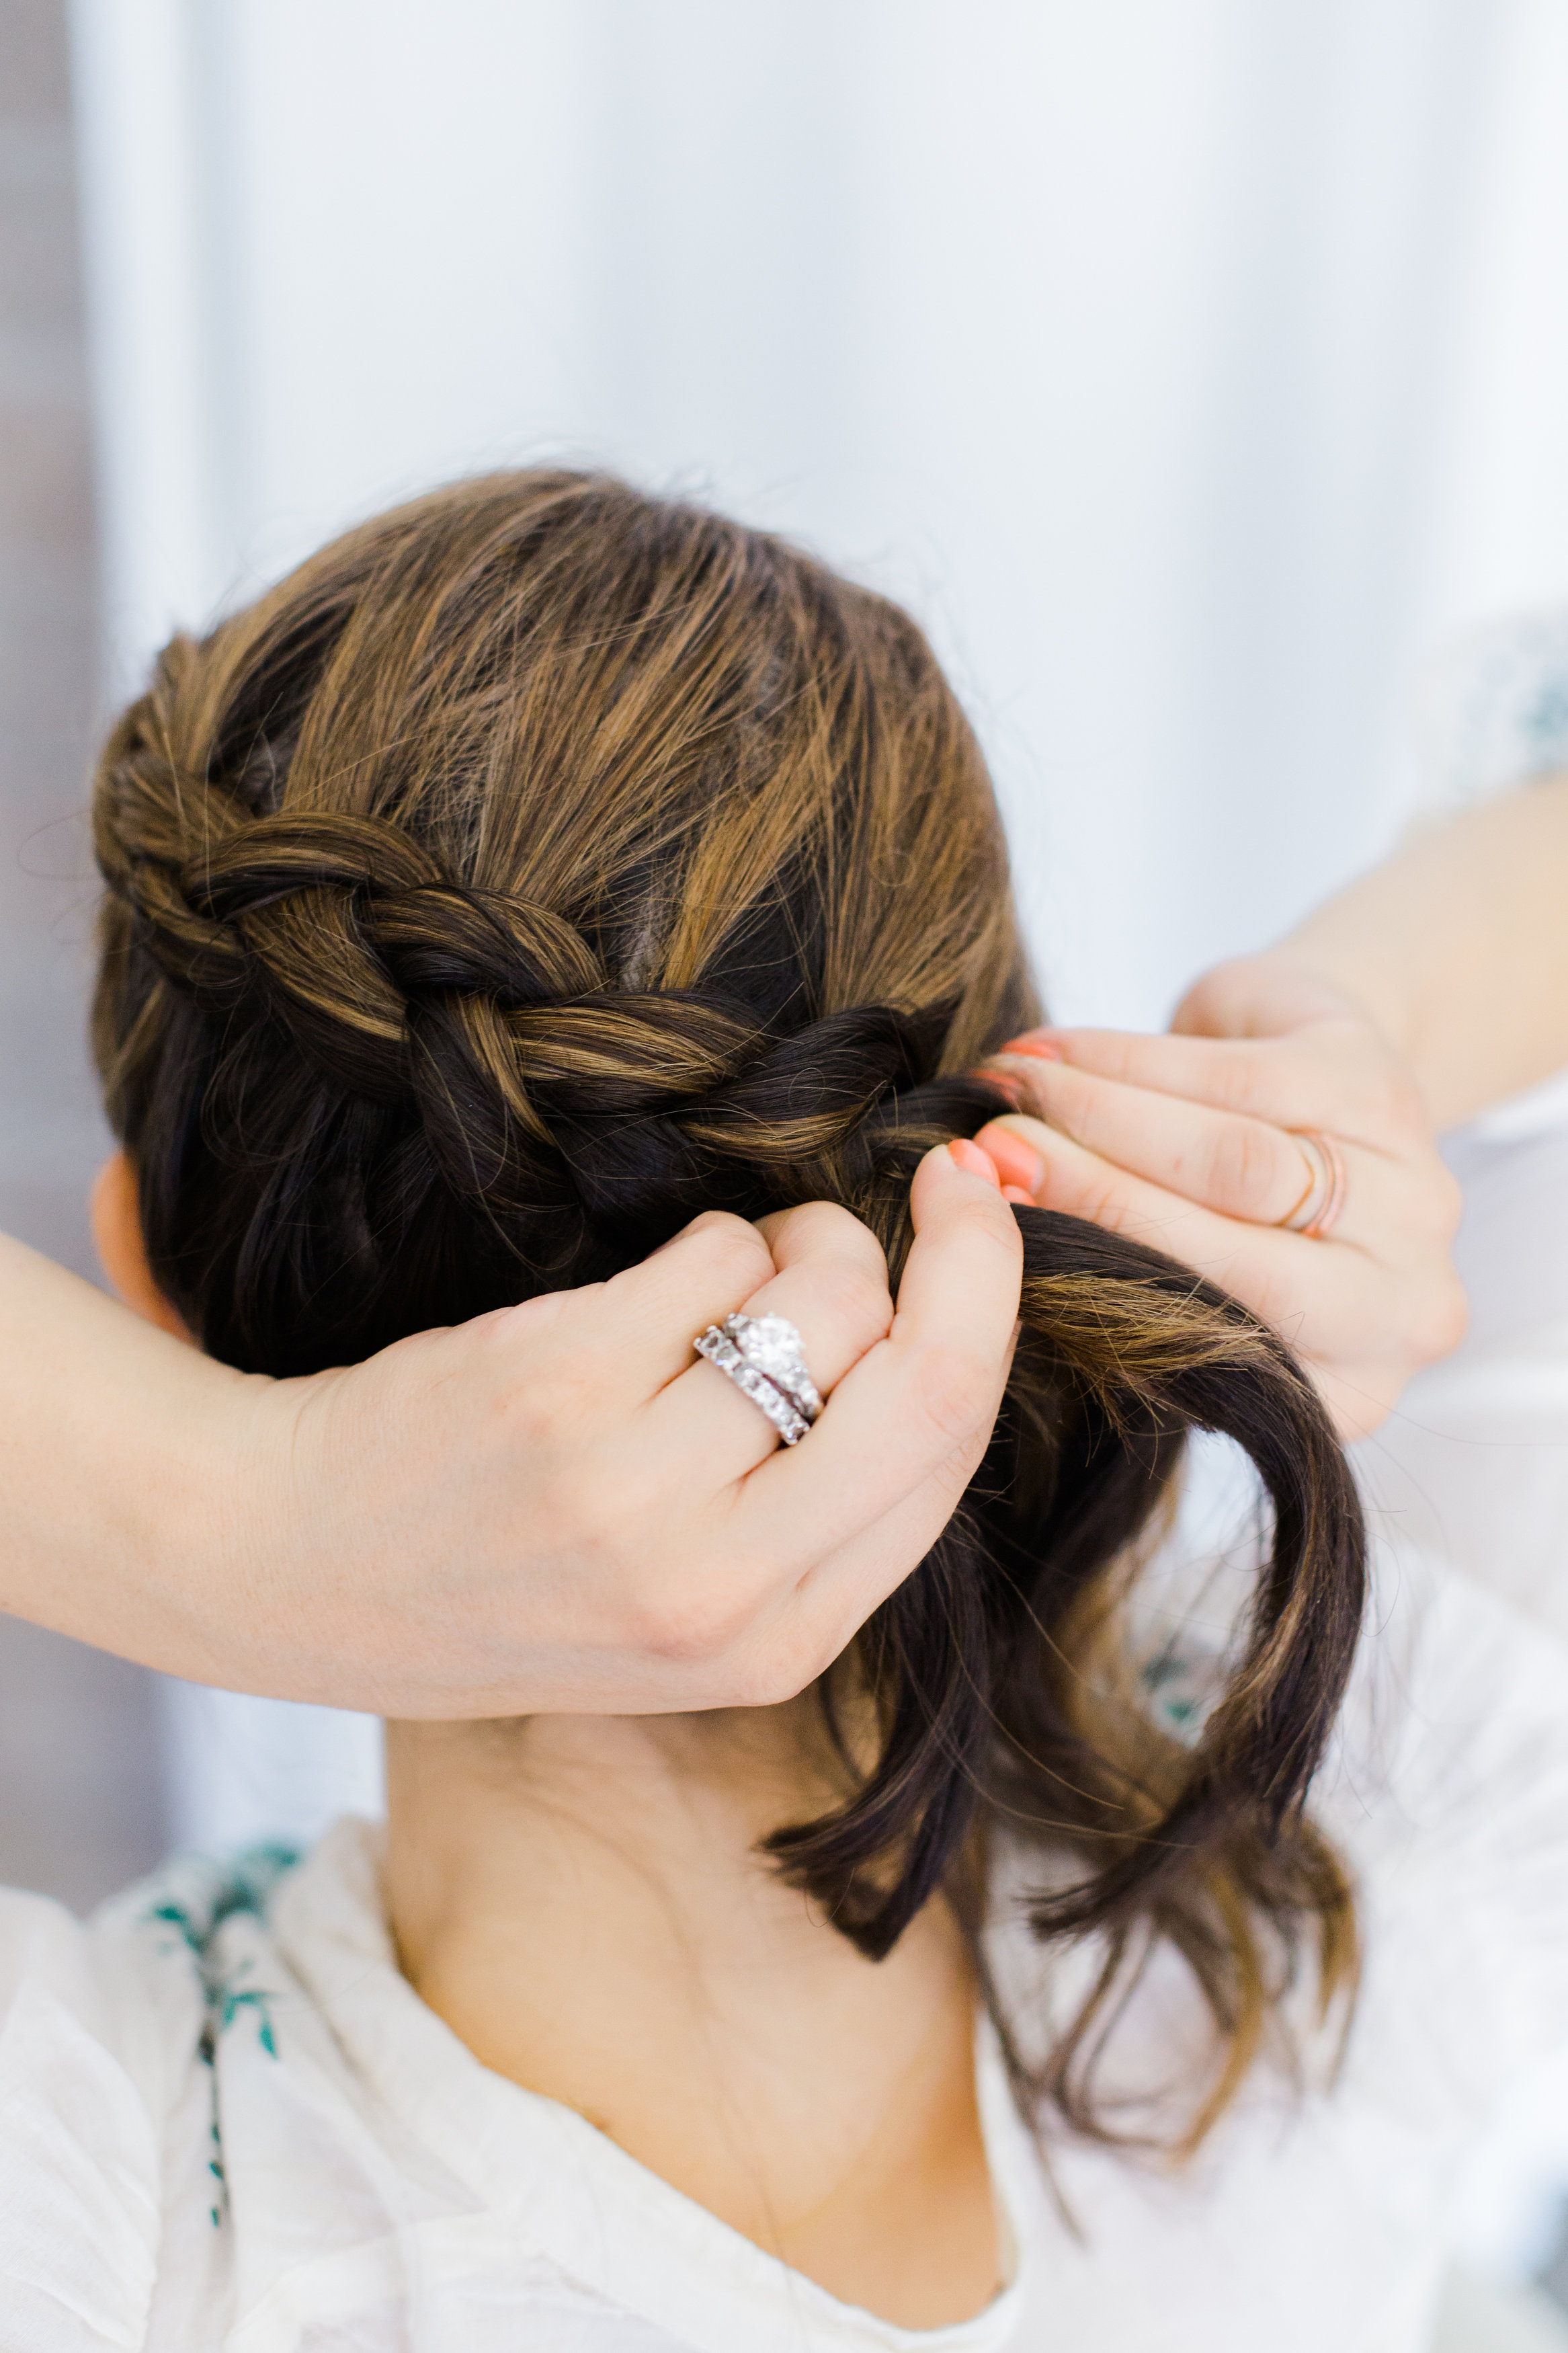
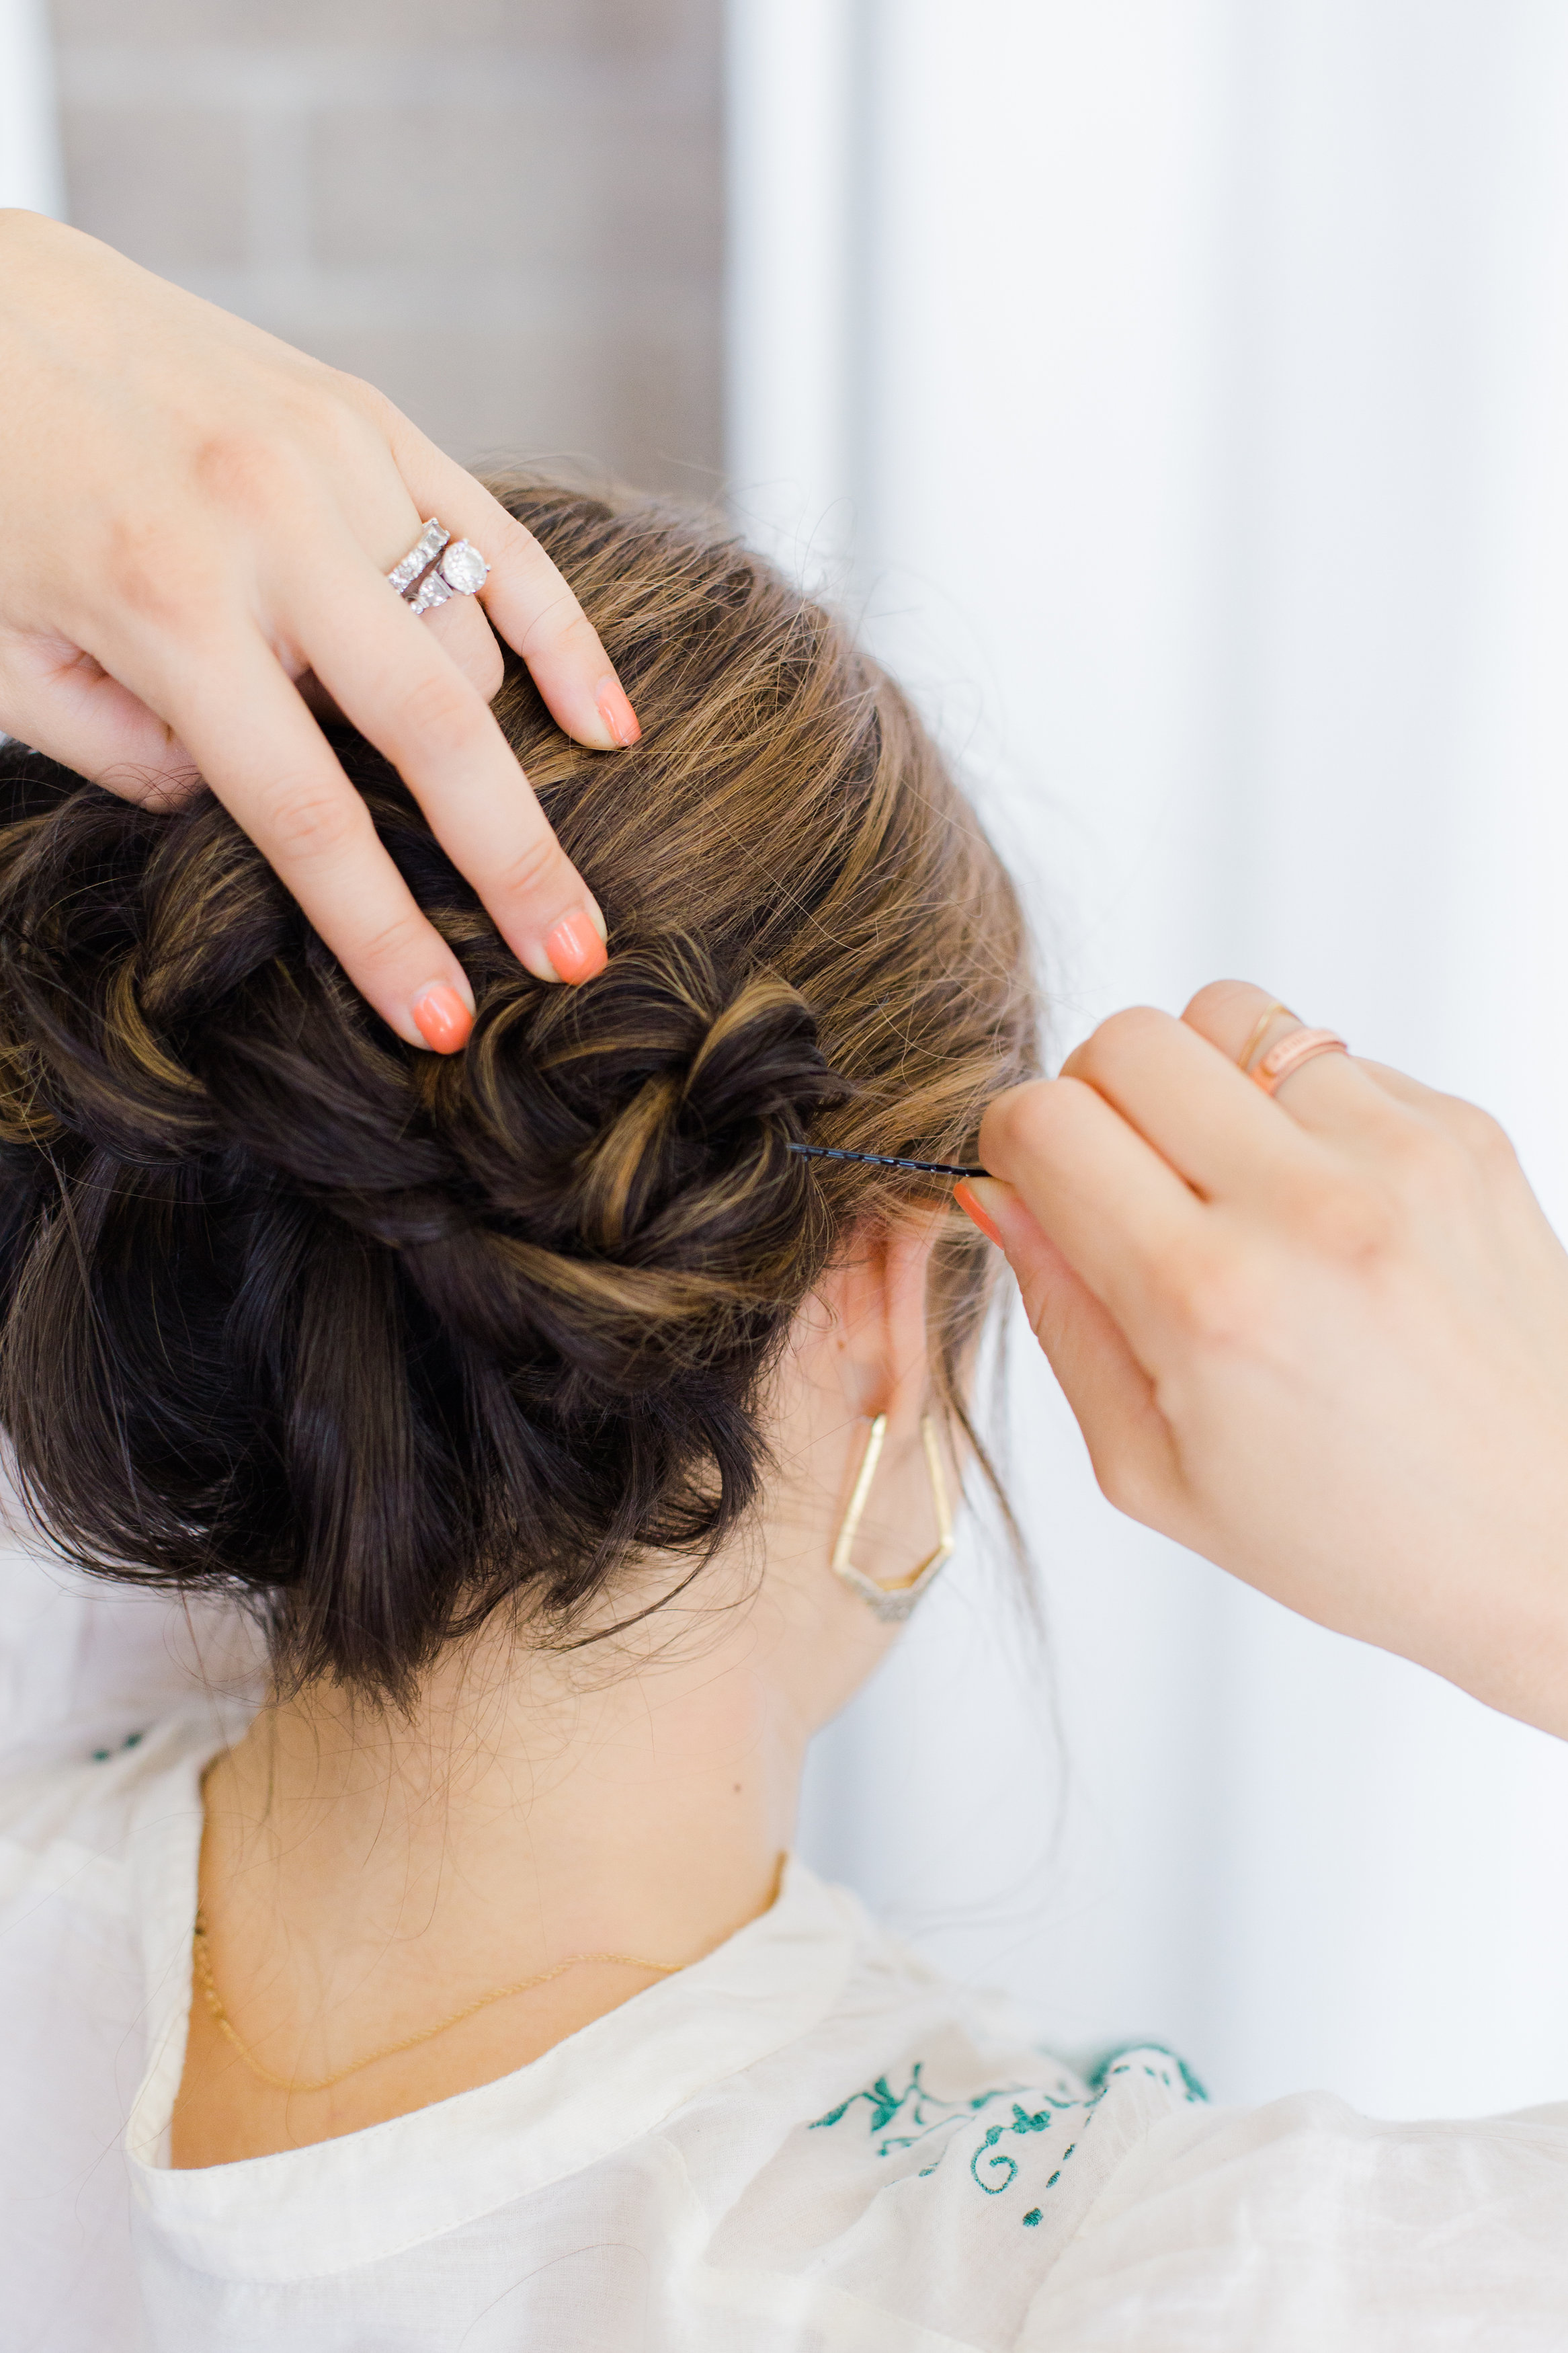
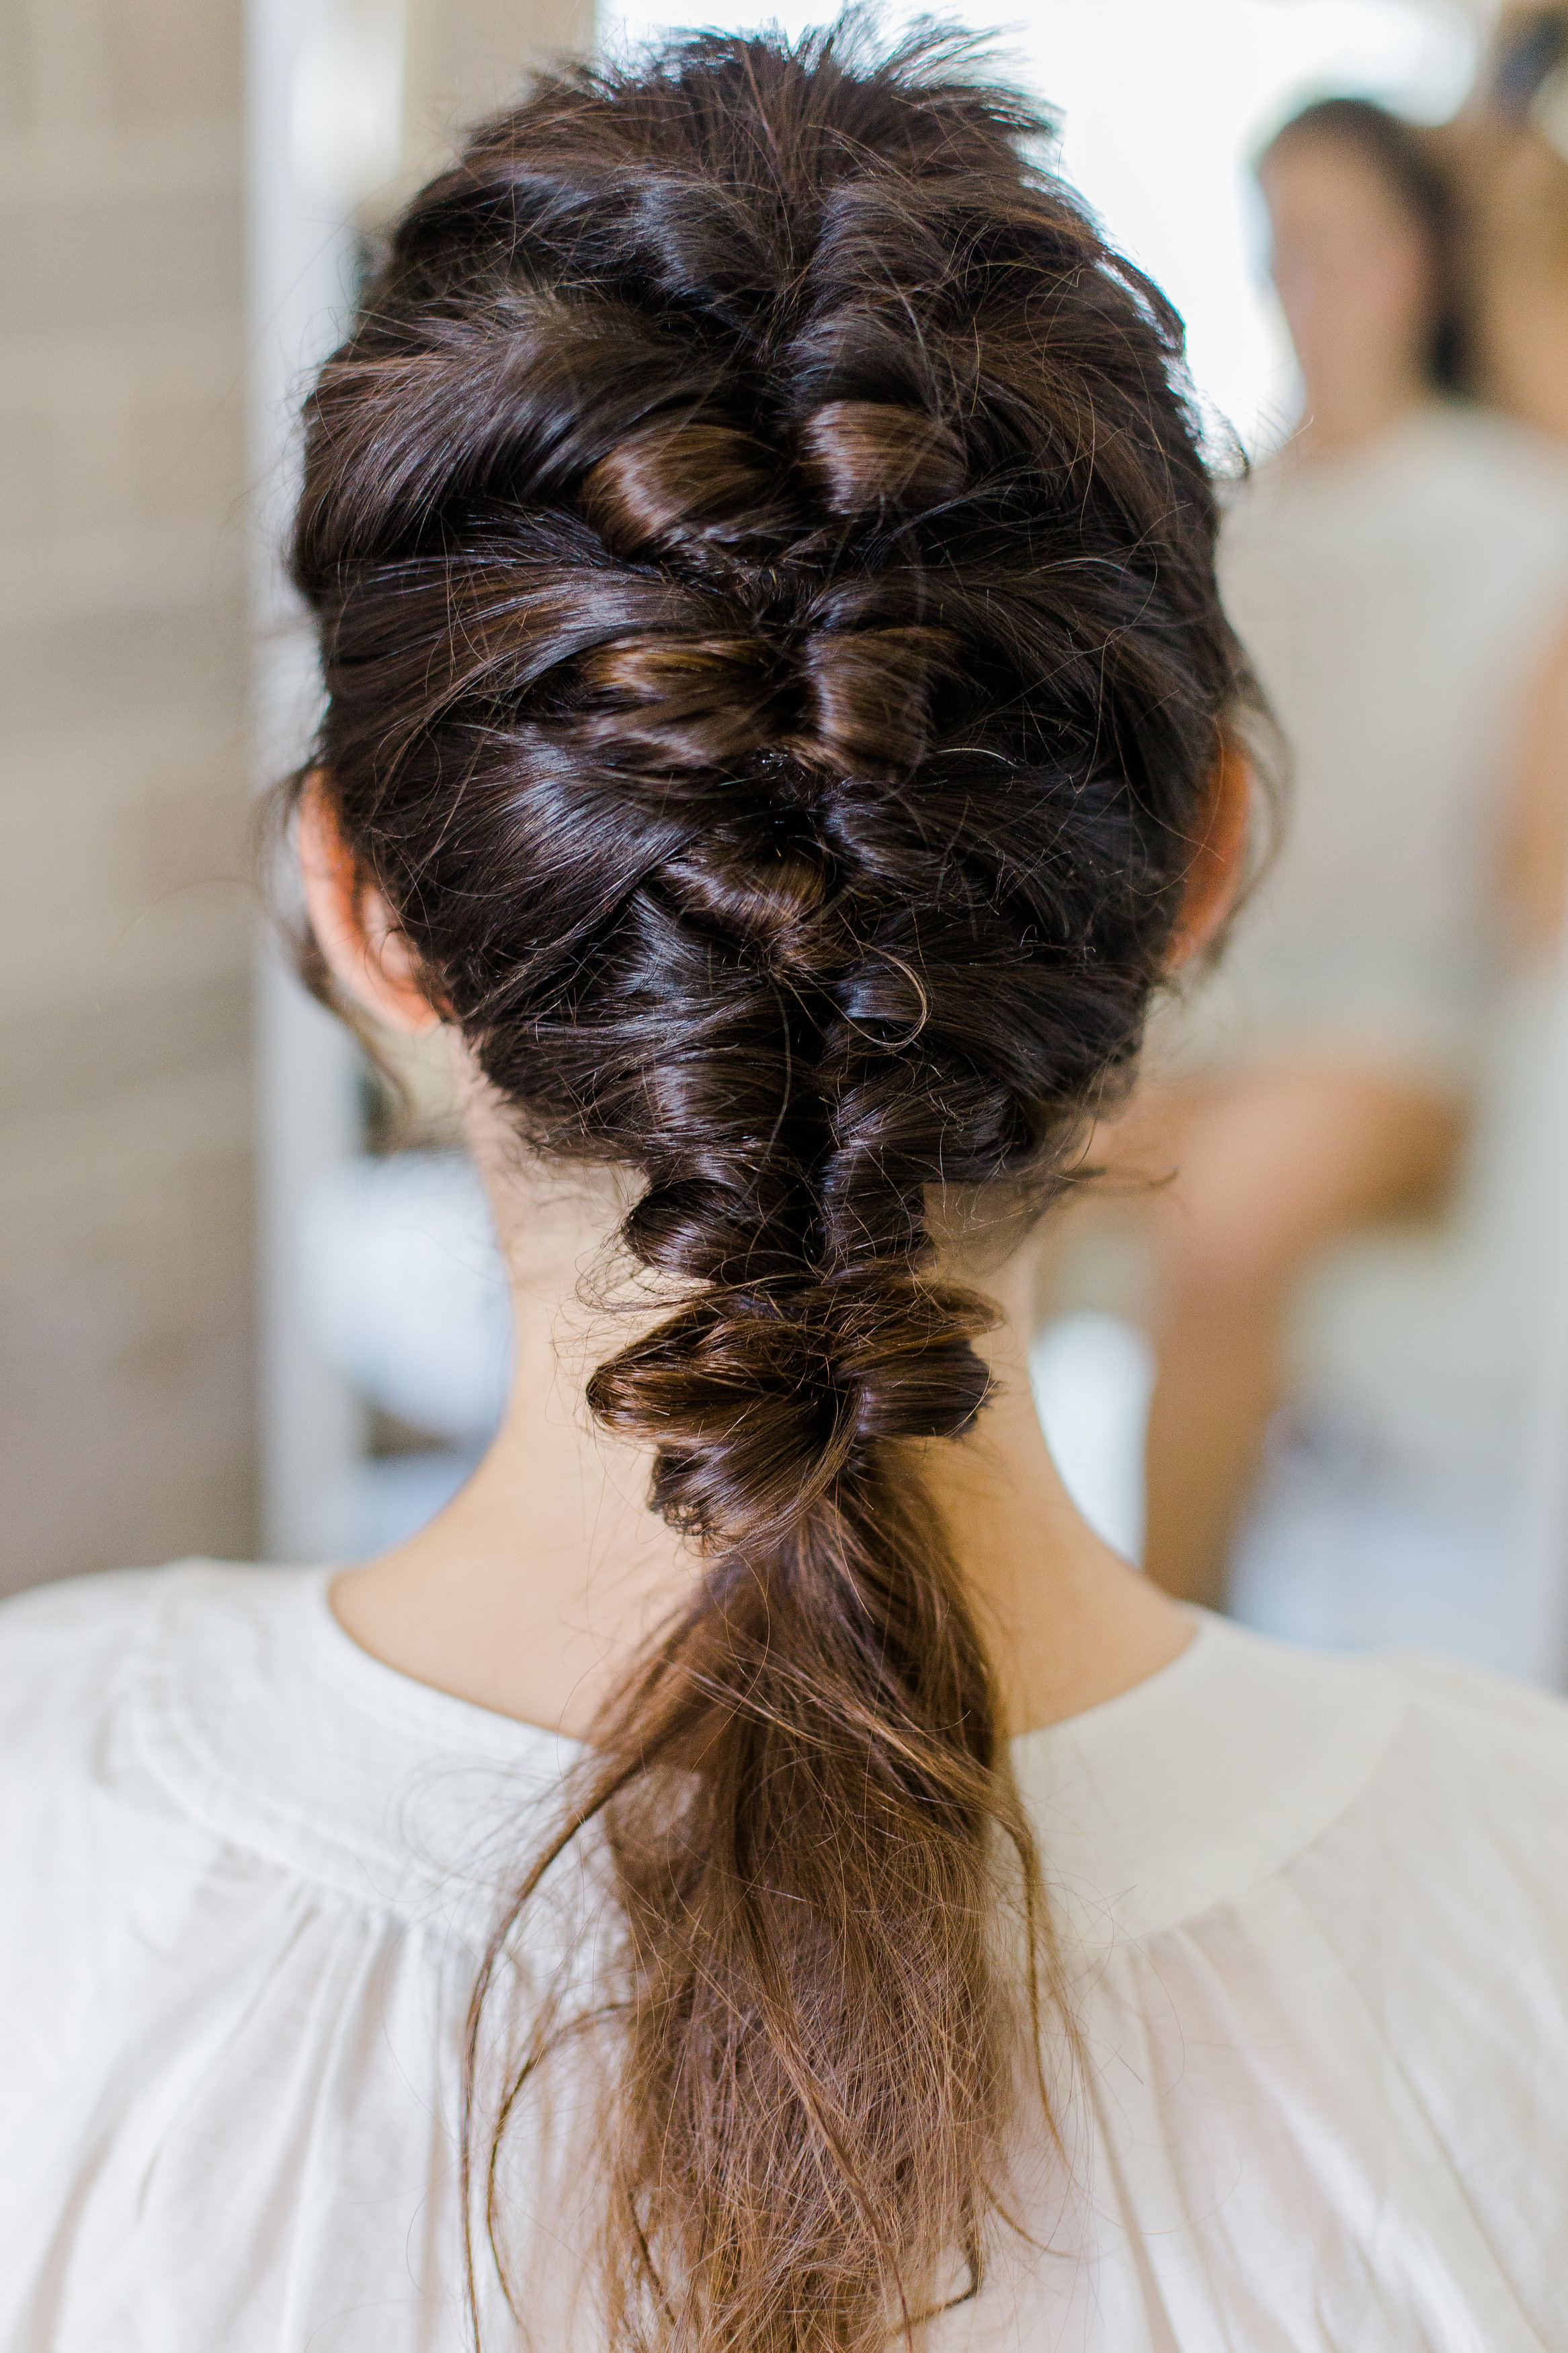
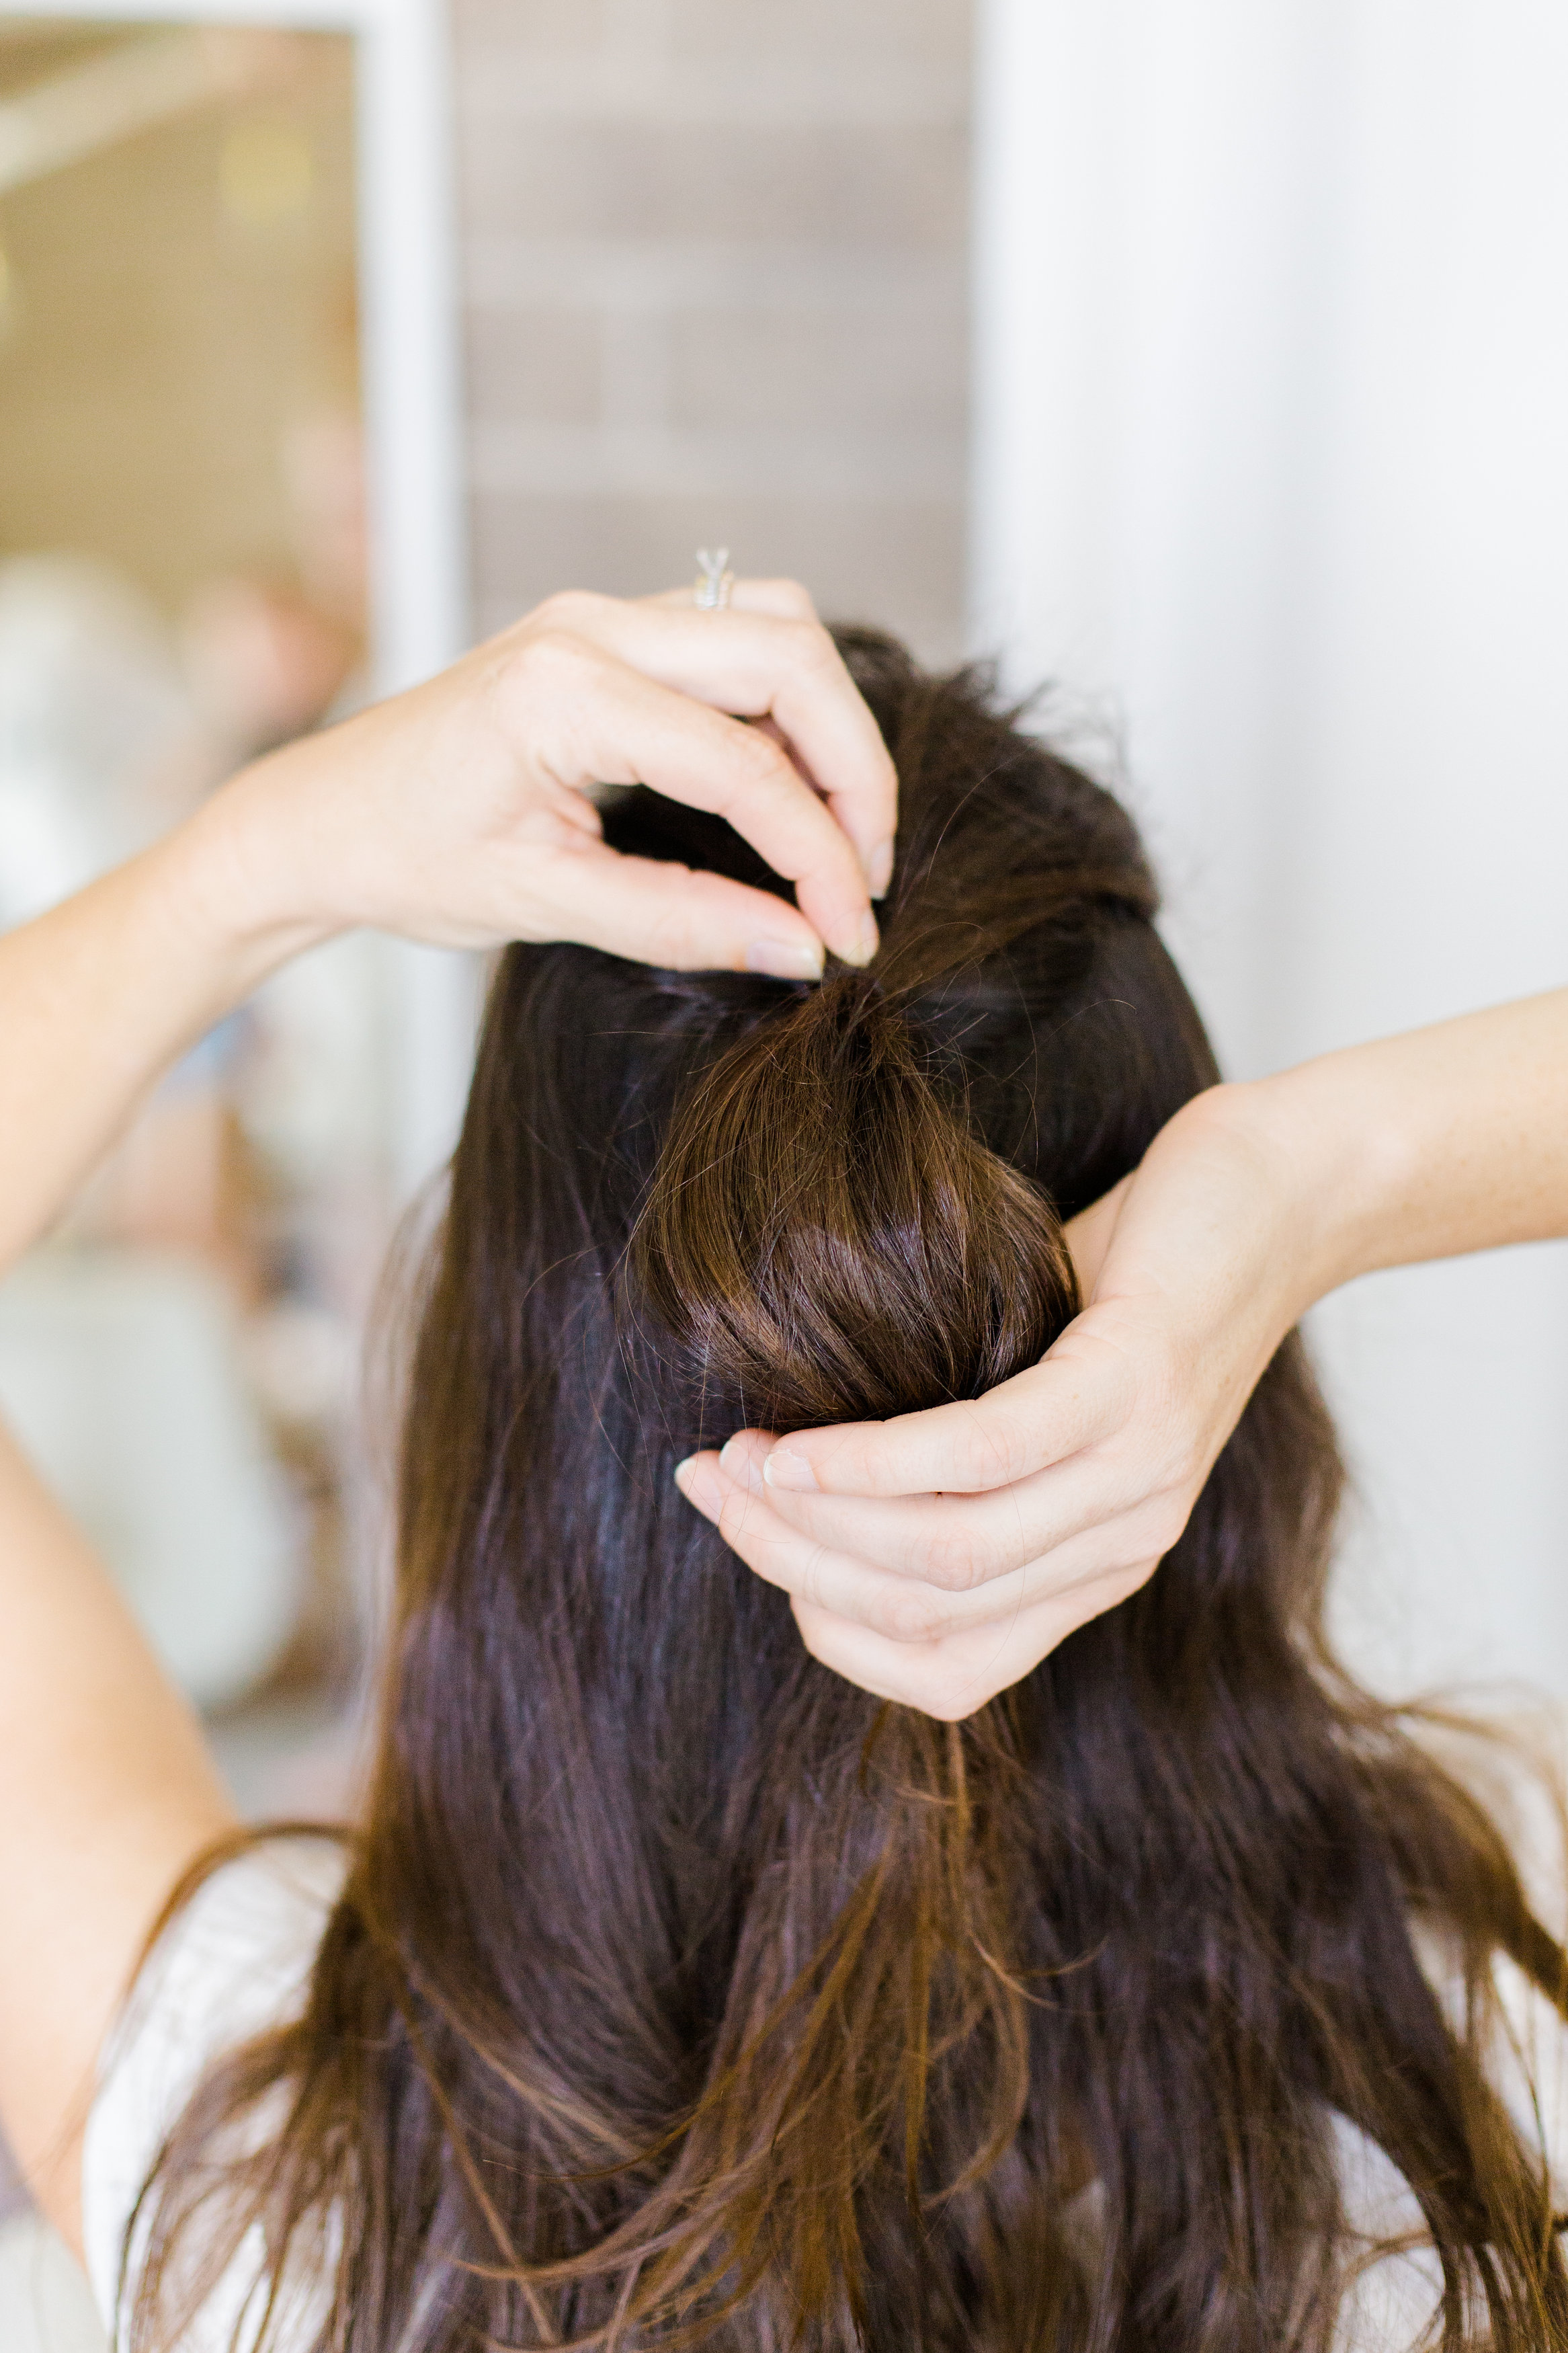
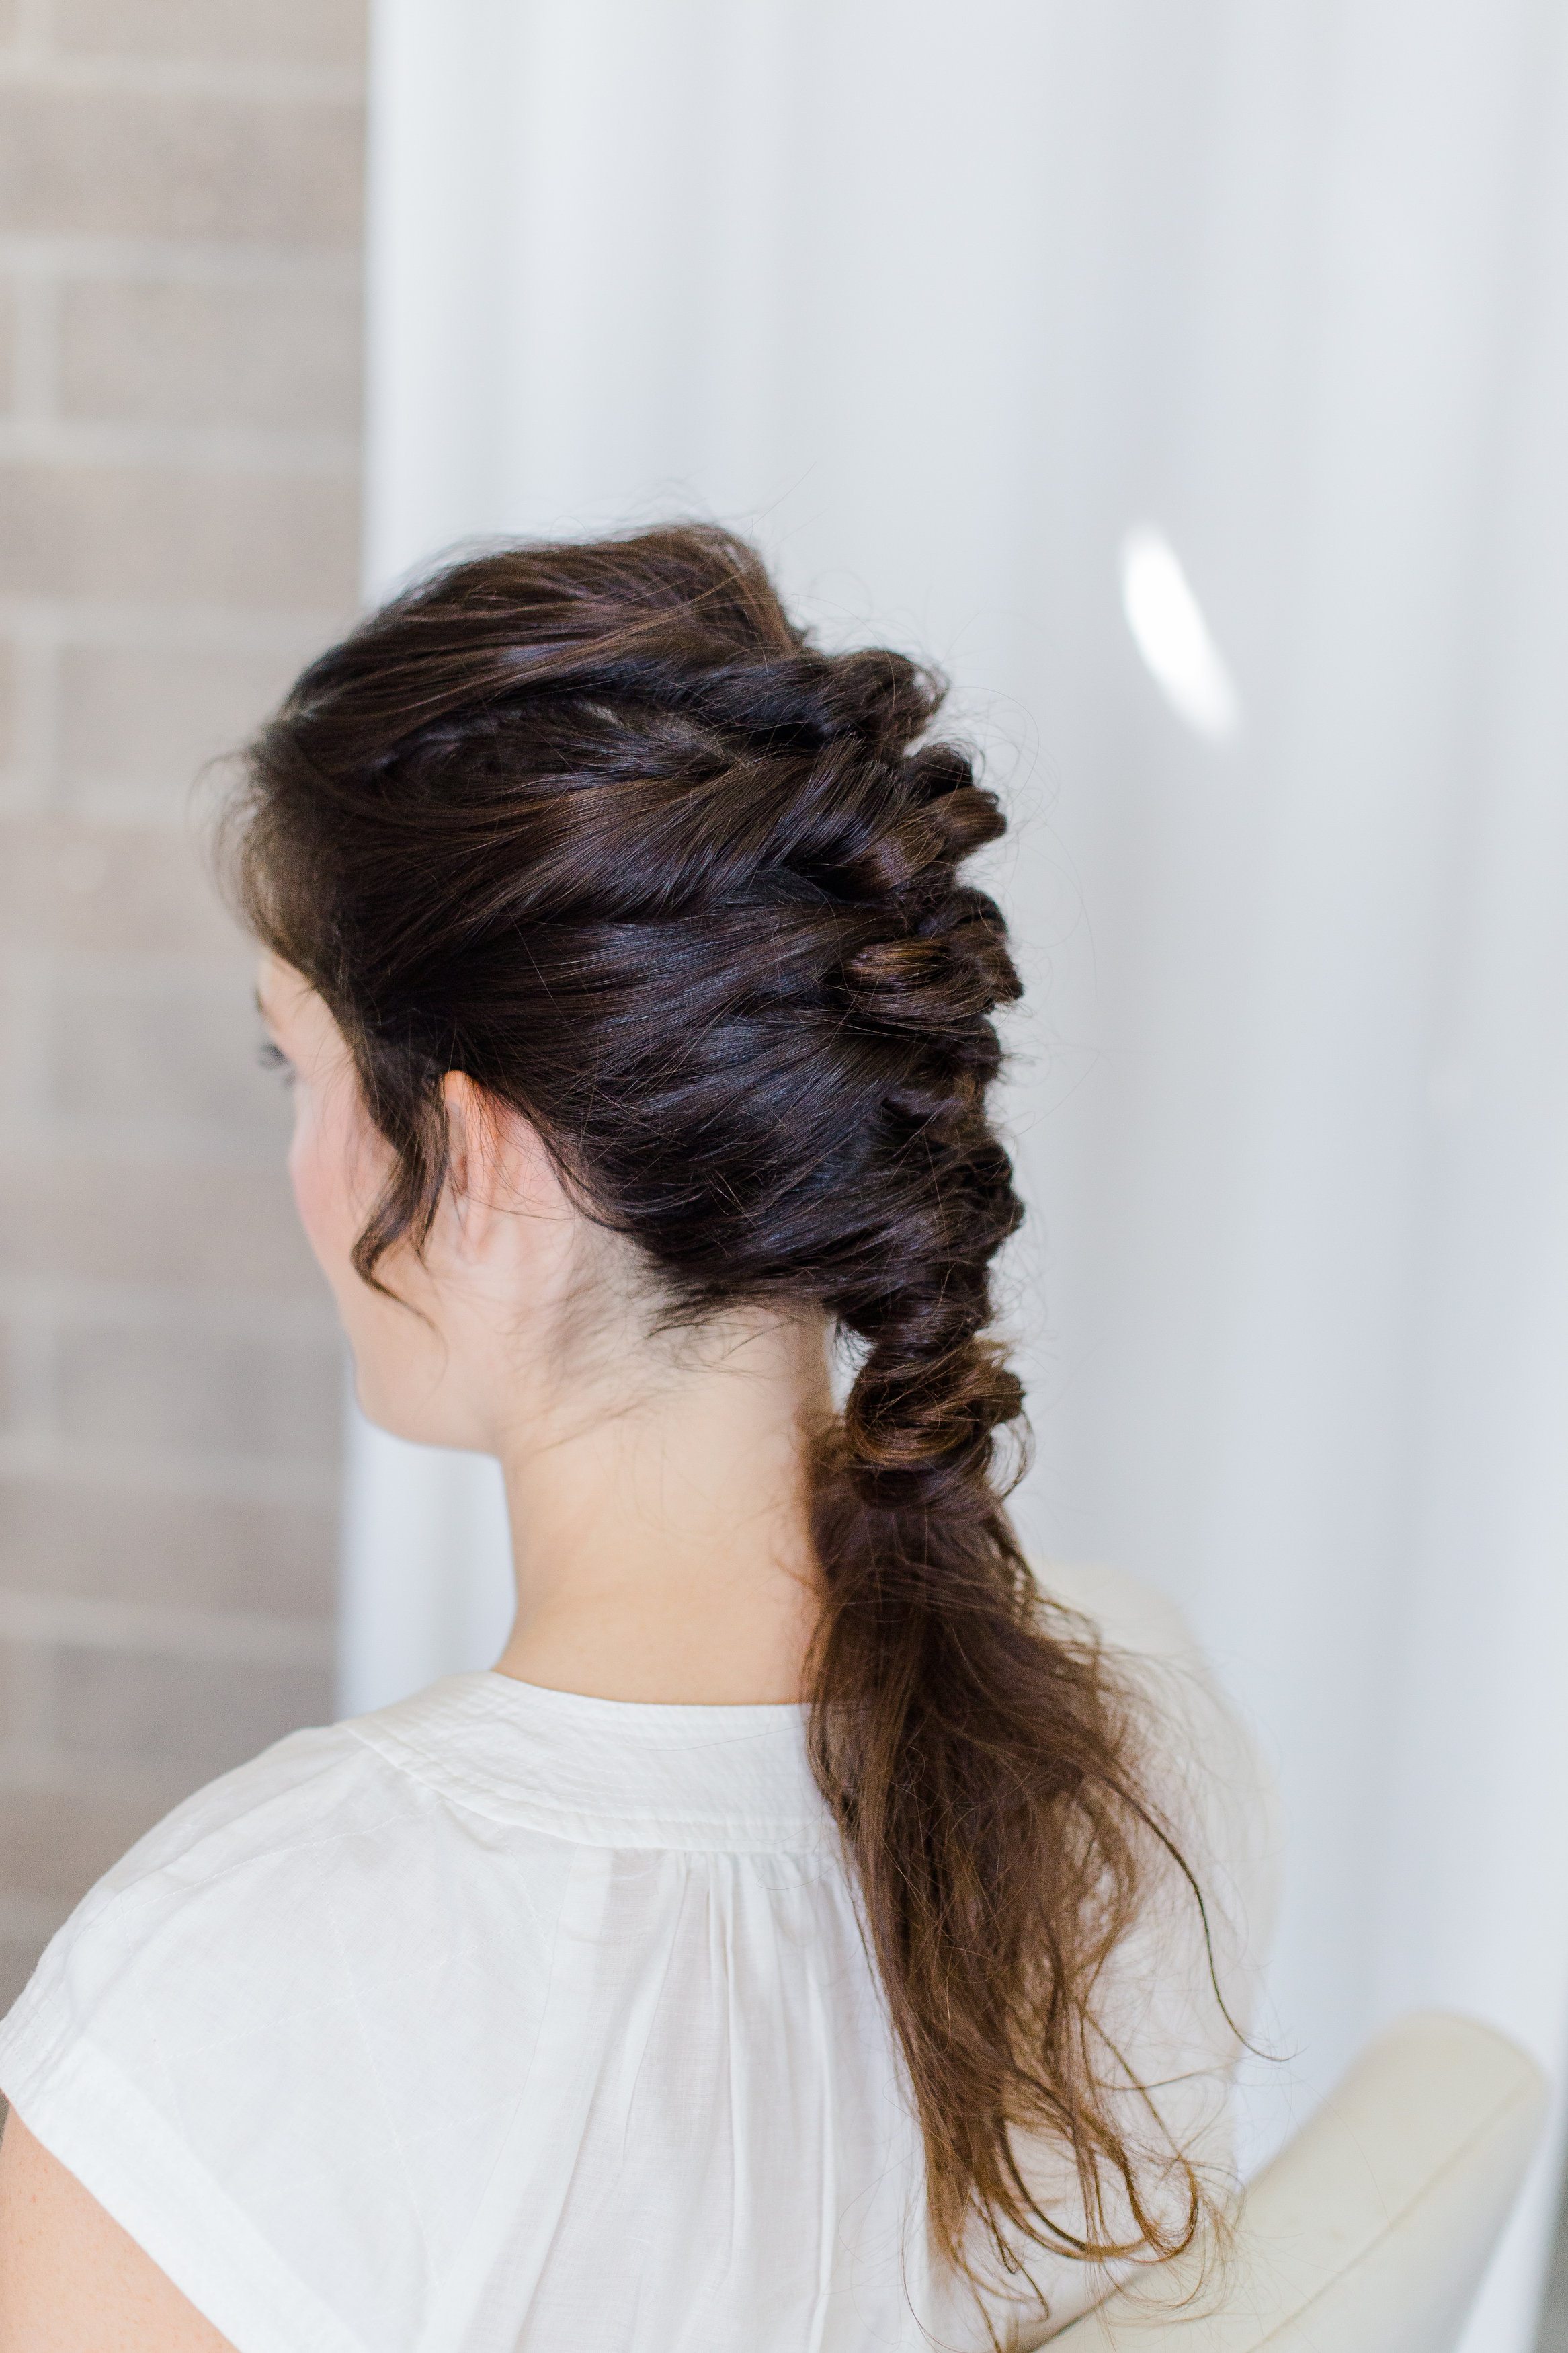
Our second braid style is the Macrame Braid. We did this on my blonde locks so you can see the detail of the macrame, and that I love a good macrame! 
thisgirlnicole_beijosevents-41

This braid woks best with medium to long hair, as you can see mine is falls at chest level. The macrame braid works well with uncleaned hair, this will allow you to achieve that “macrame” braid.
thisgirlnicole_beijosevents-26
Gather your hair to the side you would like the braid to be placed, braid your hair using a three-strand braiding technique.
thisgirlnicole_beijosevents-28 thisgirlnicole_beijosevents-33 thisgirlnicole_beijosevents-32
This part can be a little tricky, but as soon as Erica showed me, it as so easy!
Once you complete the braid, prior to securing with a hair tie, take two of the three strands and hold tight between your fingers, then take the remaining single strand and hold tight with your other hand.
Take the two strands in your one hand and slide upwards while hold the single strand tight. With the single strand you can then wrap or interweave it through the “macramed” piece, or you can repeat the same technique with the reaming piece as well- get creative.
thisgirlnicole_beijosevents-34
Once you have completed the style you desire, secure with a hair tie and spray with a finishing spray. You can take some pieces out near the frame of face to make it more of a loose style braid.
thisgirlnicole_beijosevents-40
And there you have it, The Macrame Braid! We love this look! Once you learn and master it, you will be doing it all the time.
Our third and final boho braid look is done by our own Leah, who just had her second girl, Isla Jean, this past week! Yay!! More baby boho braids in our future!
This look works great for ladies with shorter hair.
Meet Dutch aka partial crown braid
thisgirlnicole_beijosevents-101
Gather your hair on the side you would like the braid to start (the top front of your hair, near the hair line / fringe area). Leave out some fringe framing pieces if desired, or you can pull some out once you complete the style.
You will gather the hair, using the dutch braid technique (inside out braid) you will braid the hair back and around starting from the the front down and across the nape of the neck.
thisgirlnicole_beijosevents-93thisgirlnicole_beijosevents-90
Once you complete the braid, secure the end with a hair tie.
Fold the hair back towards the completed braid, tucking the secured end into the braid and securing with hair pins.
thisgirlnicole_beijosevents-94
Finish with your choice of finishing spray, and you are all set!
thisgirlnicole_beijosevents-102
We also love to add flowers into the braid for all these three styles! Simply just walk out your front door and add.
Big thank you to Erica for showing us Beijos ladies how its done!
<script type=“text/javascript”> var vglnk = { key: ’58aa2a4dcd9dc880329191230ec5b19a’ }; (function(d, t) { var s = d.createElement(t); s.type = ‘text/javascript’; s.async = true; s.src = ‘//cdn.viglink.com/api/vglnk.js’; var r = d.getElementsByTagName(t)[0]; r.parentNode.insertBefore(s, r); }(document, ‘script’)); </script>

Leave a Reply